|
 Boundary Waters Quetico ForumGear ForumDo you use a ground cloth with CCS Lean 3+?
|
 Forum Sponsor

Author
Text
")

12/19/2014 06:14AM
I got a CCS Lean 3+ last year and it worked out great. I was thinking about adding a ground cloth this year, but I am on the fence since we have not transitioned into sleeping in it. We use it as a screened shelter and store our gear in it.
I would like to solicit your thoughts and better understand how you use your CCS Lean.
I would like to solicit your thoughts and better understand how you use your CCS Lean.
")

12/19/2014 04:38PM
Have and use a Lean1+, my sleeping bag goes on top of a solo bathtub floor. Floors. CCS makes a ground tarp for these but I want open ground except under my bag.
butthead
butthead
"never underestimate the power of stupid people in large groups" George Carlin

12/19/2014 09:36PM
Like Ken said, Dan makes an excellent floor for his leans, but I also like being able to walk in and just my sleeping bag / pad protected.
I have used the Bearpaw bathtub floors for the last two years and they have worked great. I had mine made with 5" walls and use with Lawson Ti stakes in the corners most of the time.
Only use the lean when my son is along as I hammock
when I'm solo or when we have 3 or more in the group, I hang. I also take the bathtub floor with me when I'm hanging as it makes a nice place to put other gear under the tarp. They pack very small.
Bearpaw Bathtub Floors Pics
The pictures are from when I originally got them, one for me and one for the son. The walls go up a lot better than my original back yard setup.
KevinL

12/22/2014 01:51PM
We use the ccs ground cloth in the lean 2+, I usually try to set it up so there is room to walk in and take your shoes off in the lean. We had a wet trip last year, and it was nice to have the ground cloth to keep us off the wet ground. One of the tents we had with leaked and we had to sleep 4 guys in the lean a few nights, and with the ground cloth no one was on the wet ground.


12/22/2014 03:09PM
I'll offer up a few setup tips,
 I often go extra wide in the front by staking corners next loops back and spread wide as I can get it.
 I'll find a stick to spread out the backside.
 Figure 9 Carbiners are handy.
 Bend them around obstacles.
 Set up for lunch in the rain.
 Decided to stay.
 Poles constructed on the spot.
 Good shot of my floor.
butthead
 I often go extra wide in the front by staking corners next loops back and spread wide as I can get it.
 I'll find a stick to spread out the backside.
 Figure 9 Carbiners are handy.
 Bend them around obstacles.
 Set up for lunch in the rain.
 Decided to stay.
 Poles constructed on the spot.
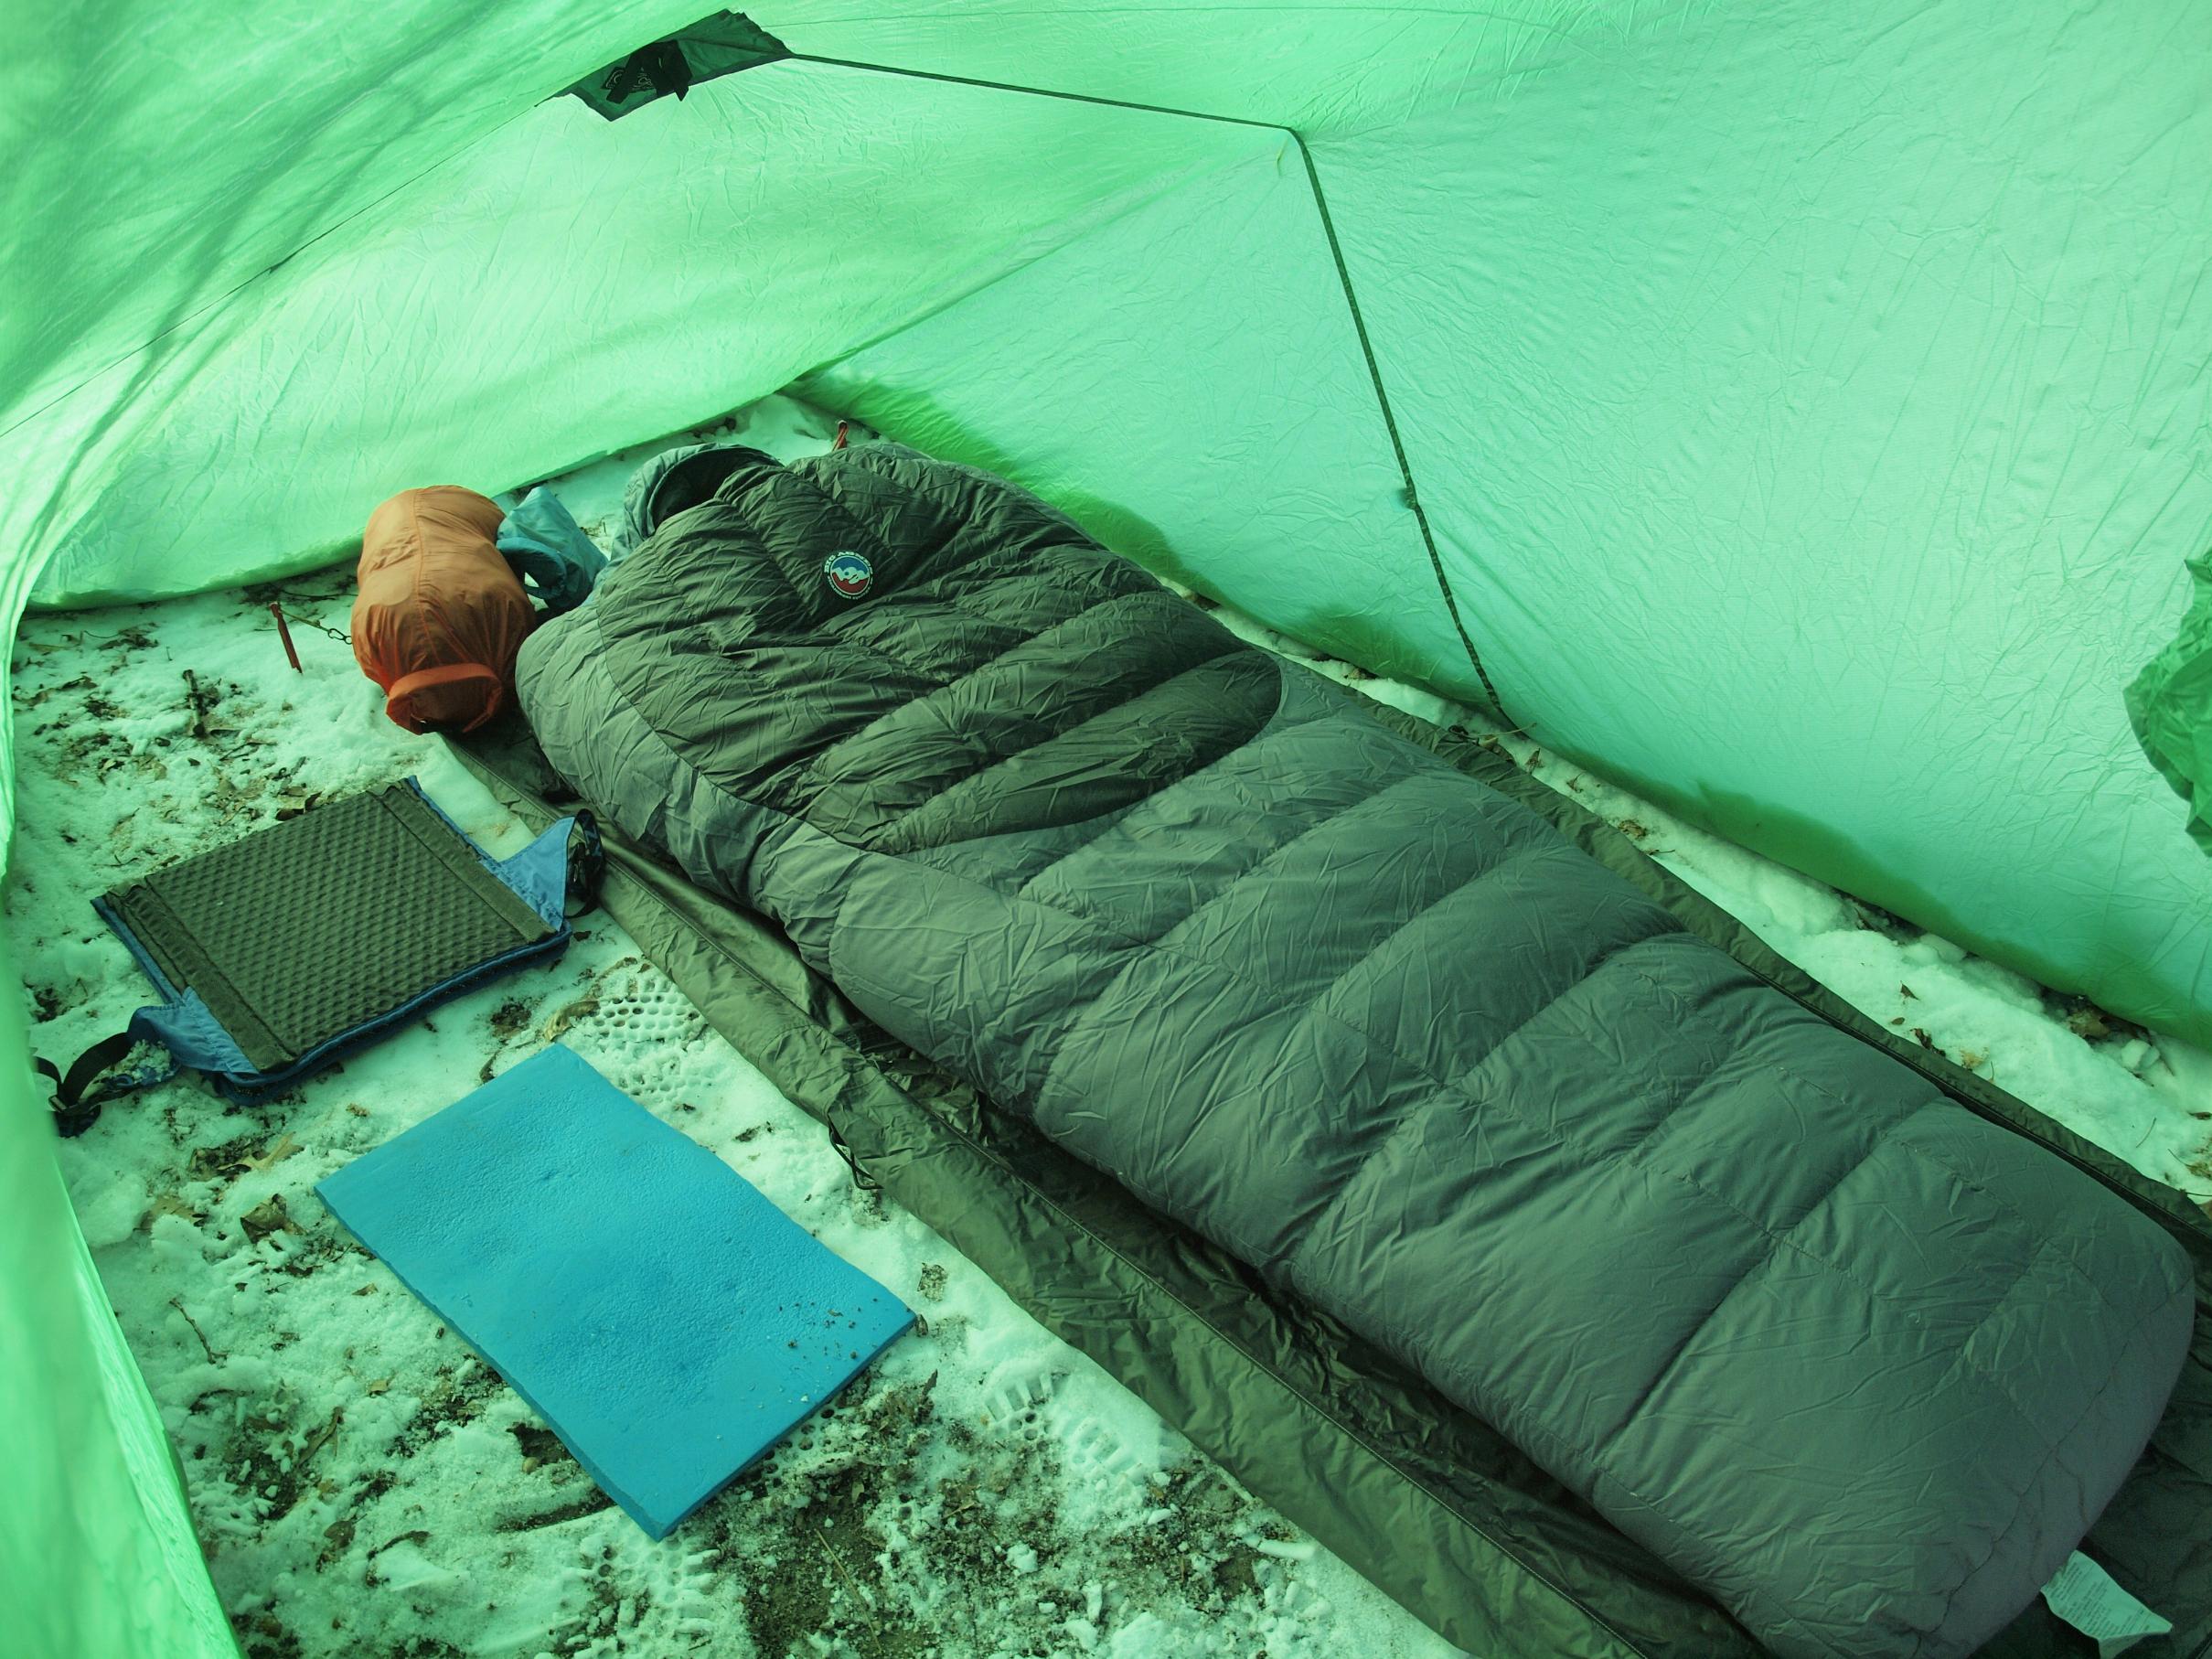 Good shot of my floor.
butthead
"never underestimate the power of stupid people in large groups" George Carlin
12/23/2014 06:27AM
Thanks. These leans really are versatile. I had not thought of the stick idea in the back. Pulling up on those back loops really does increase the amount of headroom in the lean.
Similar ideas on the ridge line, but a variation that I incorporated from my hammock gear. Terminal end of the ridge line has a knot-bone on it (same effect as a timber hitch). The other end has a prusik with a figure 9 attached to tighten and secure the ridge line (the prusik allows the figure 9 to slide on the ridge line for adjustment ... same effect as a truckers hitch). I have a series of prusik loops across the front ridge line and connect them to the lean with S biners. They enable the lean to be positioned from left to right very quickly, and makes the setup really fast.
Guylines all attach to the lean with s biners and have a terminal end with a prusik and figure 9 (same effect as a taught line hitch).
I did call Dan and I am going to have stake loops installed across the front bottom door of the lean. We usually just enter from the the left or right side, and will not stake the last couple of loops. I think it might make the door more secure in the wind. Last year we ran a line from the bottom front corners of the door and tucked the rain flap under it, toward the inside of the lean like the sides and back.
I do like those bathtub floors. One last thing, I got white to increase the ambient light in the lean. I am sure it will show dirt etc. over time, but it is brighter in there than my green bwj lean.
12/23/2014 01:47PM
I dont have a lean, although the next time I am in a gear making mood that is something I am going to consider. I do sleep in a bivy under a DIY 10*12 sil nylon tarp when I go without my wife. I "origamied" my own bathtub floor for my mat/bivy with tyvek I got from a construction friend for nothing. I folded the corners so that it made ~3" sides and lashed it down with short pieces of gorrilla tape on each corner. It doesnt have to be staked because I ran the lightest shock cord I could find (3/16?) down the center of both axis connected to the sides to hold them up. The sides arent perfectly tight but good enough for the $ and time I have into them.
If anyone is interested in what I did I could put up a couple of pics later.
If anyone is interested in what I did I could put up a couple of pics later.
Two things are infinite: the universe and human stupidity; and I'm not sure about the universe. -- Albert Einstein
12/23/2014 10:20PM
I have a Lean Plus and a Lean3. I never use a full ground cloth and usually don't use any ground cloth. But I do take a cot. For the weight differential and the cost differential, consider a Thermarest cot. They get you off the ground which is much better than a ground cloth and they are much more comfortable. I like walking in there with my boots on or putting a chair in there to sit and read in foul weather. Of course I have a ground cloth for each of them but never take them anymore.
If I did use a ground cloth, I would get one just larger than my sleeping pad or maybe half the size of the Lean so that I had some uncovered space to enter with my shoes on or sit in my chair. The Tyvek is a good, inexpensive option but Tyvek does not fold well and is very noisy. Some people wash it in a washing machine (to make it more supple and quiet) which might affect the waterproof qualities. You could get the Lean Plus groundcloth for the Lean 3 or just buy a cheap one man tent footprint if you wanted a small groundcloth.
If I did use a ground cloth, I would get one just larger than my sleeping pad or maybe half the size of the Lean so that I had some uncovered space to enter with my shoes on or sit in my chair. The Tyvek is a good, inexpensive option but Tyvek does not fold well and is very noisy. Some people wash it in a washing machine (to make it more supple and quiet) which might affect the waterproof qualities. You could get the Lean Plus groundcloth for the Lean 3 or just buy a cheap one man tent footprint if you wanted a small groundcloth.
12/25/2014 07:47PM
One thing I did not mention as a tip, Dan offers a stuff sack, kind of tailored to the Lean series, RIDGELINE LEAN STUFF SACK 2 sizes, and I do like mine!
butthead
butthead
"never underestimate the power of stupid people in large groups" George Carlin
12/26/2014 10:35AM
quote butthead: "One thing I did not mention as a tip, Dan offers a stuff sack, kind of tailored to the Lean series, RIDGELINE LEAN STUFF SACK 2 sizes, and I do like mine!
butthead"
I saw these when Dan was at the Winter Camping Symposium. He was using them during a tarp demonstration. Another thing to add to my list.
I set a goal of losing 10 lbs. this year. I only have 15 left to lose.
02/19/2015 06:31PM
CCS Lean stuff sacks are twice the depth with a middle drawcord and top drawcord, making it about the easiest stuff sack I have used. Long to make stuffing easy, the push the fabric down into the bottom half, tuck in the "stuff collar" cinch tight. The Ridgeline Sack has a grommeted hole in the base to leave the end of the ridge line exposed and works like a large diameter snake skin, staying on the line after setup.
butthead
butthead
"never underestimate the power of stupid people in large groups" George Carlin
02/19/2015 08:15PM
OK, I'm not really familiar with the "snake skin" thing, but I'm guessing that the thing about the ridgeline stuff sack is this: Your lean is setup with a ridgeline that goes through all the ridgeline loops and each end goes around a tree and gets tied off. So one end of this ridgeline comes out the grommet hole in the bottom and the lean is stuffed in and the other end of the ridgeline goes in then. When you go to set it up you secure the end of the ridgeline that comes out the grommet hole, then the other end and the lean comes out and gets tied off, the back and corners get staked out and everything gets secured for a good pitch. The stuff sack stays on the ridgeline and everything just gets reversed when you take it down . . .?
It seems like the lean would be a lot of loose material to deal with otherwise and this would help to simplify the process in bad weather - especially wind and rain.
Do you use carabiners on the ends of the ridgeline to secure the end loops?
It seems like the lean would be a lot of loose material to deal with otherwise and this would help to simplify the process in bad weather - especially wind and rain.
Do you use carabiners on the ends of the ridgeline to secure the end loops?
02/19/2015 10:18PM

this is how i "floor" my Baker shelter.a heavy space blanket to get what needs to be kept dry off the ground with a hole cut into it where i put my cook stoves.a few hours after i took this shot i storm moved thru and water ran down the bedrock the shelter was hung over and under the space blanket.i sleep in a tent,this is just a bug and rain shelter.
it's just a level trail thru the woods.
02/20/2015 07:22AM
I rig my ridgeline with the following variation that I use on my hammock:
1) Terminal end of ridge line secured around the tree with a NiteIze Knotbone.
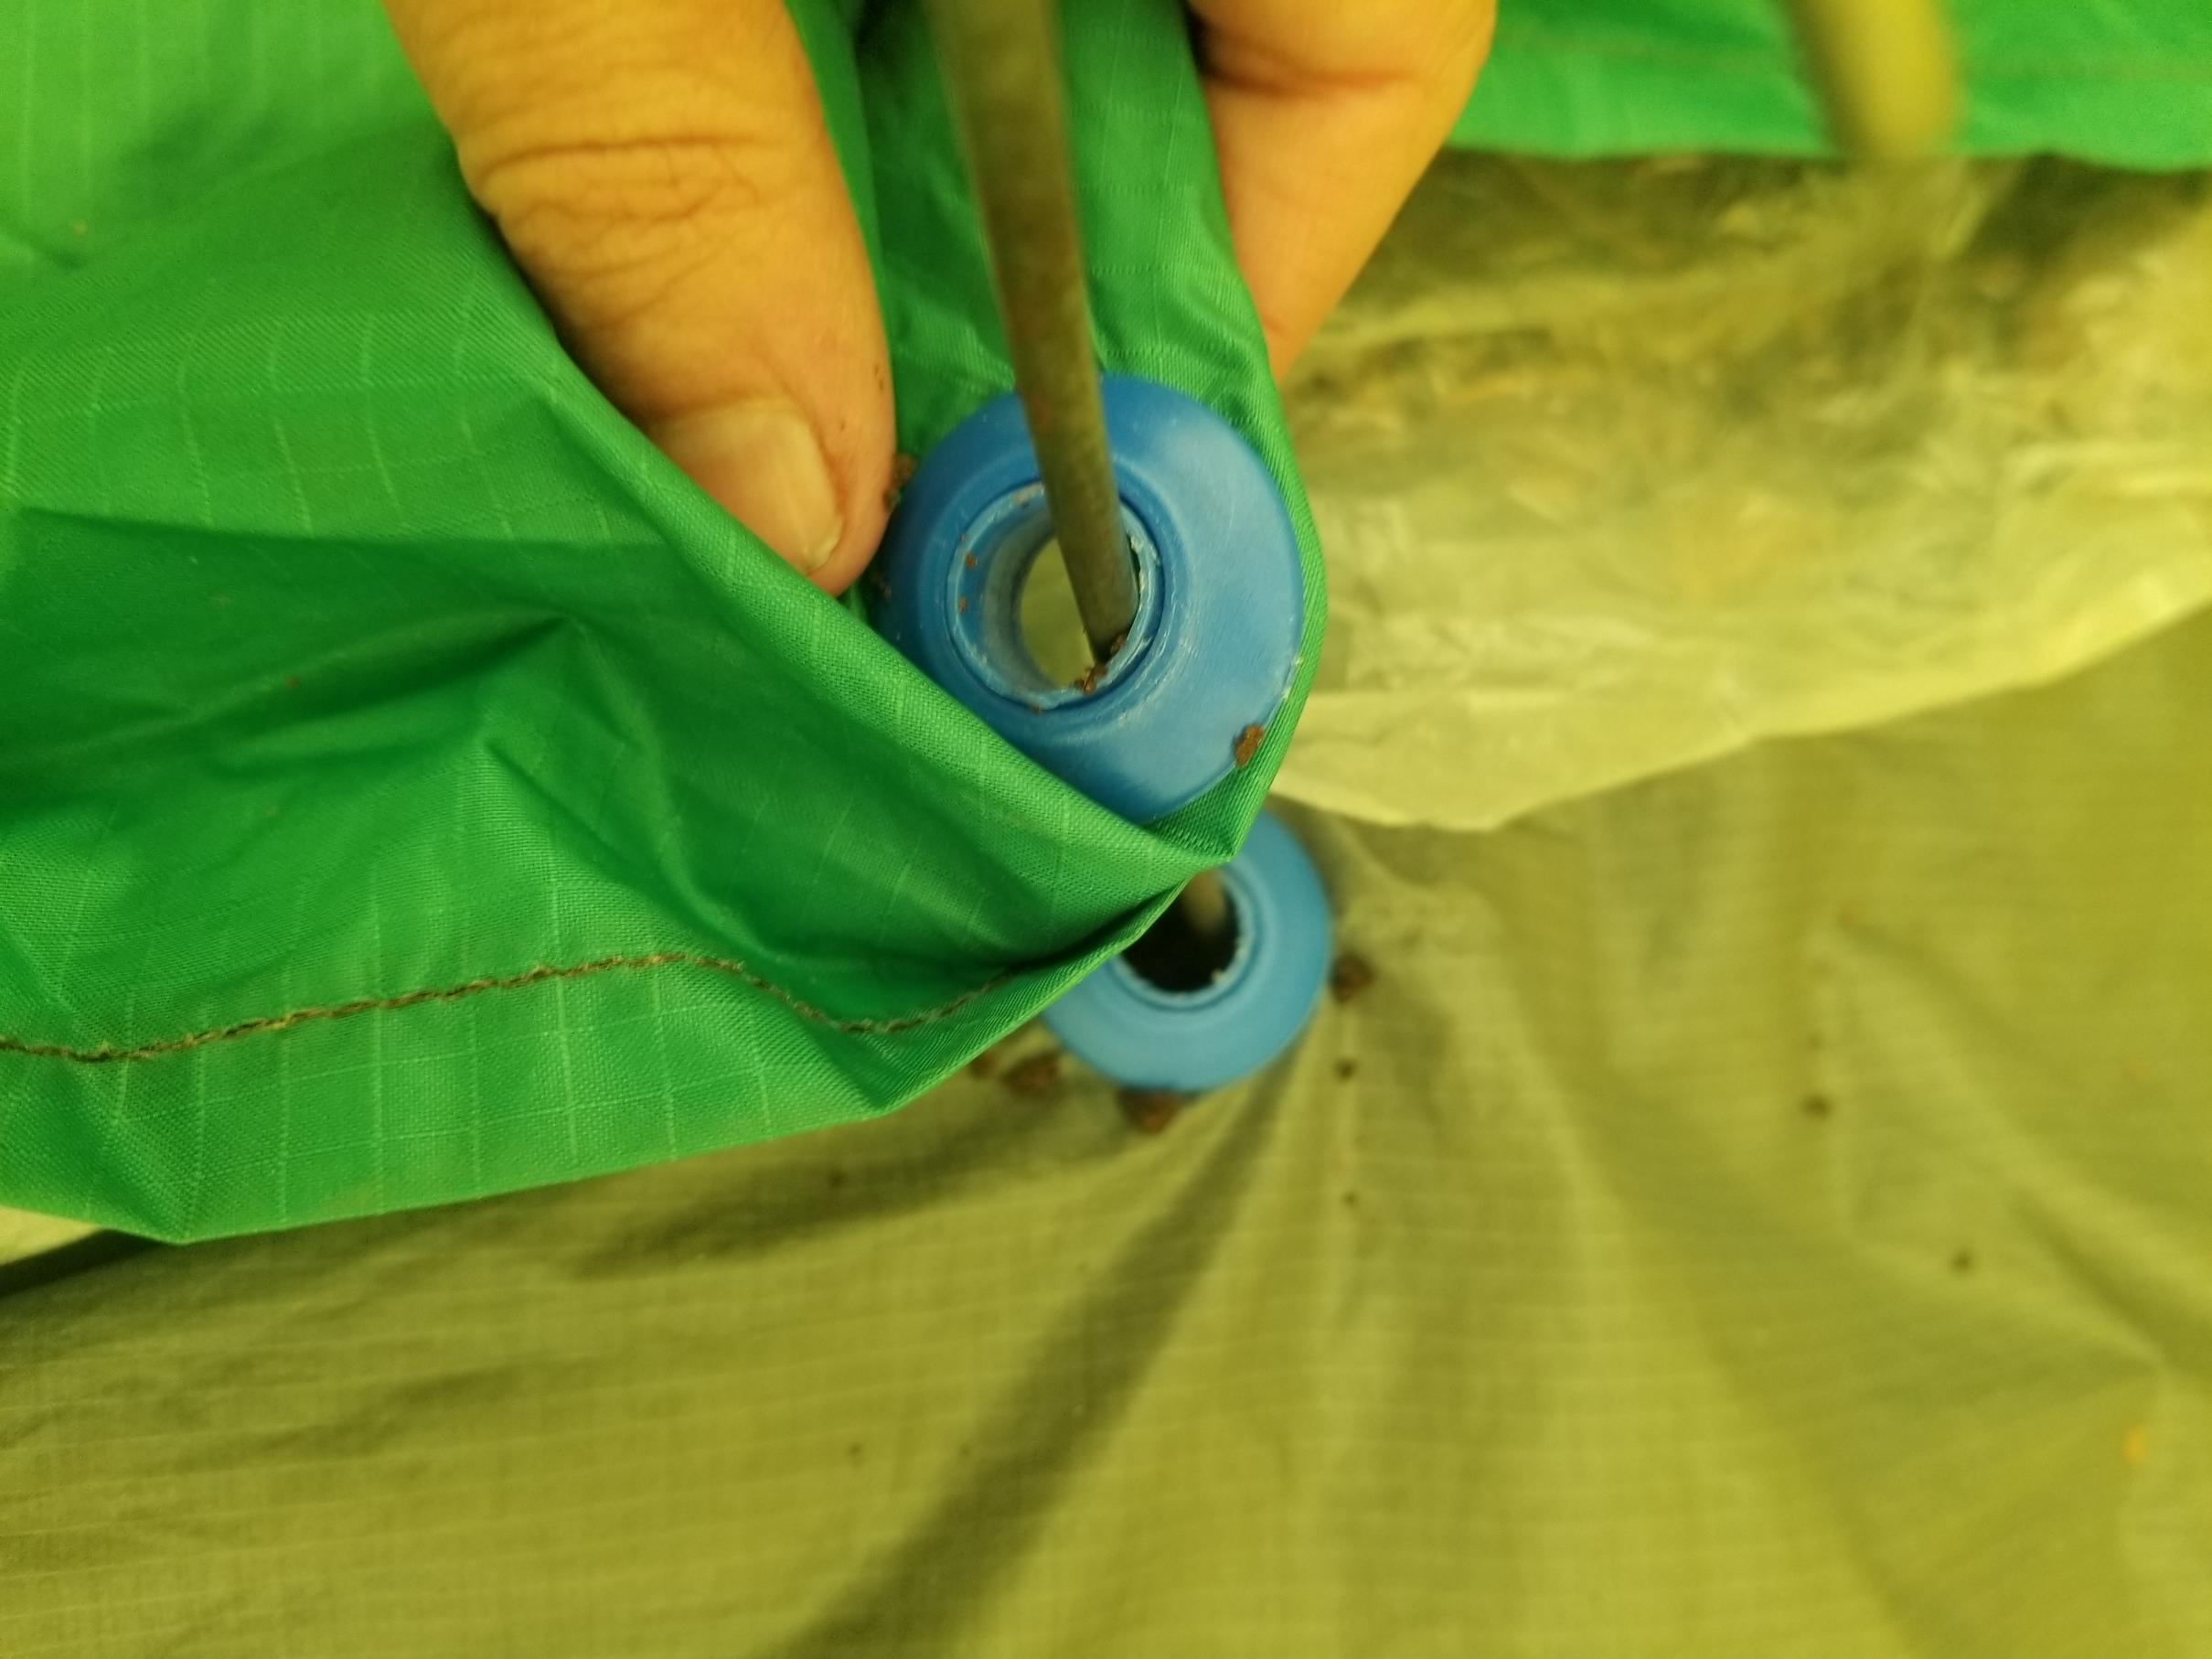
2) Prusik loops for each of the lean attachments. The prusik loops stay on the ridgeline. They can be slid horizontally on the ridge line to stretch the lean. I connect the the prusik to the lean with a NiteIze S-Biner. I tie the following variation of the loop used for the prusik, so that there are 2 loops (1 for the ridgeline and 1 for the s-biner). Here is a pic of the loops utilizing a fisherman's knot. 1 of the loops is actually used to create the prusik on the ridgeline.
3) Tag end of ridge line has a prusik loop (same as #2) with a NiteIze Figure 9 instead of an s-biner that allows the ridge line to be pulled tight.
This is a super fast setup ... wind, rain, etc.
1) Terminal end of ridge line secured around the tree with a NiteIze Knotbone.
2) Prusik loops for each of the lean attachments. The prusik loops stay on the ridgeline. They can be slid horizontally on the ridge line to stretch the lean. I connect the the prusik to the lean with a NiteIze S-Biner. I tie the following variation of the loop used for the prusik, so that there are 2 loops (1 for the ridgeline and 1 for the s-biner). Here is a pic of the loops utilizing a fisherman's knot. 1 of the loops is actually used to create the prusik on the ridgeline.
3) Tag end of ridge line has a prusik loop (same as #2) with a NiteIze Figure 9 instead of an s-biner that allows the ridge line to be pulled tight.
This is a super fast setup ... wind, rain, etc.


02/20/2015 11:31AM
No floor for me in my Lean3 Plus.... its the club house. We don't sleep in it

I run all 80 feet of line through the ridgeline and use Figure 9's
I can set up anywhere there are two trees within 70 feet of each other.
I use Kite String/Cord Winder to keep the line together and put them in the little clear Exped Bags they ship stuff in and use the little loop on them to hang on the figure 9. Works Slick.
Easy up and down


"One inch on the map ~ is not one inch on the ground"
02/20/2015 01:32PM
Here's a tip if you find yourself camping in more remote locations.
If you find that your only choice in terms of placing your Lean is over a bed of caribou moss (or the like), use a ground cloth.
Would you like to know one place skeets hang out during the daylight hours, only to vigorously explode at dusk? Yep, you drop the front screen and it makes an excellent "capture cage."
dd
"If you can keep your head when all about you are losing theirs" chances are you missed something. (Inspired by Rudyard Kipling.)
02/21/2015 10:58PM
quote linkster: "I rig my ridgeline with the following variation that I use on my hammock:
1) Terminal end of ridge line secured around the tree with a NiteIze Knotbone.
2) Prusik loops for each of the lean attachments. The prusik loops stay on the ridgeline. They can be slid horizontally on the ridge line to stretch the lean. I connect the the prusik to the lean with a NiteIze S-Biner. I tie the following variation of the loop used for the prusik, so that there are 2 loops (1 for the ridgeline and 1 for the s-biner). Here is a pic of the loops utilizing a fisherman's knot. 1 of the loops is actually used to create the prusik on the ridgeline.
3) Tag end of ridge line has a prusik loop (same as #2) with a NiteIze Figure 9 instead of an s-biner that allows the ridge line to be pulled tight.
This is a super fast setup ... wind, rain, etc."
Thanks, I'm sure it works great, but I'm having a little trouble visualizing it since I'm not familiar. I did find one photo in your photo journal which seems to be the prussic with S-biner for the ridgeline loop. Why do you use it instead of a figure9 or figure9 carabiner? What's the advantage of using an S-biner and prussic for each ridgeline loop instead of just running the line through all the loops and tying and tying off each end loop?
02/21/2015 11:09PM
quote bojibob: "No floor for me in my Lean3 Plus.... its the club house. We don't sleep in it
I run all 80 feet of line through the ridgeline and use Figure 9's
I can set up anywhere there are two trees within 70 feet of each other.
I use Kite String/Cord Winder to keep the line together and put them in the little clear Exped Bags they ship stuff in and use the little loop on them to hang on the figure 9. Works Slick.
Easy up and down
Where/how do you use the figure9's - do you put one on each end loop of the Lean ridge and tie off the ridgeline to each one? Or do you put them on the ridgeline, loop it through each end loop, and then tie it off on the figure9's. I couldn't quite tell in the picture. It could make a very informative video, boji :).
02/22/2015 01:08AM
Boonie
You can get the Figure 9 almost anywhere....
Nite Ize Figure 9 Small Carabiner ` REI
I hook the gated hook to the last loop on the ridge line (each end)
Run the cord around a tree and back to the Figure 9 and tighten (each end)
Roll up the excess cord and put in the little Exped Bag that is attached with the gated hook of the figure 9.
Done
Very Very easy.
Figure 9 Video
"One inch on the map ~ is not one inch on the ground"
02/22/2015 08:20AM
There are many ways to rig a ridgeline. I will try to clarify my approach.
The ridgeline is kept separate from the lean. The lean is not attached until the ridgeline is taught. The ridgeline has a knotbone attached on the terminal end, 7 prusik loops with s-biners for the lean attachment, and 1 additional prusik loop with a figure 9 attached for the tag end of the ridgeline.
I start with the terminal end of the ridge line. The ridge line is looped around the 1st tree and secured with a knotbone (you could use a timber hitch or the figure 9 carabiner attached to a loop in the ridgeline). I use the knotbone because it is easy and the terminal end is not where you are pulling the ridgeline taught. You are really just creating a fixed loop around the tree.
Then, I move to the 2nd tree. I use a prusik loop with a figure 9 attached (could use a figure 9 biner). I use the prusik because it slides horizontally along the ridge line easier than a figure 9. I could have used a figure 9 biner attached to the prusik, but my figure 9 is permanently attached. The distance between trees and where I want to set the lean are always different. I want to be able to easily adjust the length of the ridegline. I move the prusik loop to adjust the length of the ridgeline, I loop the ridgeline around the 2nd tree, around the figure 9, and pull the ridgeline taught. I then secure the ridgeline to the figure 9.
I think there are 7 loops across the front of the lean. I have 7 prusik loops that stay on the ridgeline for attachment to the lean. I take one of the corners of the lean and attach it to one of the prusik loops with an s-biner. I move to the opposite corner of the lean and attach it to one of the other prusik loops with an s-biner. Now, I can slide the lean horizontally on the ridgeline where I want it. I then finish by attaching the center lean loops to the ridgeline center prusik loops. I can adjust them a little to the left or right to eliminate any slack in the lean.
I utilize the same type of ridgeline for the awning and sometimes back dependent on the setup. I do not have any guylines attached to the lean until setup. I do not want a bunch of lines whipping around in the wind. I connect the guylines with a s-biner to the loops on the lean. I could use a figure 9 with a biner, but that means you are pulling the guyline taught at the lean loop. This is not a problem on the sides, but the ones on the back in the center can be hard to reach. I have a prusik loop on the guyline with a figure 9 that is pulled taught at the stake point not the lean. Again, the prusik loop slides easier than the figure 9. It is super flexible and fast.
I hope my explanation did not add to the confusion.

02/22/2015 10:56AM
Thanks, linkster-
That helped me get a better idea of what you are doing; some good ideas. I'll just have to get a bunch of these figure9's, S-biners, carabiners, and knotbones to try out some different things. I guess I'll have to learn about prussiks, too.
That helped me get a better idea of what you are doing; some good ideas. I'll just have to get a bunch of these figure9's, S-biners, carabiners, and knotbones to try out some different things. I guess I'll have to learn about prussiks, too.
02/23/2015 04:41PM
I just got my modified lean back from Dan at Cooke Custom Sewing. Dan installed stake loops across the bottom of the front door. Now the ground flap folds in like the back and sides and is staked from the outside. This should help stabilize the front door in windy conditions.
Dan turned the mod around in a couple of weeks and shipped it back to me at no charge. The new stake loops look great. He really does do a nice job.
Dan turned the mod around in a couple of weeks and shipped it back to me at no charge. The new stake loops look great. He really does do a nice job.

04/12/2021 09:13PM
Depends on if I am sleeping in it or just using it as a cooking/ dining / gathering shelter
Some folks have used Velcro or another brand of hook and loop closure to "join" the ground cloth to the sod cloth. I just lay mine down to shingle the ground cloth over the sod cloth that is sewn around the perimeter of the Lean 3. I tend to have the outer edges of the ground cloth rolled a bit toward the center to create height so water doesn't flow on top of the ground cloth if drainage on the site is iffy. Folk have used the CCS ground cloth/ Tyvek / plastic or a tarp.
Some folks have used Velcro or another brand of hook and loop closure to "join" the ground cloth to the sod cloth. I just lay mine down to shingle the ground cloth over the sod cloth that is sewn around the perimeter of the Lean 3. I tend to have the outer edges of the ground cloth rolled a bit toward the center to create height so water doesn't flow on top of the ground cloth if drainage on the site is iffy. Folk have used the CCS ground cloth/ Tyvek / plastic or a tarp.
Dan Cooke
04/13/2021 12:53PM
Speckled: "The real question; is this an innie or an outie?"
I have a thin plastic drop cloth under the sod cloth to prevent condensation. I found the main reason you get condensation in the lean 3 is from the vegetation under you and not in the air. By adding the plastic under the sod cloth you eliminate this problem. So then the real question becomes am I both an innie and an outie? Can you be both? I am normally very innie.
Life jackets float, you don't!

Subscribe to Thread
Become a member of the bwca.com community to subscribe to thread and get email updates when new posts are added. Sign up Here
Community Links
 Search BWCA.com
 Donate
 Featured Sponsor