|

Author
Text
")


11/19/2015 05:01AM
This project has been a while in concept and implementation, as I have considered building my own canoe for over a year. To set the stage, please follow a previous post and I will pick up the construction thread as I progress with my build.
Disclaimer: This will be my first woodcraft project since making a guillotine frame in Mr. Melcher's 9th grade wood shop class. The next quarter I cast an aluminum blade in metals shop. Cool but very crude. My strongback and form, a Merlin, are on loan from renowned master knife forger Karl Andersen and I have had virtual support from Jim D, a vigorous contributor and fine composer of water craft. A special nod of approval goes to everyone who has posted upon the bwca.com site and perhaps more importantly, the builders group section. Your canoe construction stories have inspired me and it is my hope to build a vessel capable of withstanding your scrutiny. Kudos to my Dad as well as he inspired my building The Canoe.
This will not be a fast build as my shop address in near my father's house, 20 miles away and my time is like yours, split between work and play.
The finished product will be a working canoe for my solo trips to the BWCA and beyond. I look forward to wearing The Canoe out.
The past:
9/02/14 bwca.com post
12 hours 11 minutes, 623 miles, 7 pit stops, numerous small towns, rain, sunshine, lunch in Independence, a bag of fresh home baked chex-mix and many recollections made Labor Day 2014 perhaps the most memorable, and enjoyable, holiday I have had in a long time. All because of a chance of an old canoe.
On the south side of St. Paul, my father mentioned to me that he likely hadn't been twenty miles from home in over four years. We traveled through his sales territory on our way to central Iowa; each sight a new story, each story another insight into my Dad. Our first stop in Zumbrota was a wake up for me as the "walker" had replaced the "cane" and taking a restroom break underscored the aging process as a challenge each of us will face in our own way at some time. My father, the one who introduced me to the BWCA in the mid-1960's, whose first canoe was a 1955 red Old Town wood/canvas and whom I have admired for his tenacity and intelligence is maturing gracefully...although way too fast. Our excitement over the canoe project was building as we continued down 52 in and out of both vibrant and gentrified farm communities.
Lunch was to have been in "one of those family diners", and although we looked for one high and low, our tastebuds settled upon BBQ at an all around sports club/family dining/bar and grill called Bill's. We left with a doggie bag and more than half of his order. No appetite anymore from a guy who hovered around 180 the last 60 years and loved good food. One hour to go and we would be viewing the catalyst of the day's adventure. By now the "what if" game was being kicked around. What if it has dry rot, what if it is too long for transport back on top of my Impreza, what if it is in amazing shape, what if the small amount of gunnel rot the owner mentioned on the phone is just an easy fix, what if it we moved the table saw to create more space in the shop, what if we painted it red just like your first canoe....
Jerry, a fine gentleman greeted us at his house and we followed him to his storage facility for the viewing. At first blush my heart stuttered upon realization that this restoration opportunity was way, way more than I had anticipated. Although pretty handy with tools and quite able to ferret out answers to wood craft mysteries, the extent of my patience was not going to do the vessel any favors. It was apparent quite quickly that the restoration of this canoe would likely test our father/son relationship rather than enhance it.
Many cracked ribs, missing half-ribs, rotted stems, disintegrating gunnels, animal chewing damage upon numerous ribs and bow planking worn through on the transport trailer quickly brought my father and me back to reality. We wanted a project that we could complete together in his remaining life-time and not one that would over-tax our future days. This canoe deserved better than us to make her dance upon the water again. This canoe would require an experienced restoration craftsman with the tools necessary for a bottom up rebuild.
You bet we may have left a valuable example of canoe heritage in that Iowa pole barn, but to be honest, it sure was nice not to put it on the top of my car. In all likelihood we would have been scattering loose planks, delaminated gunnels and busted ribs across Iowa as we transported the 18 foot piece of kindling back home.
However this canoe was a vehicle of great satisfaction as it brought a father and son much closer together. I reheard many of his tales of triumph and tragedies, politics and motivations as we cruised our way to and from Montecello. Every new small town a story, every mile on the road a memory, I could not have had a better adventure.”
As I recall, somewhere around Northfield and a side trip down memory lane to Dad’s college years at Carlton, he turned to me and said, “Rather than wait for a fixer upper, why not build your own canoe?”
Thus this saga begins.
12/10/2014 01:12PM bwca.com post
Karl Anderson:
Guys, I need a home for these - even if it's temporary.
I built my Merlin at the neighbor's, and they have sold their house.
My shop is pretty maxed-out.
AS many know, a huge % of time and expense is devoted to building, cutting out and tweaking the forms and strong back.
I spared no expense when making mine. I used good plywood for the strong back and 3/4 MDF for the forms.
The forms have also been shaped - of course - to the curvature of the hull.
These need a home for a while.
They helped me to build my 15' 11 5/8" Merlin.
I'm in Northern Minnesota.
The strong back got additional horizontal lengthwise bracing.
The entire build is available earlier in the forum.
12/15/2014 07:55PM
MacCamper wrote:
Wanted to take a moment and thank Karl for allowing me the opportunity to utilize his forms and strong back. Last Saturday I traveled from Forest Lake to Warba in a dense fog/drizzle. The welcome was warm and incites plenty for this wanna-be boat builder. I can hardly wait to get moving on my build. Also thanks to Ben for his kind offer of a 38 Special form.
With the forms in the shop and two episodes of the Bev's Alaskan Adventure under my belt, I may not sleep at all tonight.
Mac
11/14/15
Step one, preparing the shop for building The Canoe.
Built the first year I attended college, my father's shop was constructed as a late 1970's man-cave for storing "stuff', building projects and providing a distraction from what was becoming a very complicated life for Dad. He was a typical workaholic and often his job limited family growth as I was growing up. It was thought that this building would bring some of the family closer together. Little did I know it would be 35 years before this shop enhanced the father/son relationship I know today. Two years ago I snuck some space for an Old Town Trapper restoration and today I am cleaning up and moving in to build The Canoe.
Three and a half decades of empty boxes, spare carpet chunks, plastic pipe, scrap wood pieces and what I interpreted as junk had to be moved, rearranged or thrown out in an effort to create the space necessary for my build. I had no idea Dad was such a pack rat as the rest of his life was so very orderly. Unfortunately I won't be doing a super thorough job as I don't want to inadvertently misplace his "stuff".
Beneficial for me, my father likes tools, and in particular clamps, so my arsenal of equipment is on the ready. The Canoe project begins.


Never better, attitude is a choice.
11/19/2015 08:25AM
Great story. Looks like you're all set!
You and your father can definitely do this. It's really not a complicated thing to do. The most frustrating thing about the first time you build a canoe is that there are so many ways of doing each step that it can drive you crazy trying to decide which way to do it. Just remember that they all work and it's nearly impossible to screw it up beyond repair. I've made plenty of mistakes and fixing them isn't tough.
Looking forward to following along.
Alan
11/20/2015 05:51AM
Last winter, needing an escape from the snow and ice, I set myself doing research for building The Canoe. Besides a wealth of on-line reading information, upon my shelf I have the latest edition of Canoe Craft, a very old three ring binder from the Minnesota Canoe Association describing canoe construction and a copy of the Northwest Canoe building notes I received from a good friend, Dr. Scott, along with his tips, in August. Combined I have learned as Alan said, there isn't any one "best way" to build a cedar strip canoe.
That is great for me as I admittedly often don't like to follow directions.
11/15/15 (still catching up to the present)
Today I went to Home Depot to select a few poplar boards for my accent pieces. There is a wide selection available, however I was surprised by the amount of 'green' colored wood, as I thought it would be very white. While there I also purchased a new Freud 7.25/24, circular saw blade, as suggested on this board, as well as a piece of angled aluminum for my rail. Because I didn't need 4 feet of rail, I have cut it in half and am willing to share 2 feet of guide with anyone else starting a build using the Minnesota Rip method for cutting their strips.
Attached find a picture of the oversized BDB's I use to strap whatever I want to my canoe rack. Simple to make and fast to install, I have used the elastic straps for many, many projects without a mishap.
Upon arrival at my fathers's house and before The Canoe project, we set to changing an outdoor lightbulb, one of many small projects I have undertaken as the only logistically close child in the family. Although 56 degrees and sunny, Dad came out of the house bundled up as though it were 15, "Doctors told me last week that my heart is working overtime, I need to stay bundled up and keep away from anyone who is sick. Your not sick are you?" At times I don't know what is more difficult, seeing my destiny or watching my father live it.
Lights working, we went to the shop to put the strong back together.
With very little time wasted, Dad and I put the "kit" strong back into shape. Thanks again to Karl for the loan. All the lines and marks you placed to facilitate the re-construction were very helpful. With Dad's final approval I was set to rip some boards...tomorrow.


No need to question the hammer... Dad was doing his part and helping.
Today, during a break, he told me a story about the time in the late 70's when he took my brother horseback riding while they were heading to Maine to pick up the Old Town Trapper Canoe I recently restored. Dad on a horse's back?? Brother Curt his side-kick?? Really?? Hard for me to fathom but a wonderful tale for him to tell. I look forward to many more.
That is great for me as I admittedly often don't like to follow directions.
11/15/15 (still catching up to the present)
Today I went to Home Depot to select a few poplar boards for my accent pieces. There is a wide selection available, however I was surprised by the amount of 'green' colored wood, as I thought it would be very white. While there I also purchased a new Freud 7.25/24, circular saw blade, as suggested on this board, as well as a piece of angled aluminum for my rail. Because I didn't need 4 feet of rail, I have cut it in half and am willing to share 2 feet of guide with anyone else starting a build using the Minnesota Rip method for cutting their strips.
Attached find a picture of the oversized BDB's I use to strap whatever I want to my canoe rack. Simple to make and fast to install, I have used the elastic straps for many, many projects without a mishap.

Upon arrival at my fathers's house and before The Canoe project, we set to changing an outdoor lightbulb, one of many small projects I have undertaken as the only logistically close child in the family. Although 56 degrees and sunny, Dad came out of the house bundled up as though it were 15, "Doctors told me last week that my heart is working overtime, I need to stay bundled up and keep away from anyone who is sick. Your not sick are you?" At times I don't know what is more difficult, seeing my destiny or watching my father live it.
Lights working, we went to the shop to put the strong back together.
With very little time wasted, Dad and I put the "kit" strong back into shape. Thanks again to Karl for the loan. All the lines and marks you placed to facilitate the re-construction were very helpful. With Dad's final approval I was set to rip some boards...tomorrow.


No need to question the hammer... Dad was doing his part and helping.
Today, during a break, he told me a story about the time in the late 70's when he took my brother horseback riding while they were heading to Maine to pick up the Old Town Trapper Canoe I recently restored. Dad on a horse's back?? Brother Curt his side-kick?? Really?? Hard for me to fathom but a wonderful tale for him to tell. I look forward to many more.
Never better, attitude is a choice.
11/23/2015 05:38AM
11/16/15


Thus far the project has been rewarding from many perspectives. Time with my Dad is a bonus when he is "up" for working on The Canoe, conceptualizing the steps of the build as I go is better than a crossword puzzle, developing skills with equipment long dormant both physically and mentally and learning through trial and error have brought more smiles than frowns.
Using the MN Rip method, I began cutting my trim boards. Poplar, cherry and walnut will accent The Canoe with western red cedar comprising the bulk of the frame. The cherry is a left over material from trim boards installed in my house 10 years ago. They vary in thickness 1/2", 5/8" and 3/4" and will be incorporated into the poplar strips. In the process of ripping the progressively thinner components I found my guide rail to jam into the supports I had screwed into the strong back. This was remedied by knocking out the little tags left behind when I cut the 3/4" strips.
In the process of making an accurate cut, I forgot about the screws I had used to affix the supports to the strong back and ripped through a couple screws causing a warble in the following cuts. I was using the old 71/2 inch /24 blade that was on the saw and didn't feel too bad about setting it aside for less critical operations. Unfortunately, but a good lesson learned, the new blade I put on the circular saw was narrower than the the old blade. Fortunately, I caught my error after producing only two slightly wide strips and not the whole stack.
It is all part of the thought process and I am okay with making minor errors and learning from my mistakes.
I have also been creating a temporary inner stem for the mold I am borrowing. Originally the Merlin canoe plan didn't include inner or outer stems. The last canoe built using this particular form was constructed with inner and outer stems thus adapted. As I am using the MN Interlock and no stems, I needed to create a spacer to fill the void.

Using a piece of very aged scrap redwood I found on the "wood shelf", I cut the proper number of strips to length and began an overnight soaking in my fishing rod travel tube. In the back of my mind I thought I had read that simply soaking the strips for an extended period of time would soften the wood to a point where it could be bent to the form. Ah...,no, this doesn't work, the strips snapped with the crispness of a cracker. In further review I saw my error. The passage read that very dry wood should be soaked for an extended period of time followed by steaming and then bending quickly upon the form. I guess I overlooked the requirement to steam regardless of the soak time.
I recut more strips, soaked the wood for an extended period of time, steamed the strips for 30 minutes per set and finished with my intention, a pair of "filler stems". One item of note. When steaming I was amazed at how quickly the components dried and became brittle while bending to the forms. On the first attempt I had to re-steam the strips to make it work without destroying them.


No Dad today as he was tired from a morning of errands. Sometimes this is a good thing as often his presence takes us on tangents that have little to do with The Canoe...but then again, that is a fine part of the journey as well.
Never better, attitude is a choice.
11/23/2015 09:05AM
Good morning Jack. I'm posting this too late to help you, but might help others.
Your saw set up is fine, except the edge that rides against the plank needs to be reduced, from 3/4" to at least 5/8"
Here is a pic I hope will help !
Great Progress !
Jim
Your saw set up is fine, except the edge that rides against the plank needs to be reduced, from 3/4" to at least 5/8"
Here is a pic I hope will help !

Great Progress !
Jim
Keep your paddle wet and your seat dry!
11/23/2015 11:05AM
select a few poplar boards for my accent pieces. There is a wide selection available, however I was surprised by the amount of 'green' colored wood, as I thought it would be very white.
The Poplar you buy at lumber stores is not related to Aspen, as you would expect. It's a southern species and very different: Tulip Poplar.
Alan
11/24/2015 03:14PM
You're not just building a canoe here. You're building two other things that are far more important: your relationship with your Dad and the memories that will remain with you whenever you see and paddle your project. This, my friend, is the greater build.
I can't wait to see how everything turns out.
I can't wait to see how everything turns out.
aka HermitThrush "Such sights as this are reserved for those who will suffer to behold them." -Eric Sevareid
11/25/2015 05:47AM
11/20/15
My arm is sore as with a little twisting, Dad strongly suggested I buy my cedar strips from NW Canoe. Although I feel 100% confident that I have the abilities to cut my own, he was very persistent and the decision was made over a lunch of wonderful home-made cornbread, real maple syrup and ham. I'd say it was bribery. No matter, in the end as it was his Friday contribution to the project and would move the build along much quicker.

Hard to believe that The Canoe is sitting atop my BWCA car, sans seat, thwarts, accent strips and decking.
Off to NW Canoe and a fantastic visit with Dennis; a swell craftsman, great story teller and willing teacher. Upon arrival he greeted me as he typically does, by stopping his current task and talking canoe. If you have the opportunity, be sure and visit Dennis at his "factory" in St. Paul. Besides viewing canoes in many stages of repair or construction, take a look at the ceiling ornaments, building accessories and assorted wood (especially if you are a wood hoarder as I am) to capture ideas and stimulate conversation.
Almost two hours later I left with The Canoe strapped to my car and a bundle of design ideas. At one time, this was to be a staple-less canoe as I didn't want any blemishes and I had plenty of time to complete the project. Now, after much discussion with Dennis, I feel comfortable with using 3/4 inch composite brads. They do leave a tiny hole, but after looking closely at his builds, the impressions are easily overlooked. I also plan to water soak the blemishes to hide the minor dots. I was told that the beauty of the composite brad is they don't have to be removed, rather the plastic nails are broken off the forms when the shell is popped off.
Another consideration is that the forms I am using are on loan and built for staple construction...that is they do not have additional clamp holes bored at strategic locations to accommodate the extra clamps Dennis felt important for staple-less building. With full appreciation that jigs can be constructed to facilitate blemish-free building, I think I will wait for my next canoe to do that.
And, after reviewing the hours necessary to complete the project, I feel that visual progress will enhance my father's experience as well as my own.
Never better, attitude is a choice.
11/25/2015 08:11AM
Sounds like the trip to NW canoe was a very productive one. On my first build I bought my strips from them as well. Ripping your own isn't a big deal, as I later found out, but it's nice to push the easy button on your first build since you've got enough other things to worry about.
Will you be beveling each strip or doing bead and cove? I switched to bead and cove and haven't looked back, as have the other builders I know.
Alan
Will you be beveling each strip or doing bead and cove? I switched to bead and cove and haven't looked back, as have the other builders I know.
Alan
11/25/2015 08:23AM
It's nice to start with quality strips !
As Alan has stated, bead and cove is the way to go !
I too at an early stage switched to bead and cove. I would do it no other way.
It gives a beginner the advantage of building like a pro ! Beveling strips by hand is daunting !
Here's a few pics of my router set up.

Jim
As Alan has stated, bead and cove is the way to go !
I too at an early stage switched to bead and cove. I would do it no other way.
It gives a beginner the advantage of building like a pro ! Beveling strips by hand is daunting !
Here's a few pics of my router set up.


Jim
Keep your paddle wet and your seat dry!
11/26/2015 06:04AM
A big yes on the B&C. After reading all the material available on this forum I am convinced that B&C is the best option for me on this build, although Dennis doesn't feel it necessary. Then again, he can build a boat in his sleep and I, well, really need to be wide awake for this and many other amateur projects.
11/22/15
Yesterday Dad and I worked on fixing a shelf full of lumber that had detached from the wall and landed upon the radial arm saw. Fun and noteworthy to sort through his wood scraps. He has had friends in the lumber business and would stop by to pick up bits and pieces of exotic wood from around the world. Not necessarily enough to do anything with construction wise, but as a wood hoarder his collection outgrew the shelf. It would have helped if the angle iron had been screwed to a stud and not just into the knotty pine siding.
During the project I couldn't help but chuckle to myself when he pulled out the soap for lubricating the screws. Indeed, a great idea and often put into practice by many builders; nothing wrong with a bit of Ivory in the threads. However, my father's dish of soap was a mashed conglomeration of Zest, Ivory, Irish Spring, Dove and anything else too small for successful washcloth use. Some would say disgusting, I just laugh and think of the man who busted his ass to provide his children a lifestyle much better than he experienced as a youth. Thrift was/is king in the Mac Sr. household!
Onto the forms:
Thanks again Karl for loaning me this awesome form and strong back system. Everything was marked for correct assembly. With the exception of finding a flat section of floor in the shop, the set up went extremely well. Dad approved too.


A laser level was very helpful in confirming the correct positioning of the form.
Question for the group. When fairing with a long strip, where is the strip placed upon the hull forms and is the process intuitive. When I use a long and flexible strip upon several forms the outline looks smooth flowing. When I use a shorter strip and three or four forms I find what appear to be extreme inconsistencies between the forms. Maybe I'm thinking about it too hard and should lay a couple temporary strips to get a better visual? Or is there a better, simpler method?
Thanks, and Happy Thanksgiving,
Mac
Never better, attitude is a choice.
11/26/2015 08:10AM
Question for the group. When fairing with a long strip, where is the strip placed upon the hull forms and is the process intuitive.
It's intuitive after you've done it a few times. Up until then it's kinda aggravating. Like you said: how long of a strip, where to place the strip, and what exactly am I looking for?
Long strip is best. It will help since you have your dad there to hold the other end. Start by laying along the top of the forms, right on the keel line so that it stretches from the first to last form. I use a scrap strip that's only about 1/8" thick so it follows the shape easily. But a full 1/4" strip will work too
For starters does it touch every form or does it bridge some of them? Depending on the rocker and stiffness of the strip it might not touch the end forms but that's probably ok, you can hold it tight to those forms by hand.
If it's bridging a form, #4 for example, you need to try and figure out if it's because #4 is too low or if perhaps #5 or #6 is too high. I don't have any good tips on how to figure that out. Best way is probably to sight down the strip and see how it flows over that bridged area. If you think one form is too high then obviously you either lower it or sand it. If a form is too low raise it or build up the thickness with tape, or sometimes a really thing strip of wood.
Do the same thing at the shear line to be sure it flows smoothly from one end to the other. Since I'm always doing this myself that's a hard thing to do on account of gravity. So I usually just staple that first strip in place and site down it. If it's way off I'll pull the strip back off for adjustment. But usually there will just be one form that got sanded a little too far so I just loosen up the staple and jam some folded up tape in the gap until it flows smooth.
Those are probably the most important parts to check and the easiest. If those are right everything else probably is too unless a form was cutout/sanded incorrectly. Pick a few more spots along the hull to hold the long strip against and see how it lays. Then start stripping and pay attention as you go. If you find that strips aren't laying in quite right on one form you can still adjust as you go. Usually you find a low spot so you either build up with tape or, after the strip as been stapled, pull it back out just a little so that it's fair.
Alan
11/26/2015 08:21AM
We builders tend to hang on to wood ! I've got piles myself, filling my rafters in my garage. Sort of ATMOSPHERE to me ! HA !
I just take a strip of about 6-8' in length,and position or hold it the same as a strip as I would be stapling to the forms going up the side, Ideally it should touch all the forms without a gap.
I just set up forms, that I had to move a couple of forms, to fair things out. A strip will tell you ! Before bringing out the staples and glue.
Hope that helps ! Lovin the build already !
Jim
Keep your paddle wet and your seat dry!
12/05/2015 07:35AM
Unfortunately life is full of distractions including holidays and work. Thus The Canoe has been on hold for a few days. After messing around with Dad's train set over Thanksgiving, he and I are back at it.
Fairing went well. I took one of my 20 foot strips and set it as Alan suggested to the keel...perfect. Then I clamped/taped the strip along the shear line. All is in alignment when the strip is pulled to the forms, except for the second to the end forms which have exactly .25 inches of gap on the edge of the strip when the strip is set upon the stem and 3rd form from the ends. When pulled tight it flows intuitively just fine. Considering I am using a previously used form and it has been set up correctly, should there be this slight, although consistent, deviation? Sorry no pictures as I didn't have my phone with me.
Recently I have also been making some investments. The router tools available in the shop have proven to be inadequate for the job. Missing parts have plagued the set up of the table. It was simpler to buy an inexpensive Ryobi stand than jerry rig something doomed for failure. Unfortunately the new investment wouldn't accommodate the Stanley router my Dad had bought in 1978, again, miss-placed parts (I am sure I will find them some day). Back to Home Depot...good thing my father gets a 10 percent serviceman's discount!
Finally, after a week's wait due to too many work related chores, yesterday I was able to put a bead on a few strips in anticipation of the weekend's routing project. The set up went fine with almost all of the strips flowing through the jigs successfully once adjusted properly.

I have a question. A few of the MN Ripped strips are slightly thinner than perfectly cut strips. Will they pose challenges further into the project? Thanks
Mac
Never better, attitude is a choice.
12/05/2015 06:58PM
Thickness of the strips is pretty important to me. How much variation is there in your strips ?
I've had excellent luck cutting my own, with the skilsaw method.
I'd be tempted to ask my strip supplier, about his tolerances !
As for usability, If they are sold as 1/4" strips, and are off a 1/32",or more, I'd be upset.
Can you use them, yes.
A 1/16", I'd ask for a replacement.
Jim
I've had excellent luck cutting my own, with the skilsaw method.
I'd be tempted to ask my strip supplier, about his tolerances !
As for usability, If they are sold as 1/4" strips, and are off a 1/32",or more, I'd be upset.
Can you use them, yes.
A 1/16", I'd ask for a replacement.
Jim
Keep your paddle wet and your seat dry!
12/06/2015 07:18AM
All of my cedar strips from NW Canoe are right on the mark. Some of the poplar strips I cut myself are a shade off. This I now attribute to marginalizing my blade when I cut through the screws used to hold down my cutting blocks. The strips will be replaced.
Yesterday Dad and I cut bead and cove on all of the strips. We had a great time, although Dad's chore was a little boring...making sure the strips exited the router properly (I know, not really necessary but this is a relationship building project). On my next build, yes there will be more as this is great fun for me, I plan to build a trough from spilt 10' long thin walled drain tile to catch the material as it runs off the router table. Then I can do it by myself.

Following this phase of the project Dad said his favorite aspect was the invigorating conversation!
The ryobi router/table equipment and bits worked very well. One learning curve note is that after changing out the bead to the cove, I found that I had it set too deep and was chipping the edge of my cedar strip. A couple of the boards had some insults applied, but I think we can salvage the majority of each piece. The router set up I am using has a vacuum attachment that is particularly handy for keeping the shop clean. About 95% efficient, the only limiting factor is the size of the shop vac canister.
The Canoe has really invigorated me. My mind drifts to how the next build will be better, even though I haven't set a strip on this form yet. And time with Dad is great as I can monitor his health, both mental and physical, now that we see each other quite frequently. The lack of snow has allowed him to walk to the shop rather than be driven, thus exercising his new knee replacement.
My current regret is the busy schedule ahead with work and the holiday looming. Building The Canoe is really enjoyable. With any luck the anticipated frustrations ahead will be limited and I can report next spring of an exceptional father/son accomplishment.
Never better, attitude is a choice.
12/06/2015 08:25AM
Glad to hear the strips in question weren't from your supplier, if they had been, I'm sure he would have corrected it !
You router set up looks fine ! You will be glad you went this route.
Gotta love workin with Dad !!!
Jim
You router set up looks fine ! You will be glad you went this route.
Gotta love workin with Dad !!!
Jim
Keep your paddle wet and your seat dry!
12/13/2015 06:20AM
quote 1JimD: " Glad to hear the strips in question weren't from your supplier, if they had been, I'm sure he would have corrected it !
You router set up looks fine ! You will be glad you went this route.
Gotta love workin with Dad !!!
Jim"
I do enjoy working with Dad, that is unless he "straightens the shop" as he did between my last visit and yesterday! I had set canoe tools upon two 8 foot tables, handy for me to grab and right where I put them. In an attempt to give the forms one last look before tightening them up with a temporary strip, I thought I'd laser the frame one more time. Hmmm, where did that laser go? Where did most of the tools go?
Phone calls to Dad went unanswered, so I was alone on a search and seek mission. An hour plus later I had reclaimed the implements necessary to facilitate the job. Simply fascinating how my "intuitive" tool arrangement process can be so very different than my father's! The laser was hanging upon the wall behind a dust pan.
Today, after squaring everything up, I had good intentions to hang and glue a few strips using the composite brads purchased from NW. The battery operated gun, a dandy tool for steel brads, turned out to be impossible to work with as it shattered the brads upon impact. Dennis had told me that they brads were very finicky and he had a special pneumatic gun available for purchase should I desire.
Plan "B", back to a staple less attempt. So instead of hanging strips I made jigs and re-familiarized myself with the bandsaw crafting tools I hoped would serve their purpose in holding the strips tight to the forms. They do, however I need many more clamps...many more.

Question for the group. Currently everything has been set up as a dry run with no glue. My stem extension 'blank' (this form had originally been modified shorter to accommodate an inner and outer stem and I am using the stemless method) has yet to be beveled. When I fair the strips in a dry run, they taper and end very nicely about 1.5 inches beyond the stem with the inner edge resting solidly upon the stem edge. In my minds eye the tips of the strips will be glued at this extension to begin with and as I get closer to the bottom of the canoe the need for a bevel will become apparent. Does this make sense or am I over thinking it...an admittedly personal challenge I have. Perhaps I need to create the bevel now?

Regarding the "bird's eye", what is the easiest way to do this section?
Thanks. Dad showed up later in the afternoon and enlightened me that he put all the tools away so he would know where they were. As Jim said, gotta love working with Dad, and I do!
Never better, attitude is a choice.
12/13/2015 08:33AM
Hi Jack
I would start my first strip at the shearline, and continue on up the side. The correct pattern is one strip on the right side, two on the left, two on the right side, and two on the left, and so on.
This will help interlock the strips from side to side, on the ends.
I prefer regular staple guns. Stanley makes decent ones. I've found those plastic staples to be problem plagued
I use a little rat tail file on the ends, to cut a little grove in the coves, where the strips cross each other from side to side. This allows the bead to set in the bottom of the cove. Necessary to interlock the strips.
Jim
I would start my first strip at the shearline, and continue on up the side. The correct pattern is one strip on the right side, two on the left, two on the right side, and two on the left, and so on.
This will help interlock the strips from side to side, on the ends.
I prefer regular staple guns. Stanley makes decent ones. I've found those plastic staples to be problem plagued

I use a little rat tail file on the ends, to cut a little grove in the coves, where the strips cross each other from side to side. This allows the bead to set in the bottom of the cove. Necessary to interlock the strips.
Jim
Keep your paddle wet and your seat dry!


12/13/2015 09:09AM
Like Jim I'm a fan of regular staples. If stapleless makes you happy then go for it but since you said you plan to build more canoes later maybe use staples for this one and tackle stapleless next time. Your call.
The pneumatic brads do look kind of nice but the gun is expensive. I've tried the composite staples and don't much care for them. I see no aesthetic benefits over regular staples and they damaged some of my form when they were removed from under the hull. Not to mention issues they caused while stripping, which I won't get into now.
I like to strip the same as Jim described, alternating sides. I bevel my stems before I start stripping. I draw a center line down the length of the stem form and start grinding away material on either side until I get to that line. Along the way I hold a short strip against the bevel to see how it rests. The strip is long enough to touch the first two forms. Ideally you want the strip to make even contact all along the bevel your sanding but if it only makes contact at the tip and not on the sides that won't matter much. A perfect bevel makes a handy guide for the saw when you cut the angle on a strip for the other to mate against.
Like you said, this bevel changes as you get up farther. Keep sliding the strip up to see how the bevel needs to change. When I first started doing this I'd only bevel enough for 6 strips at a time since it was easy to visualize. After 6 strips were on I'd bevel for the next 6.
On my first few canoes I remember this part of the build being quite frustrating. Don't worry. I've done it right, wrong, and everywhere in between. The boats always came out fine in the end.
It's good that you plan to build more canoes. Don't expect perfection. Look at it as a learning experience. You'll find out what does and doesn't work and the next will be better and faster. And don't forget that anything you screw up can be fixed pretty easily. Save some of the cedar dust from sanding the hull. When mixed with epoxy and cabosil you can match the wood pretty close and hide all kinds of sins.
Alan
12/18/2015 03:20PM
Thank you Alan and Jim for your encouraging words and especially Karl for a great form to work upon.
The Canoe is going well. In fact, I don't believe I have had such an enjoyable time with puzzles to figure out, options to choose from, peacefulness and fulfillment when I gain purchase on an enigma. Using my mind and applying concepts foreign to me has been invigorating and very rewarding as the project takes shape.
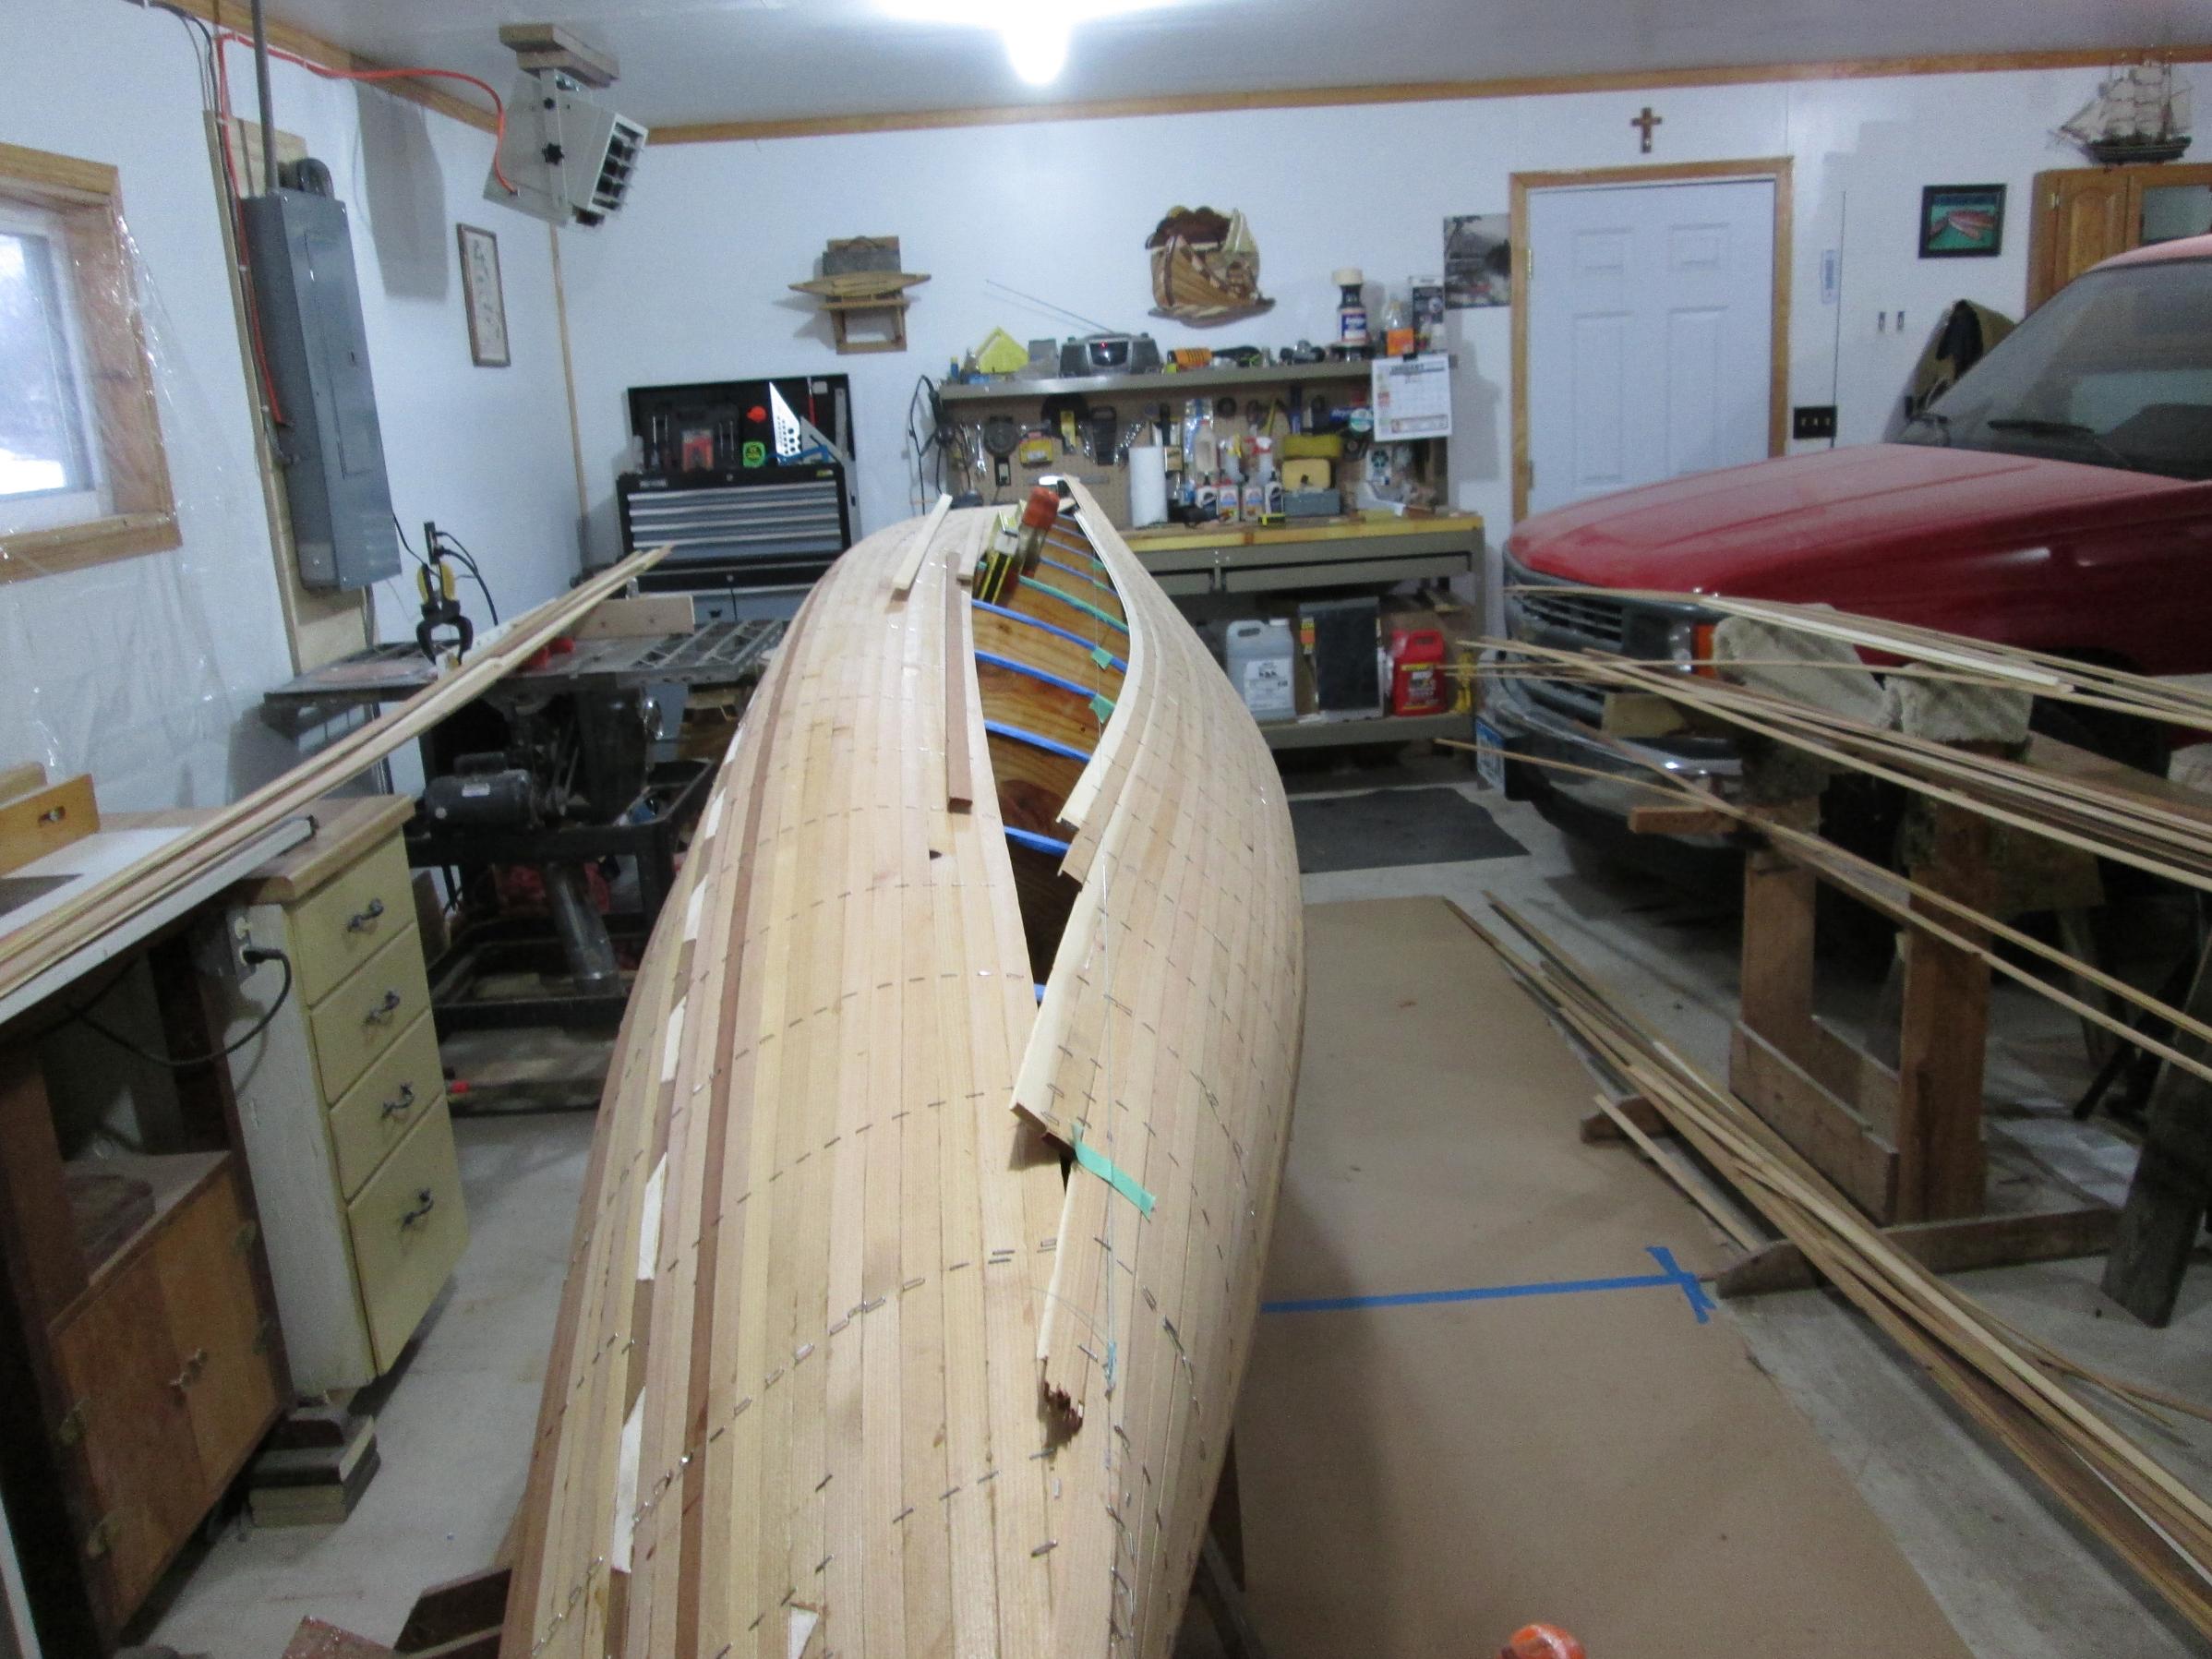
Last winter my wife gave me a canoe model kit to quench my thirst to build at the time. The principles and practices instructed are being used to build The Canoe. Giant rubber bands have become my "go to" when it comes to keeping the strips next to the forms, along with a few well placed jigs. Smaller, thinner bands (as suggested by Dennis at NWC) are used in conjunction with 1/4 inch dowels, to hold the strips together after the bead of glue is applied.
 I raided a local bike shop for the inner tubes and cut them down to size.

The system has been very successful in providing quick and easy support to the strips.
Today I brought my work with me to the shop and was double productive placing 4 strips and completing two dozen affiliate Christmas Cards to be sent on my way home, several email exchanges, four phone calls, a bit of conference planning and a dabble of business politics. It occurs to me that I may have found my new winter office...

Dad has been hit or miss on the project recently. Two days ago I learned that our afternoon of routing strips really tuckered him out. I will need to be more mindful of his stamina. On Wednesday I met him in his garage to pick up some things. Without a word he pulled up his sweatshirt to expose a bunch of pads stuck to his torso and wiring snaking into his pant pocket. "Ticker acting up, too fast, taking a test", he said dropping the flannel hem.
I don't know what bothered me more, his naked chest (some day mine will look like that) or the acceleration of his aging. Thoughts of him remained with me as I worked in the shop.
Tomorrow I hope to place a simple design on the hull.
The Canoe is going well. In fact, I don't believe I have had such an enjoyable time with puzzles to figure out, options to choose from, peacefulness and fulfillment when I gain purchase on an enigma. Using my mind and applying concepts foreign to me has been invigorating and very rewarding as the project takes shape.
Last winter my wife gave me a canoe model kit to quench my thirst to build at the time. The principles and practices instructed are being used to build The Canoe. Giant rubber bands have become my "go to" when it comes to keeping the strips next to the forms, along with a few well placed jigs. Smaller, thinner bands (as suggested by Dennis at NWC) are used in conjunction with 1/4 inch dowels, to hold the strips together after the bead of glue is applied.
 I raided a local bike shop for the inner tubes and cut them down to size.
The system has been very successful in providing quick and easy support to the strips.
Today I brought my work with me to the shop and was double productive placing 4 strips and completing two dozen affiliate Christmas Cards to be sent on my way home, several email exchanges, four phone calls, a bit of conference planning and a dabble of business politics. It occurs to me that I may have found my new winter office...

Dad has been hit or miss on the project recently. Two days ago I learned that our afternoon of routing strips really tuckered him out. I will need to be more mindful of his stamina. On Wednesday I met him in his garage to pick up some things. Without a word he pulled up his sweatshirt to expose a bunch of pads stuck to his torso and wiring snaking into his pant pocket. "Ticker acting up, too fast, taking a test", he said dropping the flannel hem.
I don't know what bothered me more, his naked chest (some day mine will look like that) or the acceleration of his aging. Thoughts of him remained with me as I worked in the shop.
Tomorrow I hope to place a simple design on the hull.
Never better, attitude is a choice.
12/21/2015 12:06PM
Work goes well. Dad stopped in the shop for a bit of time and lent a helping hand over the weekend. This was exceptional as he has been mobility challenged recently. The lack of snow this winter has been very beneficial for his physical health and my mental health as I have concerns whenever he fires up the snowblower.

The biggest challenge I have had thus far is marrying the strip ends to each other. Even using a pull saw I still manage to have a slight gap on about 50% of the joints. Easy enough to plug with a piece of angled scrap, but still annoying.
I have had to use a total of four nails thus far on forms 3 and 13 to tighten the twist section of strips to the form. Hopefully this adjustment will be locked in place by the next series of strips.

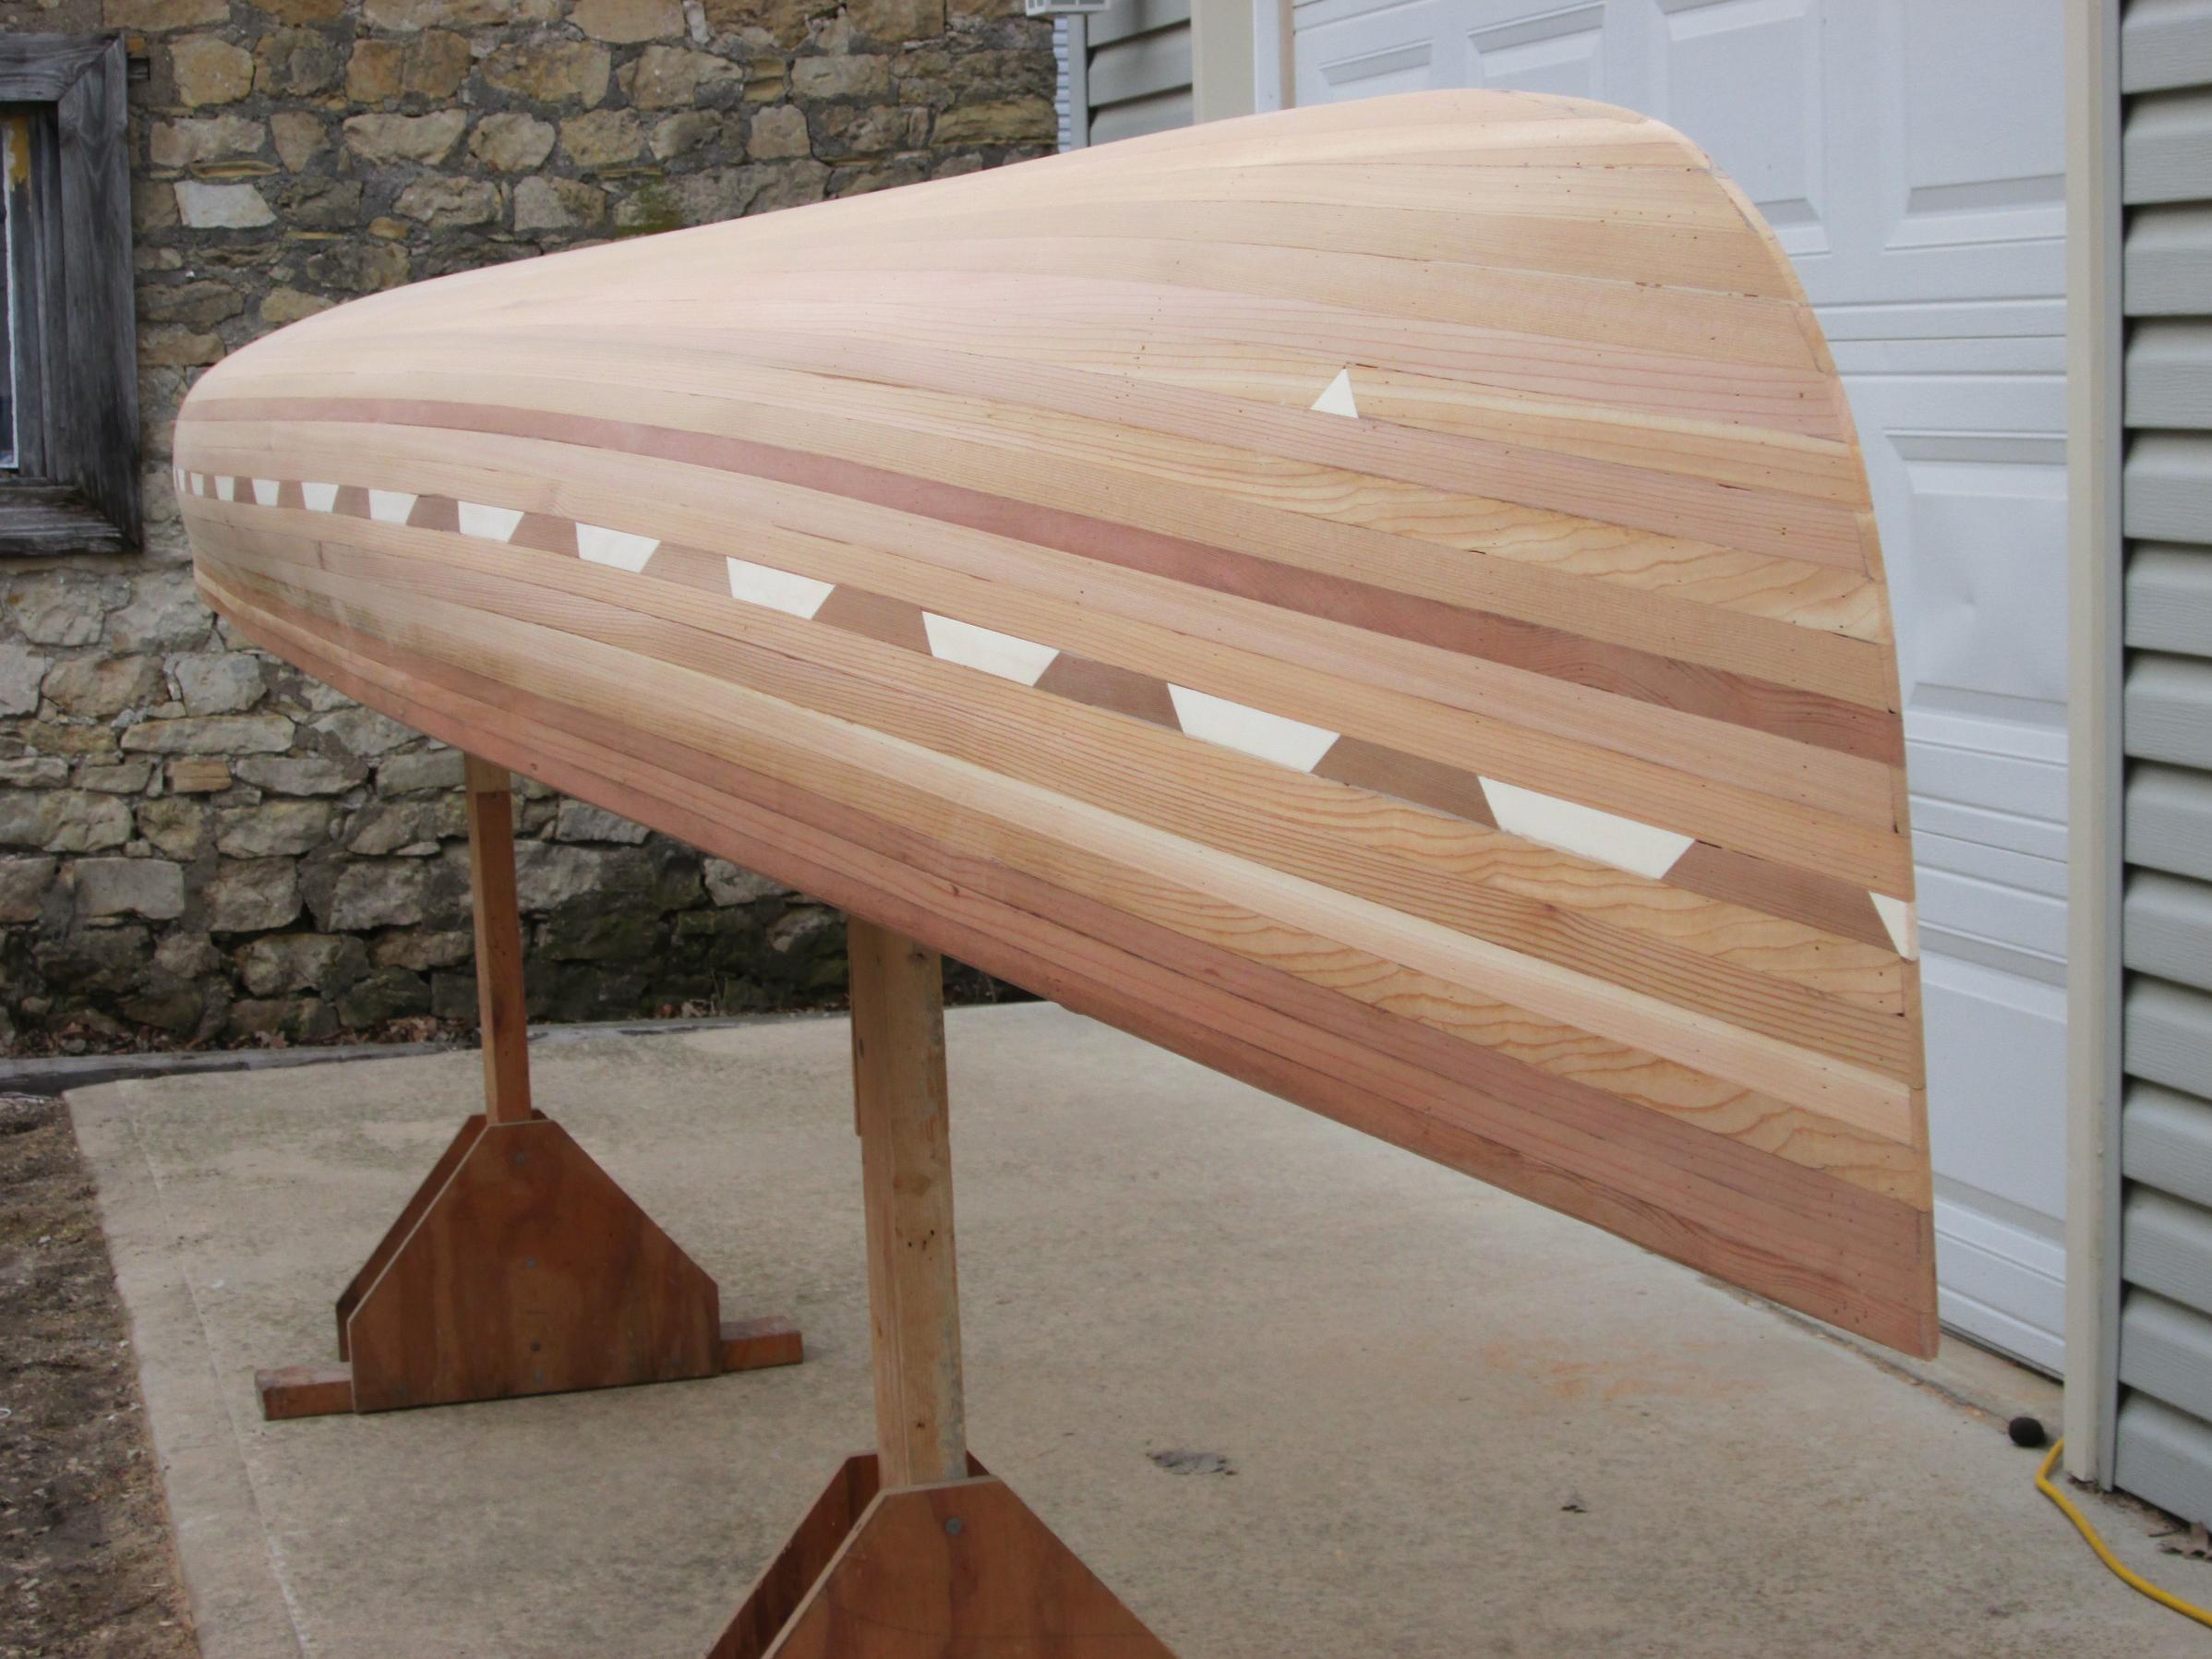
The design is a simple alternating walnut, cherry, poplar and cedar sections of strip. Not too complicated. I will save creativity for my future projects.
Mac

The biggest challenge I have had thus far is marrying the strip ends to each other. Even using a pull saw I still manage to have a slight gap on about 50% of the joints. Easy enough to plug with a piece of angled scrap, but still annoying.

I have had to use a total of four nails thus far on forms 3 and 13 to tighten the twist section of strips to the form. Hopefully this adjustment will be locked in place by the next series of strips.

The design is a simple alternating walnut, cherry, poplar and cedar sections of strip. Not too complicated. I will save creativity for my future projects.
Mac
Never better, attitude is a choice.
12/21/2015 01:05PM
And I see you are going stapleless. That's cool. It's just great to see your Dad with you in the shop. This is what it's all about man. Merry Christmas!
aka HermitThrush "Such sights as this are reserved for those who will suffer to behold them." -Eric Sevareid
12/21/2015 01:16PM
Looks like your Dad, still has a good grip ! I can't hardly squeeze those Pony clamps !
A Trick that I will try and explain, as I don't have a photo to offer.
When you are ready to cut the bevel on a strip at the ends. lay your pull saw against the stem form, roughly the angle you want to cut.
Take a scrap strip, say 2 1/2' long. Lay it against the outside of the sawblade, and your first station or form. This will give you the proper angle to cut the bevel. I hold that scrap strip against the blade and first form, until I've cut about halfway through the strip, I'm beveling.
I do this all the time, and it makes a flawless joint. A pic would help a lot.
Sometimes my pull saw will shave the tape that I have on the stem forms. Besure and lay another piece of tape over the shaved area ! You don't want to glue the strip to the form !
I hope that helps !
Jim
Keep your paddle wet and your seat dry!
12/21/2015 01:42PM
quote 1JimD: Take a scrap strip, say 2 1/2' long. Lay it against the outside of the sawblade, and your first station or form. This will give you the proper angle to cut the bevel. I hold that scrap strip against the blade and first form, until I've cut about halfway through the strip, I'm beveling.
Jim"
Great idea.
Alan
12/23/2015 01:03PM
Sometimes my pull saw will shave the tape that I have on the stem forms. Besure and lay another piece of tape over the shaved area ! You don't want to glue the strip to the form !
I hope that helps !
Jim
Subtle suggestion Jim and well warranted, thanks.
I knew I was forgetting something and your tape insight kept nibbling at my brain as I continued laying strips yesterday. Then it dawned on me...I hadn't taped the stem pieces upon the previous four sections. Your suggestion blared in my mind, I reviewed my options, popped the edge with a thin putty knife and began once again laying strips. Close call, thanks for planting that very subtle seed. I had to laugh! Good thing I am judicious with my glue applications.
Really, however, if any of you see a glaring issue coming my way, please don't let me learn on my own. Grab that 2x4 and share your experience. Of course I may go my own way, ie staple less, but to be forewarned is sometimes pretty good stuff.
I'll post more pics later today or tomorrow morning.
Your helpful suggestions are greatly appreciated.
Mac
Never better, attitude is a choice.
12/23/2015 05:27PM
Today's progress went well between wrapping up work prior to the Holiday and going grocery shopping. Speaking of which...Merry Christmas to those who are following this thread.
I have noticed that the strips routed a bit differently with a shallower groove on the cedar and thus a learning curve on glue application. Today I made my first cut error and ended up with a strip 1/2 inch too short for the spot I needed to place it upon. As there was some grain in the wood, I missed that design opportunity.

Also, I am having a real hard time getting my mind around the transition from vertical strips to horizontal on the bow and stern curves. It must just happen naturally as I reach that point of the build. Or would the new terminology be "organically"?

My little dog has decided to join me. Perhaps it is the new smokey bone I picked up for her when buying Christmas sausages, likely not the company. Her participation is new. When I first brought Sadie out several weeks ago I was unaware of all the sonic mouse deterrents my Dad had placed through the shop. I don't know how well they work on mice, but they FREAK out my dog.

Dad was out last night for a while...looking great and feeling pain-free, a first in many, many months. Then he showed me the new stretches he is doing and explained the relationship between stretching and pain elimination. Sure hope he keeps it up as it is nice to have him in the space...just so he leaves the tools alone.
Never better, attitude is a choice.
12/23/2015 08:46PM
Looking good !
The transition between vertical and horizontal will begin, when you are about ready to cover the stem forms, maybe a course or two before.
When you get to that point, and are not sure how to proceed, take a short scrap piece, long enough to contact your last form and past the edge of the stem form. Fit it. If it doesn't look right, at least you haven't ruined a full length strip. If it looks good, try it with a full length strip.
To me it's one of those challenges you face in the building process.
Remember to cut a little, and try the fit. You can rasp a fit.
If you find you've cut too much. a piece can be fit to fill the gap, or void.
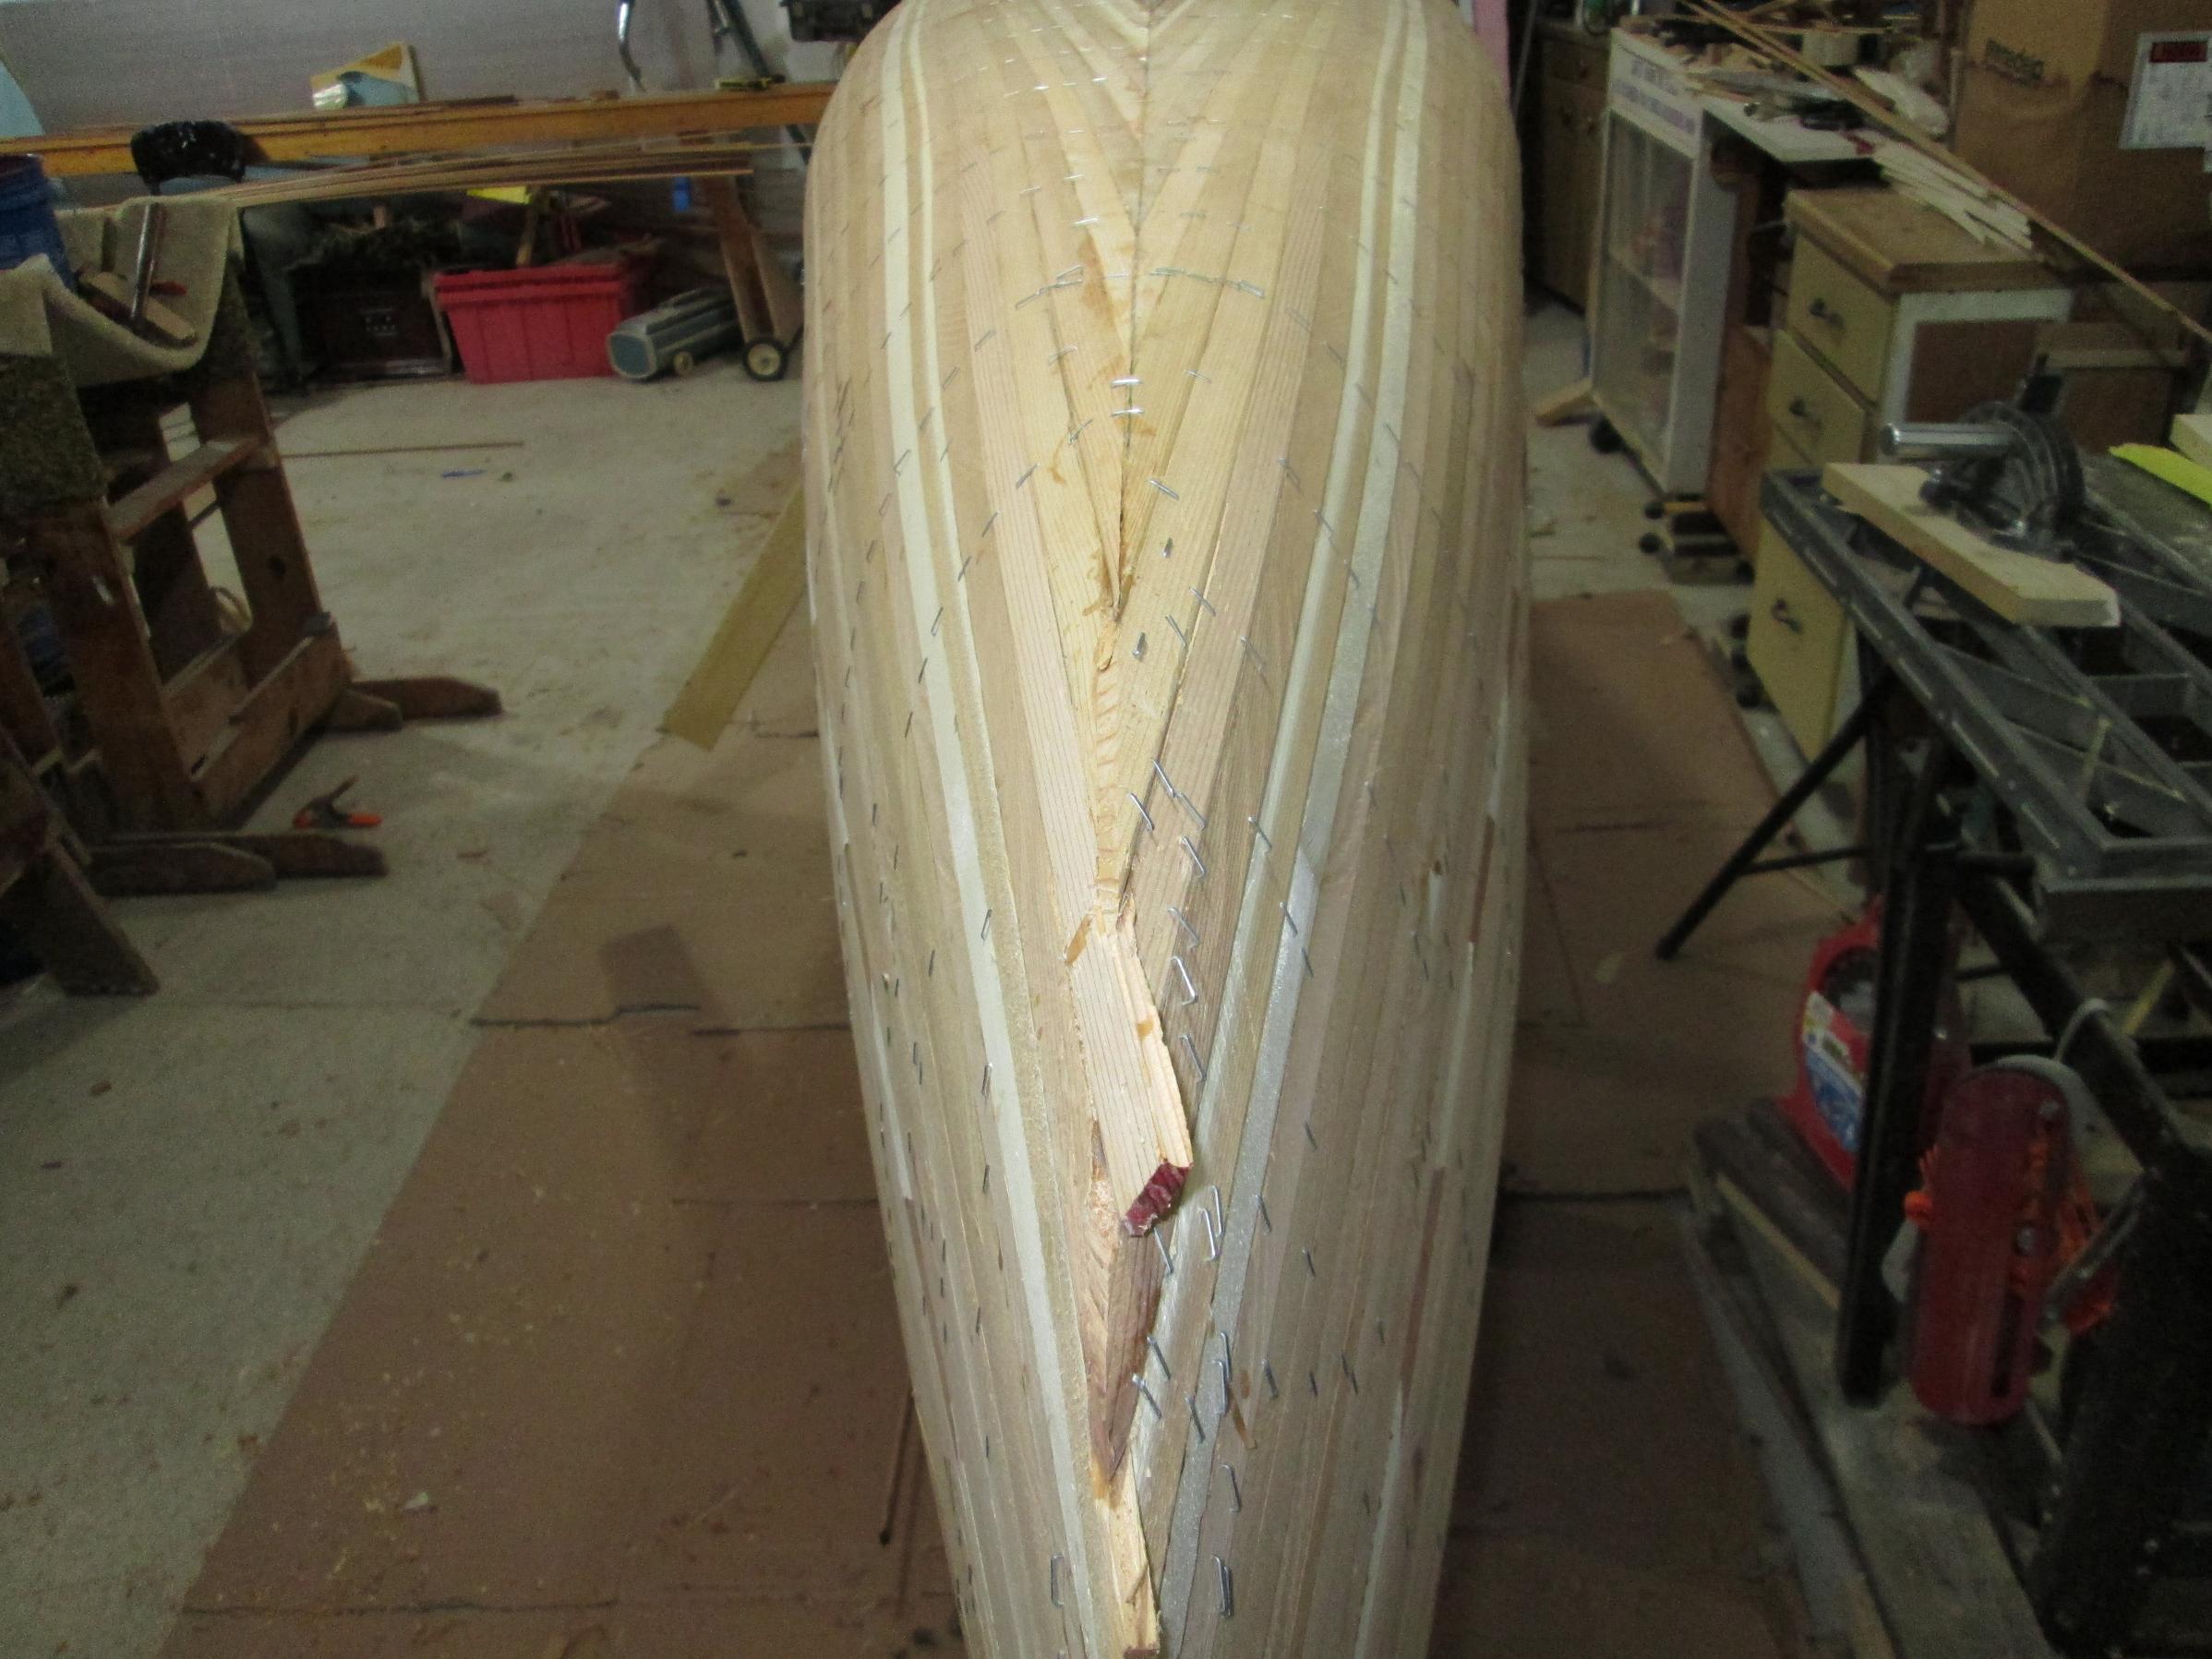
Important to have you center line marked on your forms Once you have stripped over the stem forms, you are in the FOOTBALL. Mark the center on the next few strips. You will need these to reference your centerline.
The best method I have found is to strip past center on one side. Stopping a few strips short of covering the center line on you center form. This will be a reference for cutting the center line.
Cut the centerline. Now you fit the strips on the other side.
You will be left with fitting the last few strips in the middle.
Sorry for the extra pics in this post !
You should be able to see the fish line I used to reference the centerline.
I hope this isn't too confusing ! As I can see where it might be!
Jim
You'll do fine ! 


The transition between vertical and horizontal will begin, when you are about ready to cover the stem forms, maybe a course or two before.
When you get to that point, and are not sure how to proceed, take a short scrap piece, long enough to contact your last form and past the edge of the stem form. Fit it. If it doesn't look right, at least you haven't ruined a full length strip. If it looks good, try it with a full length strip.
To me it's one of those challenges you face in the building process.
Remember to cut a little, and try the fit. You can rasp a fit.
If you find you've cut too much. a piece can be fit to fill the gap, or void.
Important to have you center line marked on your forms Once you have stripped over the stem forms, you are in the FOOTBALL. Mark the center on the next few strips. You will need these to reference your centerline.
The best method I have found is to strip past center on one side. Stopping a few strips short of covering the center line on you center form. This will be a reference for cutting the center line.
Cut the centerline. Now you fit the strips on the other side.
You will be left with fitting the last few strips in the middle.
Sorry for the extra pics in this post !
You should be able to see the fish line I used to reference the centerline.
I hope this isn't too confusing ! As I can see where it might be!
Jim
You'll do fine !

Keep your paddle wet and your seat dry!
12/27/2015 04:28PM
Limited work over the last few days, but The Canoe continues downstream. As often as I could, and using excuses such as, "helping Dad shovel or need to go to Dad's early to bring in fire wood", I was able to spend a few hours stripping. Good thing I have pictures or my wife might suspect me of shenanigans.
As I get closer to the football, I am still perplexed as to how everything weaves together. As the associated strip intersection angle cuts get longer and longer with much more putzzing around, I have noticed that the underlying cove of earlier laid strips are very visible after marrying the upper, crossing, strip. This is in the curve of the bow and stern. I assume that when making the final shape these anomalies will be erased through shaving down the ends.

By now you have discovered my lapping error. A couple of days ago I forgot my pattern and layered strips two on top of each other, nuts. Rookie mistake I suppose.
Dad has been a big help recently with a few visits as I move ahead. Not much interest in laying strips, but he has a ton of questions and is curious about the progress, especially how the end will turn out. I love hearing him exclaim, "WOW", upon entering the shop. He continues to enjoy limited pain and associates his new feeling with an orthotic metatarsal insert, recently placed in his shoes. Hmmm, might be something for me to check into as my feet can kill me especially in the fall when my part-time job is picking apples at an orchard. The ladder work is killer on my feet by the end of the day.

Tomorrow I am back to work, but as I have discovered that I can bring my work with me to the shop and be productive while the glue between strips dries, I am a very happy builder.
Never better, attitude is a choice.
12/27/2015 06:03PM
Nice progress. Looking good.
It appears you're to the point where, if I was building it, I would quit alternating sides. Just keep laying strips on one side of the canoe making sure the end of the strip goes past the centerline of the canoe. Once all the strips are over the center line you cut a straight line down the center of the hull and start filling in from the other side. The other side will go much slower since both ends of each piece will need to be angled and beveled to fit. This is the process Jim illustrated so well above. But as you can see he stops a few strips short at the very end so has a circle to fill in at the end. I don't. Just personal preference on both our parts.
Another option is to keep alternating sides and do a sort of herring bone pattern. I've done this on a few boats but it's considerably more time consuming because then you have to make fancy angles and bevels on BOTH sides of the canoe. I always thought it seemed intimidating to cut the line down the center until I finally tried it. Nothing to it.
Don't worry about messing up the sequence of you overlapping strips at the stems. I do that at least once on every build. You won't noticed when it's all done and shaped.
Alan
12/28/2015 08:48AM
One more thing about those bottom strips you'll soon be doing where each end needs to be angle cut. It's pretty exacting work to do that with a full length strip because if you goof up on the 2nd angle cut (make it too short) you have to start over from scratch because now you're piece is too short.
Personally I don't even try to do those with a single strip. I cut and fit my first angle and then cut the strip to length wherever I want the joint to be. Then I cut the other angle and strip to length for a butt joint. It's faster and more forgiving and I don't mind having those butt joints there. Some people do mind and prefer to do solid strips. Another one of those personal preference things.
Alan
12/29/2015 02:35PM
Well, although sort of messy, the ends are coming together. Darn tough to get the angles right and actually "blend" everything together. I anticipate a bit of resin/wood putty will be used to hide the imperfections. Likely quite a bit! Then again, one good trip to the BWCA will introduce many new imperfections.

Per your suggestion Alan I have incorporated short strips and long strips to the football in an effort to limit my angle cut frustration. So far, so good.

A visitor walked by in the fresh snow while I was writing emails for work as newly placed strips cured into place. Maybe a dozen feet from the window. Pretty cool.

This opportunity has been full of pleasant surprises.
Lunch with Dad today, liverwurst on rye with thick mustard, as well as many more questions. He is thrilled that the bow and stern quandary has been satisfied. Too much snow for him to adventure to the shop. Maybe later this week.
Never better, attitude is a choice.
01/02/2016 08:03AM

Dad was out for a bit yesterday as I continued work upon the football. He is satisfied with how The Canoe is progressing. It is neat to see his eyes light up with each new section.

As I progress and begin to envision the next stage, planing and sanding, I am curious how much material can be taken off to perfectly fair the hull? My slightly off strip widths and some marginal waviness in the bow and stern where the strips married into each other are perturbing. To assure a pure line I will likely need to remove some material. How much is too much?
Also, using a plane and spoke shaver I will likely accomplish my goal fairly easily on the exterior, but what is the best tool, method, for interior work?
The big binders I used did the trick for the most part in keeping the strips on the form and tightening up the glue joints.
 On the football I had to put some serious pressure on a couple of poplar strips to get them in place. I am hoping that the force won't impact the finished product.
The tag ends of the strips have been taken off to limit guests from snagging them when they look at the canoe.

Although my patience was tried reflecting upon the end areas, I am really enjoying the complexities and rewards of building a canoe.
Never better, attitude is a choice.
01/02/2016 08:54AM
Everyone prepares the hull for fiberglassing a little differently but they all work in the end. Most people don't enjoy sanding but I actually kind of like it, at least on the outside. I'd highly recommend connecting your random orbital sander to a shop vac if that's a possibility. You won't believe the difference in makes in attitude and shop cleanliness. I can sand for 2 hours straight without a respirator and at the end the shop isn't hazy with dust, horizontal surfaces aren't covered in dust, my clothes aren't covered in dust, and neither are my lungs.
Here's how I prep my hull. I spend very little time with a plane and jump almost immediately to the random orbital sander (ROS). First I walk around the hull while running my hand along it. Any noticeable ridges, usually where two strips meet along the turn of the bilge, get a swipe with the plane. Also if two strips meet that aren't lined up properly (one is taller than the other) I'll give a light swipe with the plane to roughly even it out. I'll also VERY roughly shape the stems at this point, just getting rid of the obvious stuff like strips that are sticking out too far.
Then I grab the ROS and start with 40 grit. I think starting with 40 grit is important. I think too many people start with too fine of a grit. My first round with 40 grit is nondiscriminatory. I move relatively quickly over the entire hull and while I will pay a little more attention to areas that need more work that's not really what this pass is about. What I'm really doing is chewing off all the glue drips and knocking down the worst of the ridges. The 40 grit paper does this quickly and effectively.
Now I move onto 60 grit and go over the entire hull again, but this time I pay more attention and move a little slower, taking the time to even out the obviously bad areas.
At this point the hull should be pretty good. Walk all around it with your hands. Make pencil marks on the trouble areas where there's a high/low spot or still some glue showing. Now go over the hull one more time with 60 grit. You're mainly concentrating on the trouble areas now. The good parts of the hull don't get much sanding on this round. This is also the first round where I actually start doing anything with the stems. Previously I left them alone because they require more attention and those were rough passes.
I'll use a plane again for the way off spots and for getting it close but I still use my ROS for final shaping the stems but I have the ability to turn the speed down on mine and I also use an interface pad, which is a piece of 1/2" soft foam that goes under the sanding disc. This makes sanding contoured surfaces pretty easy. If you're not pretty familiar/comfortable with a ROS you might want to do this by hand.
OK, so now the hull should be about perfect and now that it's all sanded down and shaped you can see gaps in your strips where things didn't fit together right, usually some big ones at the stems. Time to fill those with thickened epoxy. First grab a roll of masking tape and look underneath your canoe. Anywhere you see light showing through gets taped. This will keep as much epoxy as possible from running through to the inside of the hull while you're filling the gaps and fiberglassing.
Now mix up your thickened epoxy. I use cedar dust that I saved from sanding (a new bag in your shop vac before you start sanding makes this part easy) but pure cedar dust usually comes out pretty dark so usually I'll add just a LITTLE bit of microballoons, which are white, to lighten the color. Then start filling in all your gaps and cracks. You can use a little putty knife but I usually just use a scrap piece of strip to push the epoxy into the crack and wipe off the excess from the hull. Now you wait a day or two until it gets hard enough to sand.
At this point your hull looks terrible because there are big dark blotches from the dark epoxy. Now you need to sand those off to smooth things out again. Back to the 60 grit paper and forget about the rest of the hull, just concentrate on the filled areas. Start sanding until there's just a shadow of color left on the hull from where the epoxy was wiped off. You probably can't feel it but you can still see where it was.
Now I switch to 80 grit and use my interface pad. If you don't have an interface pad you'll be fine but they work great and aren't very expensive. This is the final pass over the hull before fiberglassing. It doesn't take much since the hull should pretty much be perfect, or as good as it's going to get already. You're just getting rid of the 60 grit scratches and I feel the interface pad helps get a nice curve on the bilge and around the stems. And speaking of stems; be careful around them with the ROS. It's really easy to go too far because of the small area of contact. This final round with 80 grit is also removing the last shadows from the areas you filled with thickened epoxy.
Since this is your first time it will take you quite a while and that's fine. Don't worry about sanding too far except in the stems. At the stems it's easy to have a hump that you keep shaving down until there's suddenly no wood left. Then you rebuild it with thickened epoxy and it hardly shows after fiberglassing.
But on the rest of the hull, as long as you don't go crazy and use the ROS like a grinder (and since it looks like you know what you're doing in a shop I don't think that will be a problem), you should be fine with 1/4" strips. I usually use 3/16" strips and never give a thought to sanding too far. Of course remember to keep your ROS flat while sanding and don't be tempted to tip it on edge to eliminate a low spot. You just end up with a deep divot ground into the hull. That's not to say there aren't times I apply more pressure to one edge or the other but I still keep the ROS flat and keep it moving to avoid digging holes.
Having a completely sanded hull in prep for fiberglassing is one of the best parts of the build. So nice to look at and run your hands over.
Alan
01/02/2016 07:47PM
I don't think any two builders do things the same. I do agree with Alan's procedure pretty closely.
For filler, I've used plastic wood. It comes in a little can that has the lid on the bottom side. It will bond with epoxy fine.
Walnut is my favorite, as it fills knotholes great. Sets in short order, in a matter of hours, and it's easy to sand.
Now if you need something held together, Go with a mixed epoxy and fillers as Alan suggests.
Sanding the outside, I use a scraper to remove the glue and clean up the high spots, and it's ROS time.
Anything you can do to reduce dust, go for it ! I like a vacuum set up ! It also seems to do a better job, and keeps your discs from clogging up. This saves.
My Nokomis only required two discs (50 grit) for the rough sand.
Beings you went stapleless, you won't need to fill stapleholes.
My new favorite trick with stapleholes, is Elmer's Max glue. With a pointed tip I dab the stapleholes, then press it into the hole, with my hand. So far I like it the best.
My grit choices are based on what I have on hand generally. 40, or 50 to start. 60 or 80, then 100 to 120 for finish.
The Merlins tumblehome adds to the challenge, but worth it.
Here's a pic of some of my hand tools.
I don't know if you have a Japanese Saw Rasp, but I love these for shaping.
Looks Great Jack ! Coming along nicely ! I need to get some inner tubes !!
Jim align="left" >
For filler, I've used plastic wood. It comes in a little can that has the lid on the bottom side. It will bond with epoxy fine.
Walnut is my favorite, as it fills knotholes great. Sets in short order, in a matter of hours, and it's easy to sand.
Now if you need something held together, Go with a mixed epoxy and fillers as Alan suggests.
Sanding the outside, I use a scraper to remove the glue and clean up the high spots, and it's ROS time.
Anything you can do to reduce dust, go for it ! I like a vacuum set up ! It also seems to do a better job, and keeps your discs from clogging up. This saves.
My Nokomis only required two discs (50 grit) for the rough sand.
Beings you went stapleless, you won't need to fill stapleholes.
My new favorite trick with stapleholes, is Elmer's Max glue. With a pointed tip I dab the stapleholes, then press it into the hole, with my hand. So far I like it the best.
My grit choices are based on what I have on hand generally. 40, or 50 to start. 60 or 80, then 100 to 120 for finish.
The Merlins tumblehome adds to the challenge, but worth it.
Here's a pic of some of my hand tools.

I don't know if you have a Japanese Saw Rasp, but I love these for shaping.
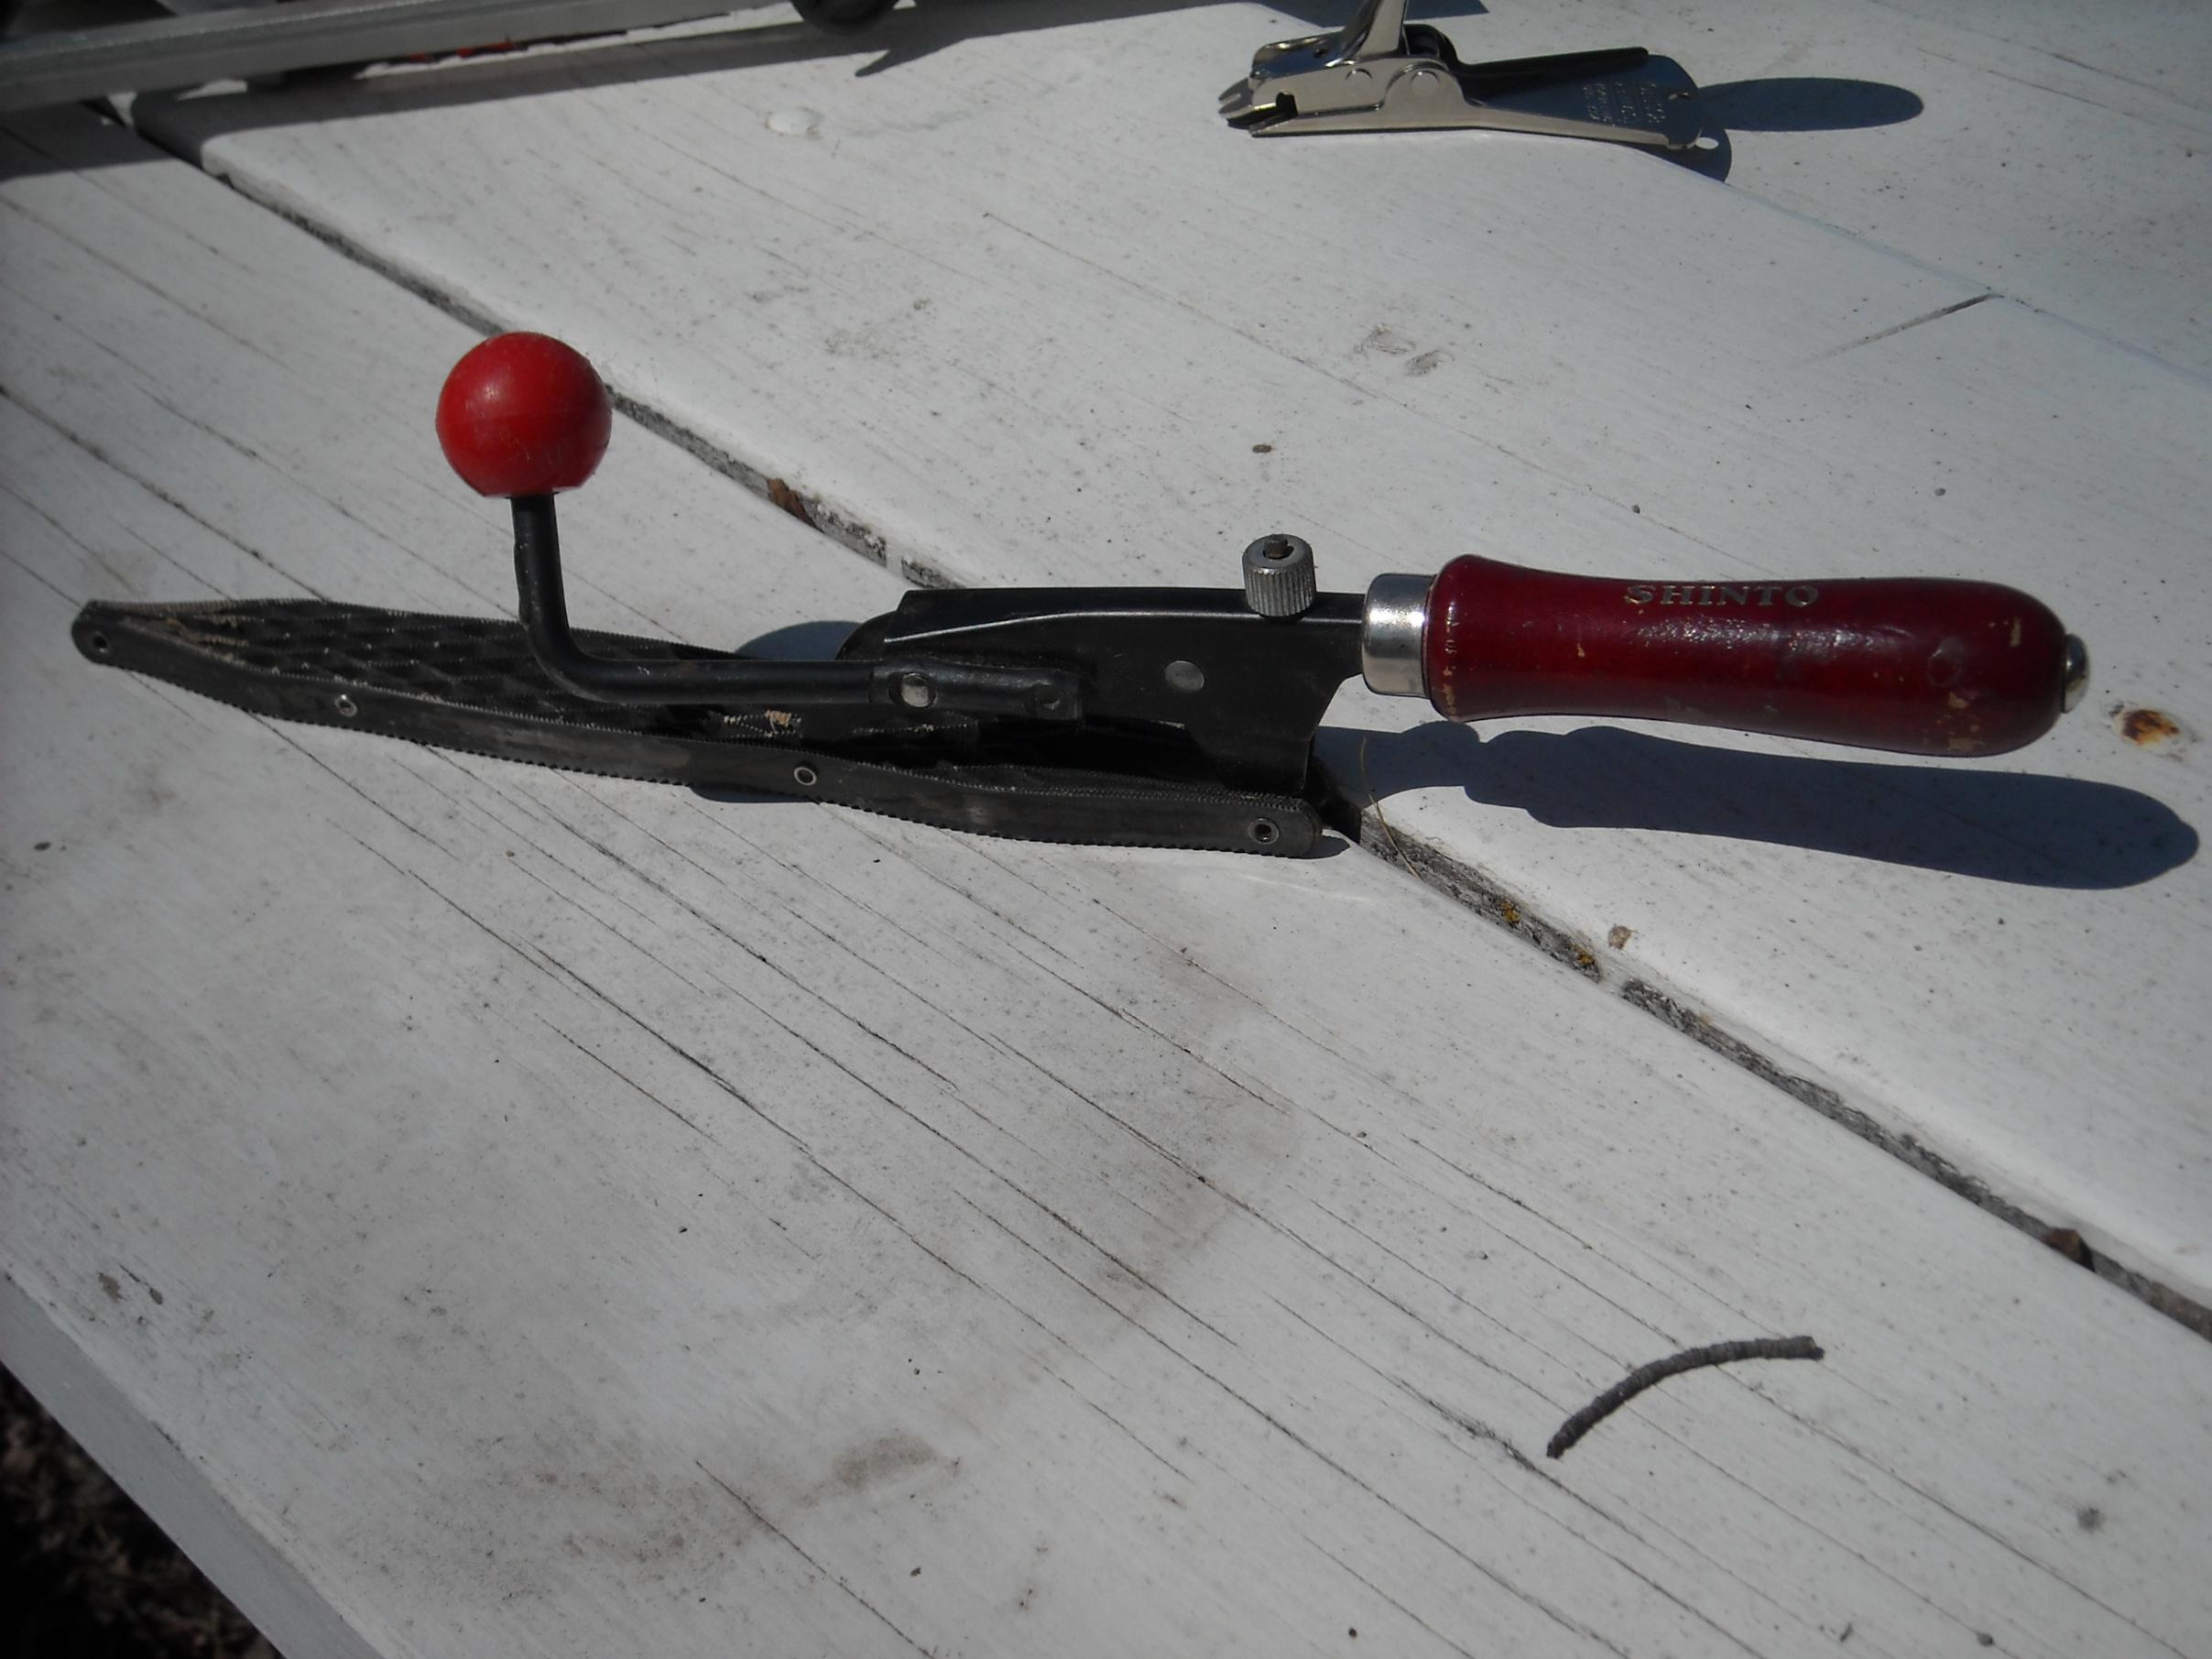
Looks Great Jack ! Coming along nicely ! I need to get some inner tubes !!
Jim align="left" >
Keep your paddle wet and your seat dry!
01/03/2016 08:33AM
Alan and Jim, your tips inspire me to advance forward in leaps and bounds, much to the disappointment of my wife. She is thrilled that I have a winter hobby...but is quite surprised at the enthusiasm I have and the time I now spend away from the house. Alan, your compliment regarding "knowing my way around a shop" would make Ron Melcher, my eighth grade wood shop class teacher, proud as he considered me a "cut-up" in school. I know it sure made me feel great especially considering how little experience I have working wood. Thank you very much.
More strips today then a trip to the big box store for an ROS with vacuum attachment. Then back home to spend quality some quality time with my considerate wife. A teacher, school starts again tomorrow, so we will be back to her schedule for several more months.
The support I have received upon this board has been greatly appreciated. Damn, you guys are helpful and have facilitated The Canoe build tremendously.
Mac
Never better, attitude is a choice.
01/03/2016 04:23PM
A thought about the time one spends building a canoe !
I used to tell my Wife, " It keeps me out of the Bars !"
Worked every time.
I'm not a bar person anyway. I have a lot of good building memories. Not so many good Bar memories !
Jim
I used to tell my Wife, " It keeps me out of the Bars !"
Worked every time.
I'm not a bar person anyway. I have a lot of good building memories. Not so many good Bar memories !
Jim
Keep your paddle wet and your seat dry!
01/03/2016 07:24PM
Besides, you're with your DAD and enjoying precious time with him. My grandpa is 74 and I never drop an opportunity to spend time with him as I know I won't have him forever.
Then again I'm not married either....LOL
Then again I'm not married either....LOL
aka HermitThrush "Such sights as this are reserved for those who will suffer to behold them." -Eric Sevareid
01/09/2016 08:53AM
Nice week in the shop. Completed many work related tasks as well as stripping The Canoe. Dad stopped out for a little look, accompanied with another , "Wow."

Unfortunately and not publicized until my stepmother shared it with me, my father had a slight car accident late last week. Thankfully nobody was injured, but Dad was at fault as he overshot his turn and rather than maneuver back to the proper direction he put it in reverse at the next stop sign and proceeding to rear-end, or is it front end, the car behind him, a relatively new BMW.
Interesting, but not wholly unexpected, Dad didn't feel it necessary to divulge the incident as it will bring his driving abilities into question. Tomorrow I am going to broach the idea of scheduling my time twice a week to run errands with him...me behind the wheel of course. My post-serious-career employment affords me great schedule flexibility and I would be very comfortable helping out both my parents, and those on the road too. It is my hope that Dad won't take it as an affront to his freedom. Although I appreciate that it is.
The introduction of parental maintenance and the reluctance to give up a lifestyle taken for granted during his last 87 years make me wonder about my own transition many moons from now. The final outcome isn't my concern...it is those last few years of trying to beat the reaper in good health, mental and physical, that causes me pause to think.
On a plus note, Dad had contacted the Marines shortly prior to Christmas with a request for a new bumper sticker. To his thrill, the local recruiting officer showed up at his door with a back pack of Marine goodies including his new skull cap (it only comes off indoors), an MRI pack (spaghetti and marinara) a high tech tee shirt, three stickers including the one he wanted, a lanyard key chain and a couple of other treats he didn't share with me. A former Captain of Artillery and forward observer, who served with honors in Korea, my Dad could not have been more tickled to receive such notoriety.
God bless him and all those who have and continue to place themselves in harms way for our liberty and way of life.
In another thread upon the forum I have read several who have always, "thought about building a canoe." Considering the amazing rewards of watching the project come together, I am surprised at my own reluctance to just jump right in. The Canoe has been relatively easy to build thus far, especially noteworthy as I am quite a novice. The greatest requirement is the thought process. By slowing down and really looking at the strips, where they will lay, how they will line up and crafting a variety of jigs to help with the angles, a once daunting task has proven to be worth 100 times the effort. It has also helped to have mentors on the build as well.
To those wary of trying...just jump right in. Quit thinking about it, make some space, buy just a few tools, do your research and get stripping. It really is fun.

Unfortunately and not publicized until my stepmother shared it with me, my father had a slight car accident late last week. Thankfully nobody was injured, but Dad was at fault as he overshot his turn and rather than maneuver back to the proper direction he put it in reverse at the next stop sign and proceeding to rear-end, or is it front end, the car behind him, a relatively new BMW.
Interesting, but not wholly unexpected, Dad didn't feel it necessary to divulge the incident as it will bring his driving abilities into question. Tomorrow I am going to broach the idea of scheduling my time twice a week to run errands with him...me behind the wheel of course. My post-serious-career employment affords me great schedule flexibility and I would be very comfortable helping out both my parents, and those on the road too. It is my hope that Dad won't take it as an affront to his freedom. Although I appreciate that it is.
The introduction of parental maintenance and the reluctance to give up a lifestyle taken for granted during his last 87 years make me wonder about my own transition many moons from now. The final outcome isn't my concern...it is those last few years of trying to beat the reaper in good health, mental and physical, that causes me pause to think.
On a plus note, Dad had contacted the Marines shortly prior to Christmas with a request for a new bumper sticker. To his thrill, the local recruiting officer showed up at his door with a back pack of Marine goodies including his new skull cap (it only comes off indoors), an MRI pack (spaghetti and marinara) a high tech tee shirt, three stickers including the one he wanted, a lanyard key chain and a couple of other treats he didn't share with me. A former Captain of Artillery and forward observer, who served with honors in Korea, my Dad could not have been more tickled to receive such notoriety.

God bless him and all those who have and continue to place themselves in harms way for our liberty and way of life.
In another thread upon the forum I have read several who have always, "thought about building a canoe." Considering the amazing rewards of watching the project come together, I am surprised at my own reluctance to just jump right in. The Canoe has been relatively easy to build thus far, especially noteworthy as I am quite a novice. The greatest requirement is the thought process. By slowing down and really looking at the strips, where they will lay, how they will line up and crafting a variety of jigs to help with the angles, a once daunting task has proven to be worth 100 times the effort. It has also helped to have mentors on the build as well.
To those wary of trying...just jump right in. Quit thinking about it, make some space, buy just a few tools, do your research and get stripping. It really is fun.
Never better, attitude is a choice.
01/09/2016 10:00PM
quote MacCamper: "
To those wary of trying...just jump right in. Quit thinking about it, make some space, buy just a few tools, do your research and get stripping. It really is fun."
Couldn't agree more. Was extremely intimidated when I started my first one. Honestly didn't know if I'd be able to complete it or not. I was pleasantly surprised at how easy it was.
It's looking great, you're on the home stretch!
Alan
01/11/2016 10:56AM
Yesterday I worked on the football and bird's eyes. In another forum I was tipped off that to eliminate consternation in cutting long angle strips necessary for the bird's eye that an exact-o knife is the best tool to use. WOW! This clue saved me a considerable amount of time and hassle. I laid the strip upon the area to be filled, pencil marked the start and stop of the angle, clamped my strip and steel ruler to a work bench and made the cut with an exact-o knife per recommendation. Slick, super slick.

I then pulled down the strip with rubber and clamped it into place.

The canoe is really starting to take shape.
Mac

I then pulled down the strip with rubber and clamped it into place.

The canoe is really starting to take shape.
Mac
Never better, attitude is a choice.
01/14/2016 10:41PM
I'm still watching with interest and thinking real hard about getting on the bandwagon, at this point it's a space and time issue.
aka HermitThrush "Such sights as this are reserved for those who will suffer to behold them." -Eric Sevareid
01/18/2016 10:21AM
Dinner last night with Dad. The main dish was politics...at least the pot roast was tasty! We are in the same camp, but he leans a bit further to the edge than I do.
Work continues as I filled the football. There are a couple of narrow, 1/16 to 1/8 inch gaps where the final strip landed into the project. It is my hope that a bit of cedar resin mud will cover the spots and not be too noticeable. Bird's eye sections are building out well too. Certainly not as difficult as I thought that they would be.


I look forward to sanding.
Never better, attitude is a choice.
01/18/2016 11:34AM
All builders have dealt with gaps. And everybody has their tricks.
One I'll share, is to tape the underside, as the resin will want to run.
I really mix a lot of filler in my putty of resin. Wood dust from my sander, ground glass, and cab-o-sil. A little mixed resin will take a lot of filler.
Looks great !
If you can stall the sanding until it warms up outside, and do the sanding outside, you will make it easier on you and cleaning the shop. Wear a good mask. That Cedar saw dust is nothing to scoff at !
Enjoying you progress. That last strip is kind of a milestone in a build !
Jim
Keep your paddle wet and your seat dry!
01/24/2016 08:20AM
A very productive shop day as the canoe comes together nicely. Two of the four bird's eyes are completed with only a small bit of consternation on one strip. Using the described razor/steel straight edge cut method and a sharp rasp, I have developed a very quick and, more importantly, accurate means of filling the final gaps. In between strip placements I began to shave the high points and excess glue with a spoke shave. It had been suggested I only use an orbital sander for this finishing process but my this canoe, my first build, had some significant high spots due to a slight learning curve. In particular a bunch of poplar strips I cut just after changing saw blades...a thinner blade made for a thicker cut. I caught it after a dozen strips, oh well, part of the process.


Dad stopped out for a visit and was fairly impressed with how the project is shaping up. The feeling of accomplishment I achieve with each step is hard to describe. Four years ago I had a major career change moving from a very "hands on" and continuous positive feed back management position to one of strictly administration. The mid-life change has been exceptional and I enjoy this career as much as my former, however the tangible results from accomplishing my daily chores was lacking, or at least not terribly rewarding. The canoe build has restored a piece of my internal puzzle that I didn't know was out of place.

I have greatly appreciated the suggestions from this board as well. Thank you for following along as I learn from this adventure.

Never better, attitude is a choice.
01/24/2016 08:39AM
It is rewarding to shape the ends, and scrape off excess glue.
A little sanding, a little putty, a little more sanding, and then it's time to glass.
ROS will leave swirl marks, go down to about 120 grit, and spend some time LOOKING it over. Often times I will wrap sand paper around a piece of Pool Noodle. This works good in the tumblehome area.
The discs are very stiff and course. They work great when you get to sanding the inside of the stems.
Looking good Jack !
Jim
Keep your paddle wet and your seat dry!
01/24/2016 09:15AM
quote 1JimD: " It is rewarding to shape the ends, and scrape off excess glue.
A little sanding, a little putty, a little more sanding, and then it's time to glass.
ROS will leave swirl marks, go down to about 120 grit, and spend some time LOOKING it over. Often times I will wrap sand paper around a piece of Pool Noodle. This works good in the tumblehome area.
The discs are very stiff and course. They work great when you get to sanding the inside of the stems.
Looking good Jack !
Jim "
I have my pool noodle ready Jim. Purple okay? As I do minimal spoke shaving, I completely understand your comment about "LOOKING" as I can "SEE" what needs to be touched up or knocked down. My high strips are coming into fair nicely and just the process of removing those LOUD blemishes makes the canoe look 100 percent better. Faster too.
Never better, attitude is a choice.
01/30/2016 09:49PM
I've always felt it was good to have a tentative deadline. It seemed to motivate me some.
But I've found that rushing things always brought me regrets.
My advice, don't make it a regrettable experience ! I've been there !
Jim
But I've found that rushing things always brought me regrets.
My advice, don't make it a regrettable experience ! I've been there !
Jim
Keep your paddle wet and your seat dry!
01/31/2016 11:33AM
quote KarlBAndersen1: "That is looking pretty darned sweet.
Gonna have her ready for ice out?"
Thanks Karl,
Ice out is a relative term! But I am trying to have some time on the open water prior to my first solo in late May. Today I am sanding...and sanding, and sanding and sanding. Even starting with 50 grit, I have a lot of work to do to bring the strips close to fair.
It is a long process, but this boat is looking "pretty darn sweet". Better yet, I am having a blast. Dad stops by when he feels like checking things out or just to visit. Great to see him when he comes over as I know it is an effort for him physically and mentally.
Jim - patience is a virtue. I think too much, and thus cannot hurry even if I tried. Today I also filled the "gaps" with slivers of cedar. They look much better.
Pictures to come.


Never better, attitude is a choice.
03/06/2016 06:51PM
Sorry, too many conferences and out state meetings recently so I haven't posted much. But the last weeks have been productive. Finished sanding and applied the fiberglass/resin .
The deeper I get into building a canoe, the more enjoyment I am getting. The fiberglass work went very well. I took a couple of pictures, but learned that resin and iphones don't like each other. Nor am I able to articulate fine photography with multiple pairs of gloves on.
My friend Paul and I applied a seal coat, three layers of keel guard pieces, the full sheet of glass and two coats of resin and then had to call it for the day as my father-in-law, suffering from lung cancer, has had a turn for the worse and my presence was needed elsewhere.
The glassing project was really pretty easy to do and I shouldn't have been intimidated. As I review the procedure I wish I had used the medium speed MAS hardener rather than the slow hardener. It just seemed that there was a lot of "extra" time that could have been used more efficiently. I did use squeegees as when I applied the resin with the rollers I purchased I had a foamy mess.
I checked the work today and was very pleased with what I saw. However I am going to scuff it up tomorrow and apply a third skim coat of resin as it is not all smooth as glass. No dry-fabric texturing, but semi-visible in areas. The sand out will also allow me to improve the ends where I wrapped the excess fabric around the bow and stern. I think I will be able to do a better job on my next canoe.
Oh yea, prior to the fiberglassing I touched up my ends to be a bit more uniform and straight up. My wife gave me her artistic eye and a thumbs up upon completion.


Dad has been real hit and miss in recent weeks. Age is catching up with him. His new knee hasn't been the miracle cure and other body components are giving him fits. However, I don't think he will ever go back voluntarily into surgery. It is still a pleasant surprise when he comes out to check the canoe over.
Never better, attitude is a choice.
03/22/2016 02:17PM
Such a GREAT learning experience! The Canoe progresses with the exterior sanded and ready for a couple layers of uv varnish protection when the interior has been completed. I unscrewed the middle forms, where the tumblehome is, and removed them from the strong back and them popped the canoe from the rest of the forms. Real slick operation.
The interior looks fine except for areas that I couldn't tape seal the few gaps between the strips due to the forms. A bit of resin leaked through and puddled up. A little extra sanding should be the cure. However, next time, and there will be a next time, I will loosen the forms and do a better job with masking tape.
I will also be a bit more creative on the 'football' design element. After many hours of searching for creative cedar strip canoes I was blown away by the very cool assortment of belly designs. Some builders are over the top. My next canoe will be a notch above in this category.
Dad had some PT done on his ankle a couple of weeks ago and is hobbling around pretty well and visiting more often. He still hasn't signed up to do any hand sanding, but his articulate suggestions are always welcome. A few years ago he erected an osprey nest platform outside the shop. Unfortunately we have yet to see any of the beautiful birds. Maybe this is the spring. In the mean time he likes to come out and watch the aerie as much as he likes to check out the canoe progress.
All is good. Time to scrape and sand the inside in preparation for 4 oz glass.


Never better, attitude is a choice.
03/27/2016 05:39AM
Yesterday I began the major removal of materials inside the canoe using a small spoke shave, several sanding tools and suggestions made by Jim regarding a firm sanding disk and pool noodles covered with sand paper. The large and relatively flat areas were pretty straight forward and inside curves a bit more difficult. It became apparent quite quickly my imperfections in cutting my strips early on in the process added to the chore.
Months ago, and during my first attempts at cutting the strips using a circular saw (super easy) I didn't take into account a measurement change caused by changing my saw blade mid-stream. Several of the strips ended up thicker than others. Fairing them on the exterior of the hull wasn't a big deal, but inside the canoe the additional material, combined with tighter and reversed contours, made the job very time consuming, especially considering that the strips were hard wood accents and not cedar. Lesson learned: be sure all of the strips are of the same width.
The rigid sanding disc is an amazing tool for getting into the bow and stern sections where no electric tool could fit and regular paper is too flimsy. Upon reflection I can't think of a better tool for removing glue and resin, and fairing this tight nook.
I also had a close call using my ROS. While adjusting my dust mask, which had become uncomfortable, with my left hand, the strap flipped over the top of my ear and caused an immediate pain due to the new fold in my ear, reminiscent of wrestling with my older brothers in my youth...an automatic submission hold. As I screwed around with relaxing the pressure on my ear with my left hand, my right hand forgot that it was still sanding and held the ROS in one place for several long seconds creating a significant gouge in the wood. Damn, double damn. Not through and into the glass, but a lesson I will have etched into the canoe forever.
After cleaning the inside I can honestly say that the craft will be much lighter! More sanding today.

Never better, attitude is a choice.
04/19/2016 05:16PM
The last twenty days have offered me only three to work on the Canoe, but they were very productive days. Fun too.
Following sanding of the interior I prepped for fiberglassing with 4 oz cloth. All went well with four sections, the middle under the seat, being laid at bias with overlapping "ribs" of additional strength. There ended up being six pieces as two small scraps were placed tight in the bow and stern stem areas.
Did I mention that all went well ... except for the third section that wanted to fall from the tumblehome. By the time it finally "stayed" where placed, my cup of resin was getting hot. Rather than throw it out and make more, I dumped it into the hull and spread it out to cool...or not. The finished product is a bit thicker than I wanted it to be, but a great lesson learned.


Onto the gunwales. Using both walnut and cherry 1/4 by 3/4 inch strips and 4 inches long, I adhered the scuppers to my ash inwale. Dad came out to help too!


The finished product was then planned smooth on my Dad's jointer and screwed, through the center of the scuppers, inside the hull with 12 inches room in the bow and stern for my decks. The screws were partially backed out so I could clamp the outwale in place, then backed completely out to pre-drill the screw hole into the outwale. The finished product placed almost all of the screws into the canoe, except for four that had to be outside/in due to the confined spaces in the bow and stern.


Next on the docket is building the seat and decks.
Anyone know how to "righten" my photographs?
Never better, attitude is a choice.
04/19/2016 09:07PM
Yes. All done glassing but a challeng with the resin overheating. I have since learn d that I should have dumped the container completely out so there wouldn't have been the overheating chemical reaction. All good though and having fun.
Never better, attitude is a choice.
04/24/2016 07:27AM
It was fun to finally meet up with you !
It was a great day with greater company ! I didn't buy a canoe,(like I need one), but I did pick up an AWESOME bent blade from Sanborn paddles, and a Tundra tarp from CCS.
Hope to get a chance to paddle with you some day !
Thanks Jack !
Jim
It was a great day with greater company ! I didn't buy a canoe,(like I need one), but I did pick up an AWESOME bent blade from Sanborn paddles, and a Tundra tarp from CCS.
Hope to get a chance to paddle with you some day !
Thanks Jack !
Jim
Keep your paddle wet and your seat dry!
05/07/2016 07:01AM
Truth be told I have been much more active on another board that is quite a bit more focused on building. That said,here is the finished product.
Great credit must be given to, Jim and Allan for their help in my project, much appreciation guys. It started as a suggestion from Dad and grew to be an anticipated hobby. The satisfaction generated through creating a fine watercraft cannot be over expressed as I have had a blast and look forward to another build next winter.
Thanks for following this somewhat abreveated blog.


Thanks also the BWCA.com for the platform we all share and enjoy.
Never better, attitude is a choice.
05/08/2016 08:33AM
An addendum...
This canoe is a dream boat to paddle. Having never experienced a true solo canoe before, maybe I was just missing out on an incredible treat. Never again as this watercraft handles like a champion with great stability and tracking, something it was designed for. Although apprehensive about it's abilities, my worries were blown apart after just a few minutes on the water. Using both a bent and double blade paddle, I was able to finesse this canoe anywhere and much quicker than I have paddled before.
My dog Sadie had fun too! And although Dad didn't join me at the lake, he wished me as much enjoyment adventuring with the canoe as I had building it. I will remember my times with Dad in the shop, although too few. It was very satisfying to "share" a big project with him from concept through completion.


Never better, attitude is a choice.
05/13/2016 09:25AM
canoetripping.net
Alan and Jim turned me onto the building section. The craftsmen and women are very talented and even more willing to share their wealth of knowledge. The group is comprised of canoe adventurers, although not specifically focused on any one region.
Alan and Jim turned me onto the building section. The craftsmen and women are very talented and even more willing to share their wealth of knowledge. The group is comprised of canoe adventurers, although not specifically focused on any one region.
Never better, attitude is a choice.
05/14/2016 09:57AM
Thank you. I picked out a half dozen good looking 1x6x10' cedar boards at Menards last night. Right now I'm building a stand up paddle board for my wife. Cedar strip canoe is my next project! If I can can pick up a few good boards every time I'm at Menards, I should have enough by the time I'm done with the SUP. These forums are a huge help.
Bernard
Bernard
Subscribe to Thread
Become a member of the bwca.com community to subscribe to thread and get email updates when new posts are added. Sign up Here
Community Links
 Search BWCA.com
 Donate
 Featured Sponsor