|
 Boundary Waters Quetico ForumGroup Forum: Boat Builders and Repair1950 chestnut prospector
|
Author
Text
")

05/26/2016 12:07PM
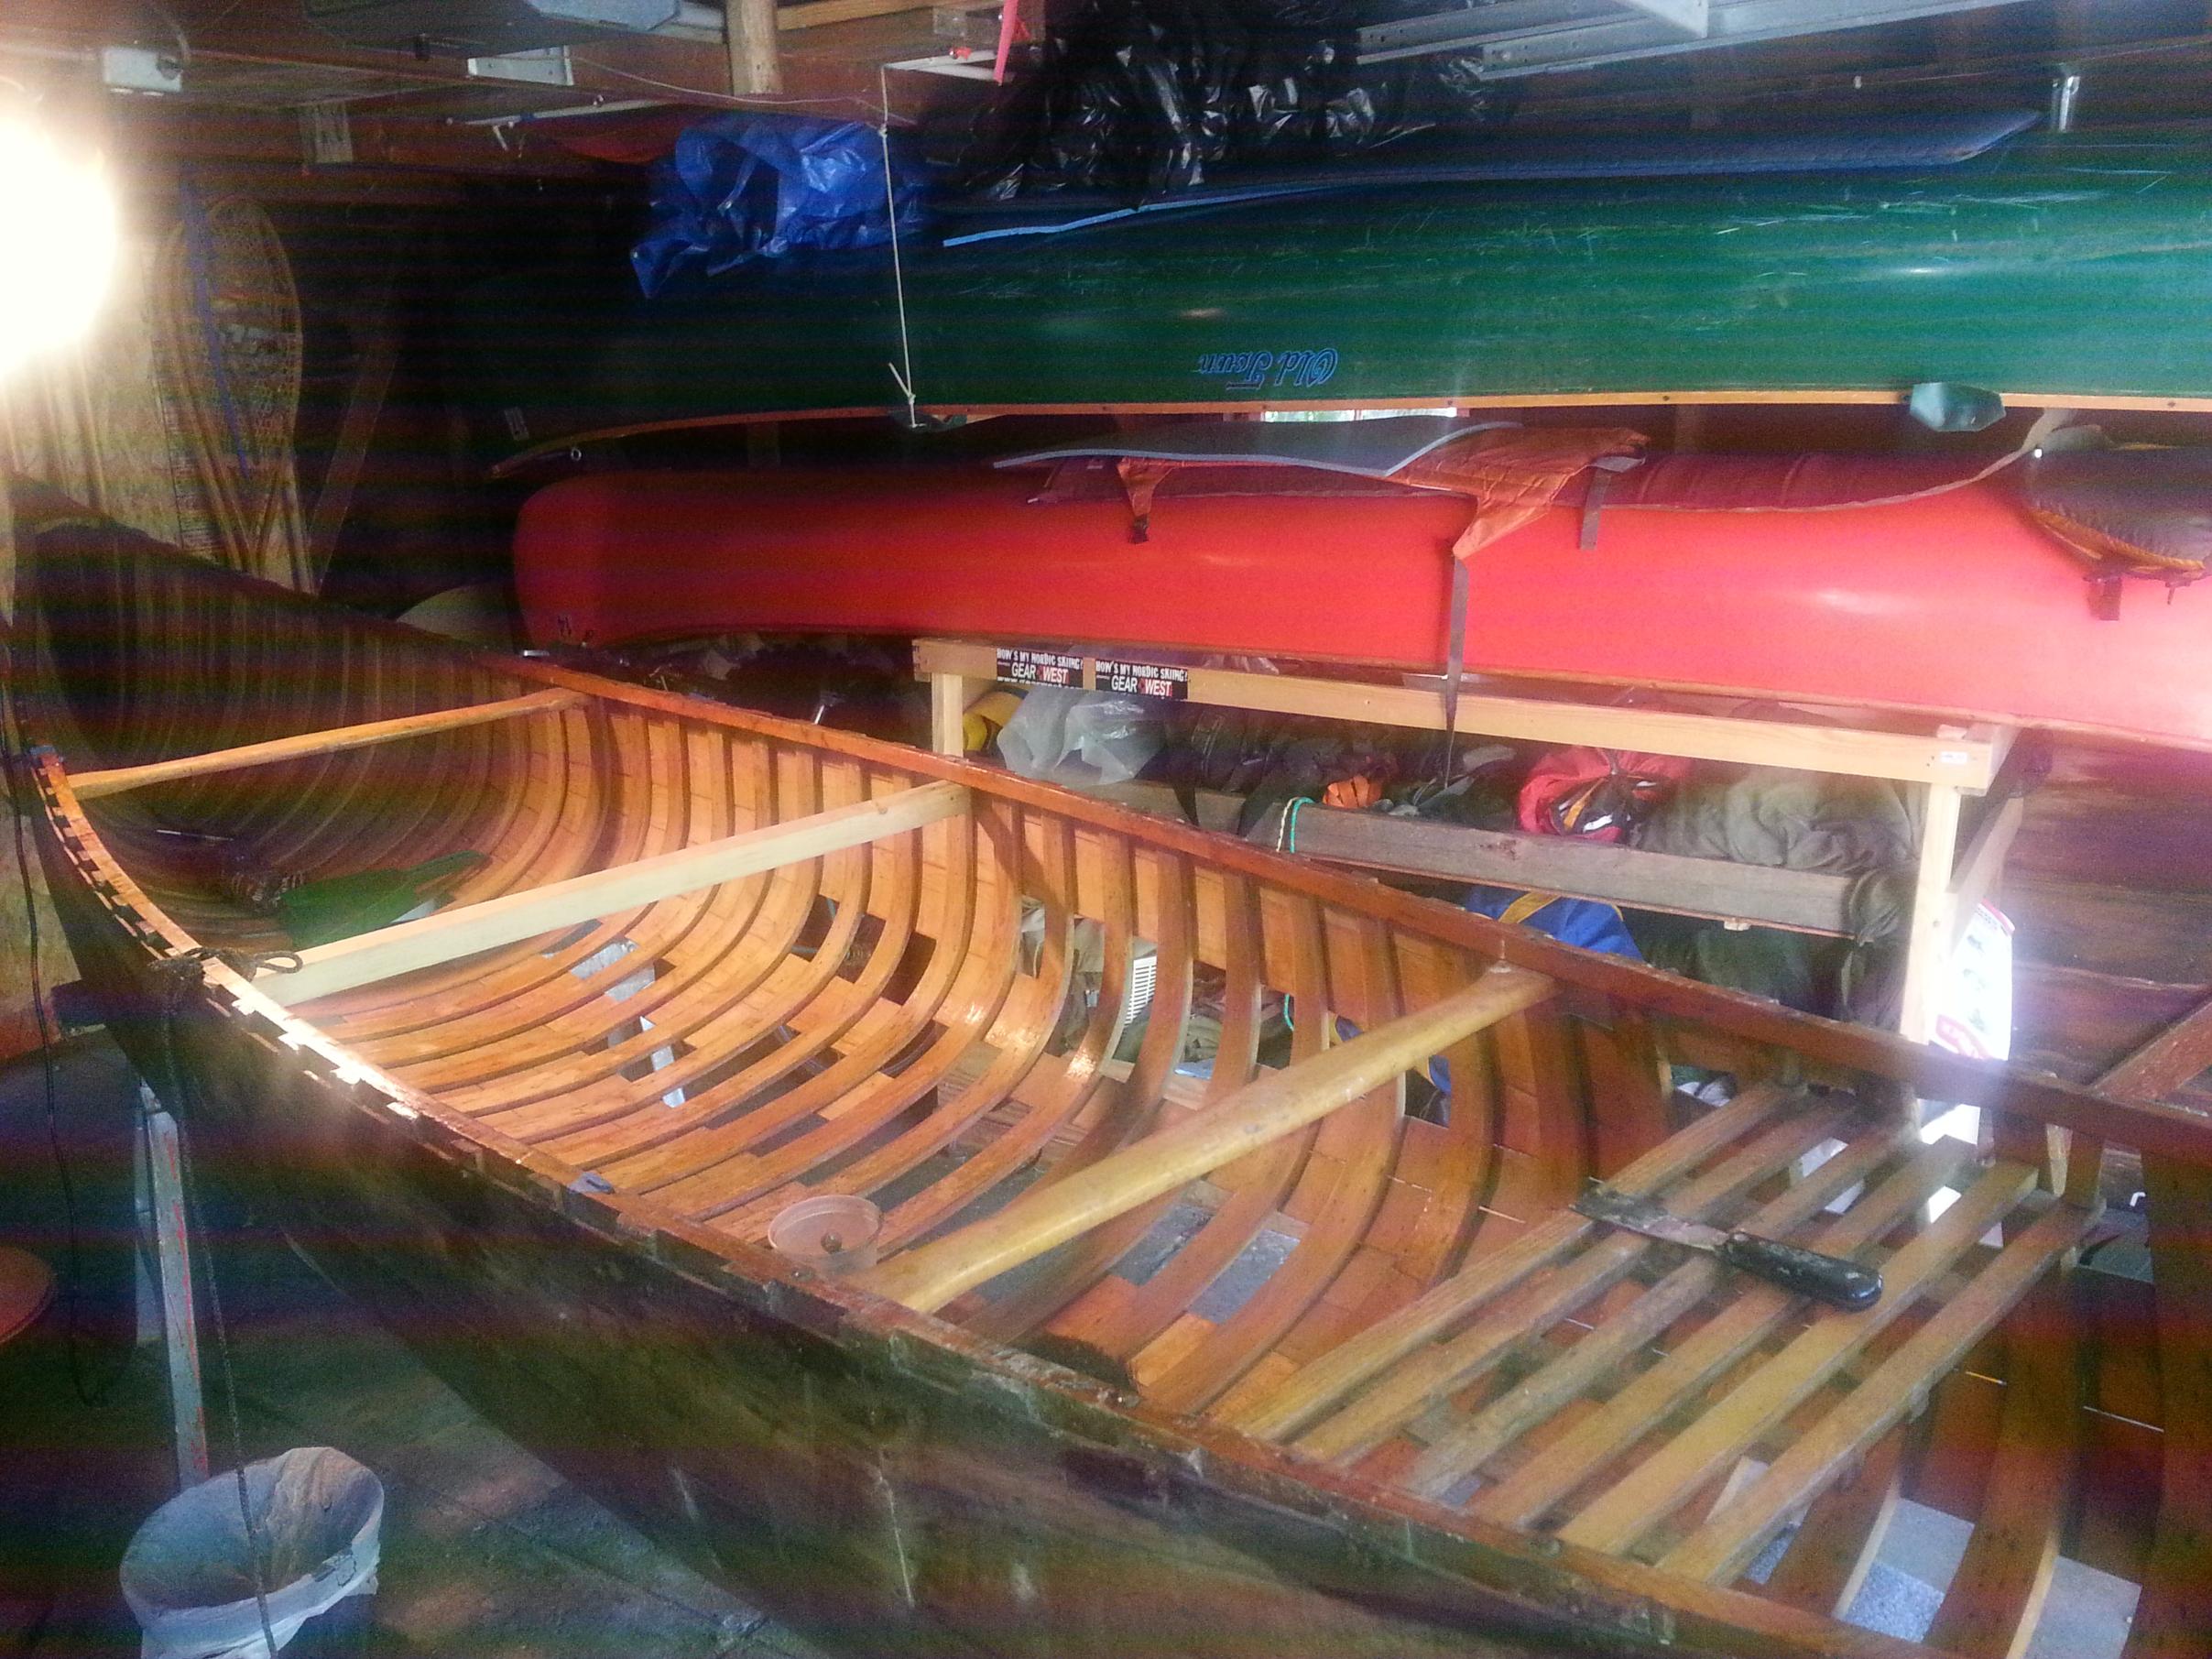
i'm rebuilding an 18' wood/canvas chestnut prospector, the voyageur model. this thing is gigantic and most likely won't be going on many bw trips. prior use was all over Northwest ontario and manitoba, probably 40 or more three week plus trips. it is beat up and needs some work.

i'm going to take my time with this. so far i've cut out the really badly damaged planks, i'm keeping some cracked ones. the goal is to keep as much original wood as possible. from what i can tell this canoe has been overhauled at least twice so keeping it as close to factoary condition is not an issue.
scraping the old varnish is easily the worst part of the job.
05/26/2016 01:15PM
Great project ! Just don't keep track of your hours ! Enjoy the rebuild, and post as you progress !
Your Canoe dog just brought back memories of my old Rat dog. I couldn't leave home with a canoe on my rack, unless I put her in the house ! She would run for miles, or until I stopped to pick her up. I did every time !
Jim
Your Canoe dog just brought back memories of my old Rat dog. I couldn't leave home with a canoe on my rack, unless I put her in the house ! She would run for miles, or until I stopped to pick her up. I did every time !
Jim
Keep your paddle wet and your seat dry!
06/09/2016 11:24AM
I got a recipe from Ralph Freese once upon a time for stripping the varnish off my old W&C rowboat. Basically, find the nastiest chemical stripper that comes in those 1 gallon tin cans. Get it really hot by immersing it in a bucket of boiling water (take the cap off first). Brush it on, let it sit, and then scrub with a solution of TSP and boiling water. Then hose the entire thing down with copious amounts of water. Two applications and my 1943 Thompson was pristine. It ain't environmentally friendly and you definitely need eye protection, rubber gloves, and some sort of respirator, but man does it work.
JD
JD
06/24/2016 08:36AM
replaced 24' feet of planking and several ribs repaired. most of varnish scraped but my body needed a break from that nasty business. previous repairs are making this job more difficult, ribs bent from the outside dimension don't necessarily fit the way they should, result is some strange non curved lines. i'm hoping that the outwales will pull the shape back to graceful curves overwise i have some more work to do. one thing with this type of restoration is you come across problems that are unique. no u-tube videos or books for guidance, you make it up as you go.


07/14/2016 12:13AM
if anything can go wrong it will. the planks are really brittle, hopefully the linseed oil will help. for what its worth this chestnut canoe is very inferior in build compared to my 1941 peterborough. tomorrow hopefully i'll attach the canvas and fill it.


07/14/2016 12:23AM
also... previous repairs were done incorrectly. the inwalls had strange curves and jogs. turns out the thwarts were 1.5 inches short. the guy i got this from is active in the wood canoe heritage association, yet my best source of info was eyeballing. it's looking good, i sort of think that i should have replaced the cracked ribs rather than repairing them.

08/09/2016 04:06PM
still waiting for filler to cure. most of the big work is finished. finding dimensions for this hasn't been easy, as it is there is flair rather than tumblehome in the mid section. i don't think that seems correct. nice thing with a canoe like this is you have a great deal of flexibility with last minute changes.

total costs including the canoe so far are under $550. i still need final enamel paint and probably another $20 of sandpaper.

total costs including the canoe so far are under $550. i still need final enamel paint and probably another $20 of sandpaper.
11/07/2016 11:10AM
lots of stuff happened this summer, i finally got the beast in the water. a few minor touch ups and final layer of paint which i will do next year. 18' and 15" and 90+ pounds. i have no plans on taking the frost river with this bad boy. i can still lift these things, that is fairly cool.
it paddles like a dream, it is hard to believe that such a big canoe can be so nimble yet track perfectly. they don't make them like this anymore.

it paddles like a dream, it is hard to believe that such a big canoe can be so nimble yet track perfectly. they don't make them like this anymore.

Subscribe to Thread
Become a member of the bwca.com community to subscribe to thread and get email updates when new posts are added. Sign up Here
Community Links
 Search BWCA.com
 Donate
 Featured Sponsor