|
 Boundary Waters Quetico ForumGear ForumNew Custom Footbrace for the Magic
|
 Forum Sponsor

Author
Text
")

09/03/2013 10:28AM
Some of you may remember the custom yoke I made last year for my Magic , I started with a nice chunk of Walnut and then proceeded to carve it up in very controlled manor to install some precision aluminum I beams to keep the screws for digging into the wood as well as prevent any breaking in the thin area of the yolk. Well that marriage of beautiful wood and aluminum left me wanting to do something similar for a foot brace, finally got around to taking it on recently. I had wanted to start from scratch but the time it would take to machine and anodize an aluminum rail wouldn’t be worth it, so I opted to start with a donor Wenonah solo foot brace kit, black, well worth the $30. Really the only part I was doing was the attachment areas but I had a specific vision for this that was original and functional. Most canoes with foot braces have them riveted in, not an option on my beautiful almond gelcoat Magic, others simply take a strip of wood and fit it to the inside of the hull, gluing it in, then attaching the alum brace to that, others yet use foam and Kevlar fabric to make mounting points. I almost caved in an just ripped some strips of Walnut to mount to but I just couldn’t take the easy way out, wanted to have a more engineered solution that was unique. I decided I would have mounting points at each end. I wanted to keep the attachment areas as small as possible, so this limited my square inches of contact for gluing. My personal experience with wood is that it is not all that strong, wood glues well but often the glue stays and the wood itself shears or pulls apart. So I decided I would machine some aluminum attachments points that would have the unyielding strength I wanted, then machine covers for those contact points out of Walnut, the goal was to never see the aluminum mounting pads and never put of oz of pressure on the wood, it would be there simply for aesthetics.
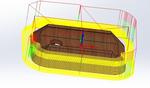
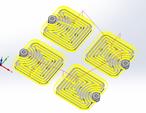
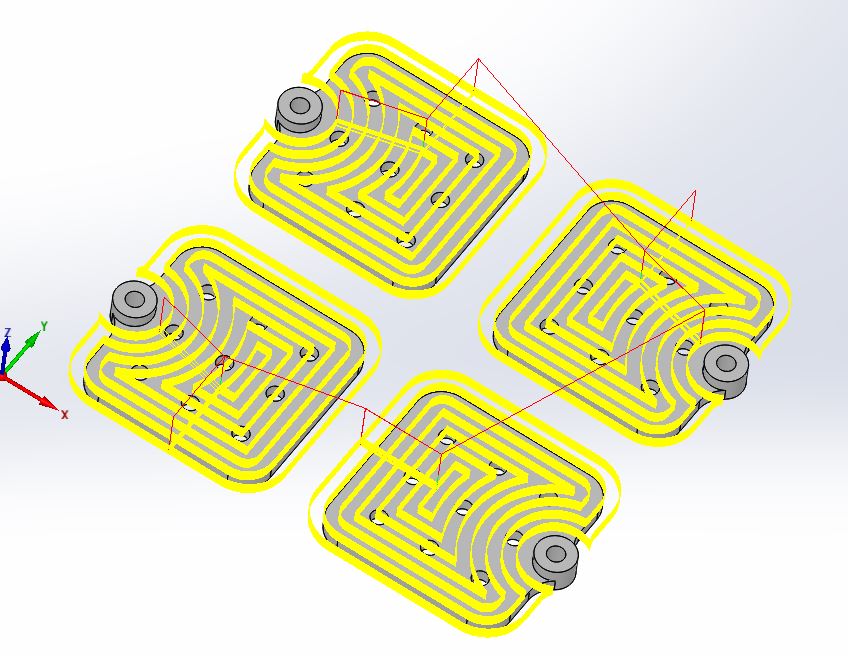
As with just about anything I work on I started with some CAD work, this lets me see what the finished product will look like, what it will weigh, and how strong it will be, plus it provides me with the solid models used for machining later on.


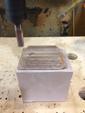
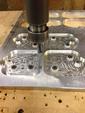
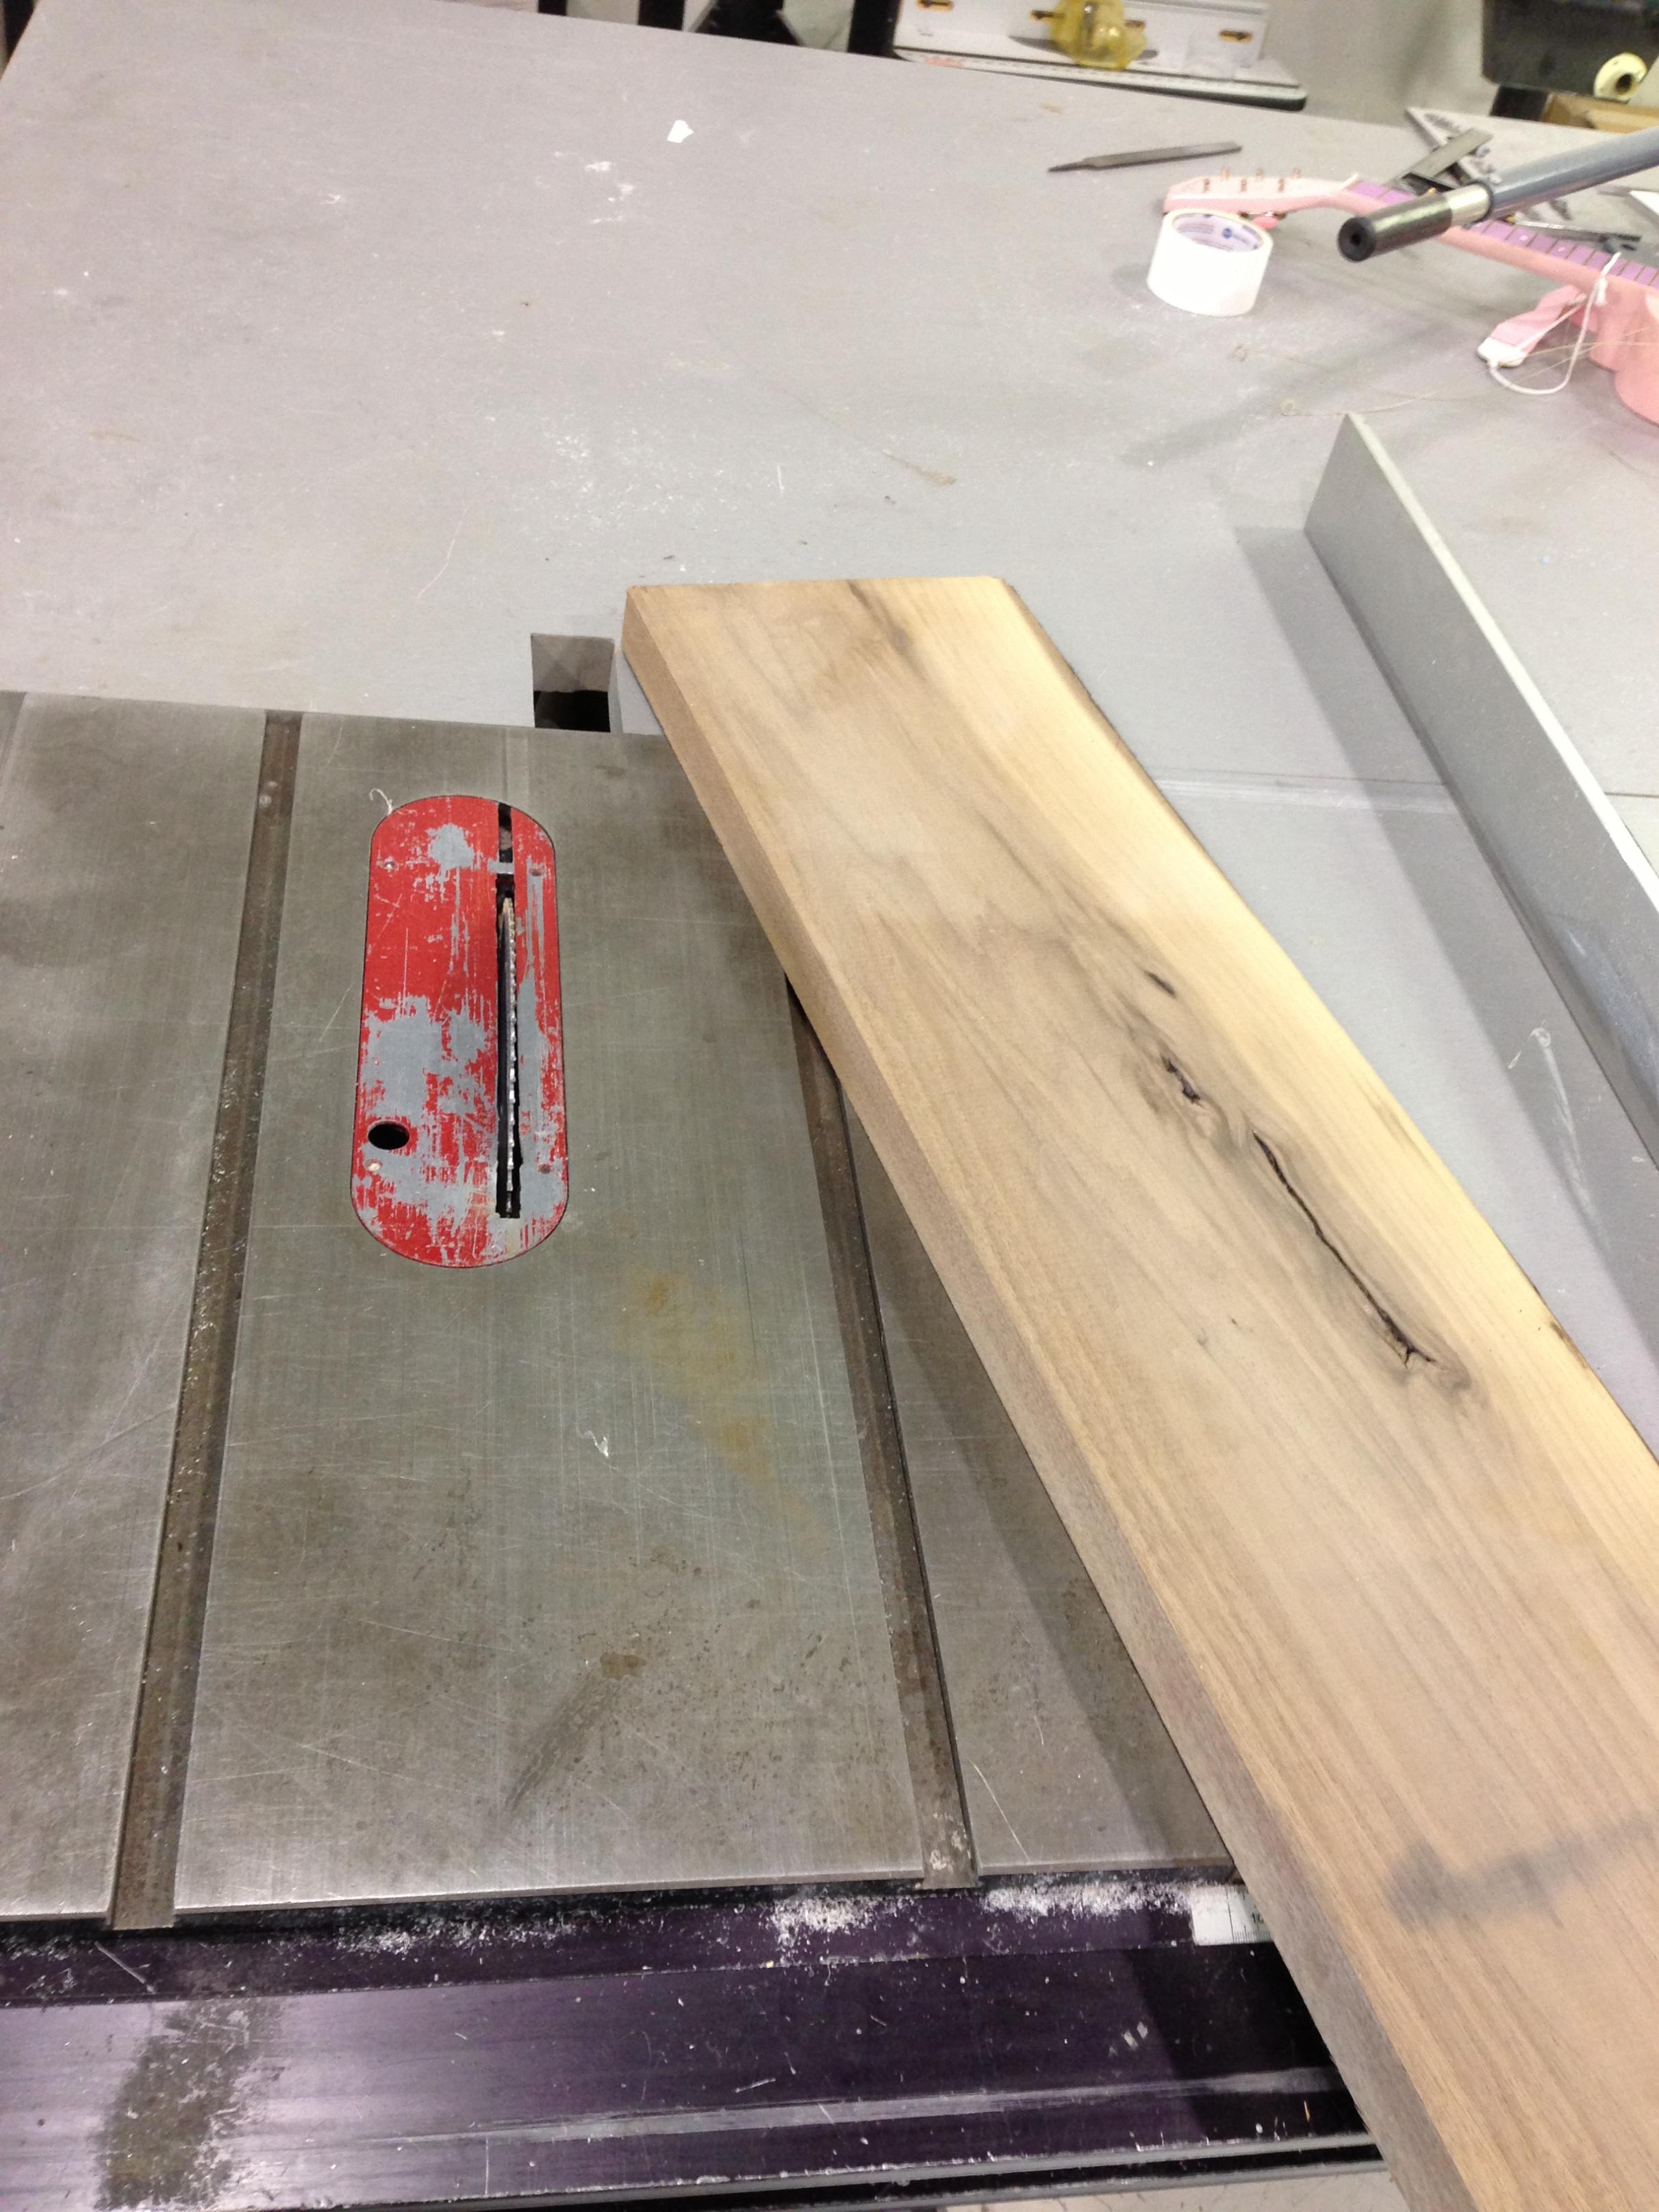
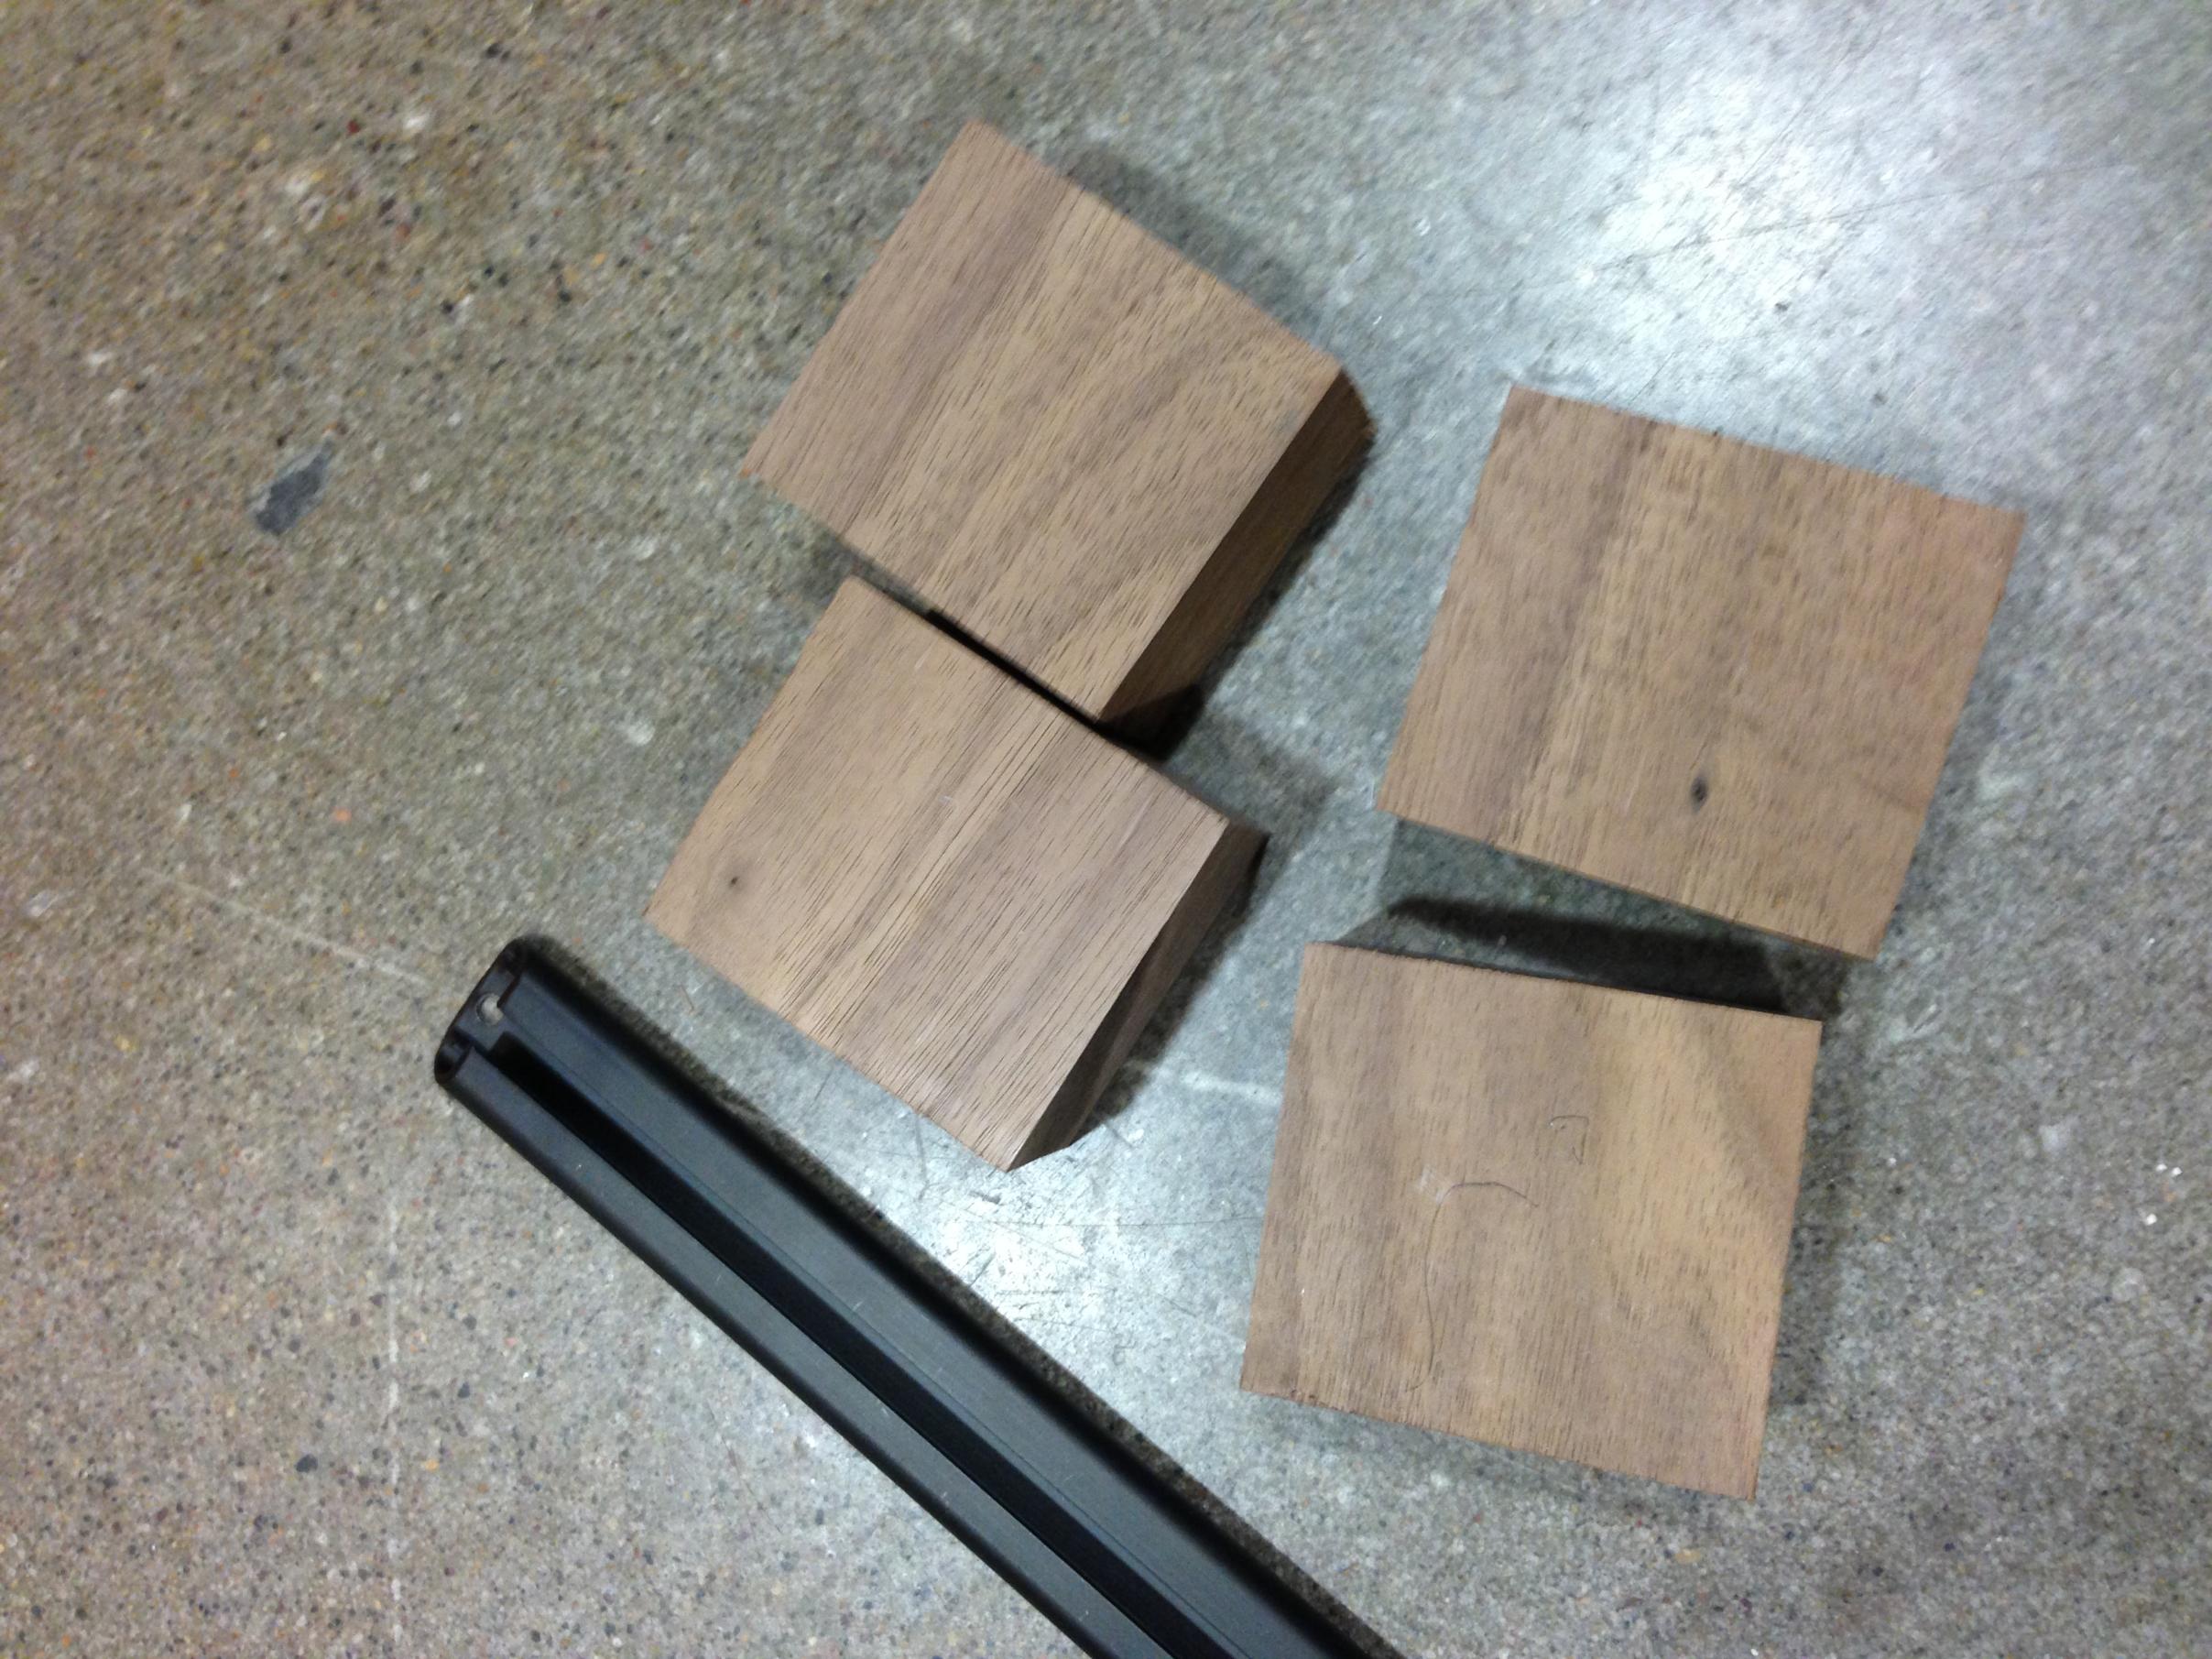
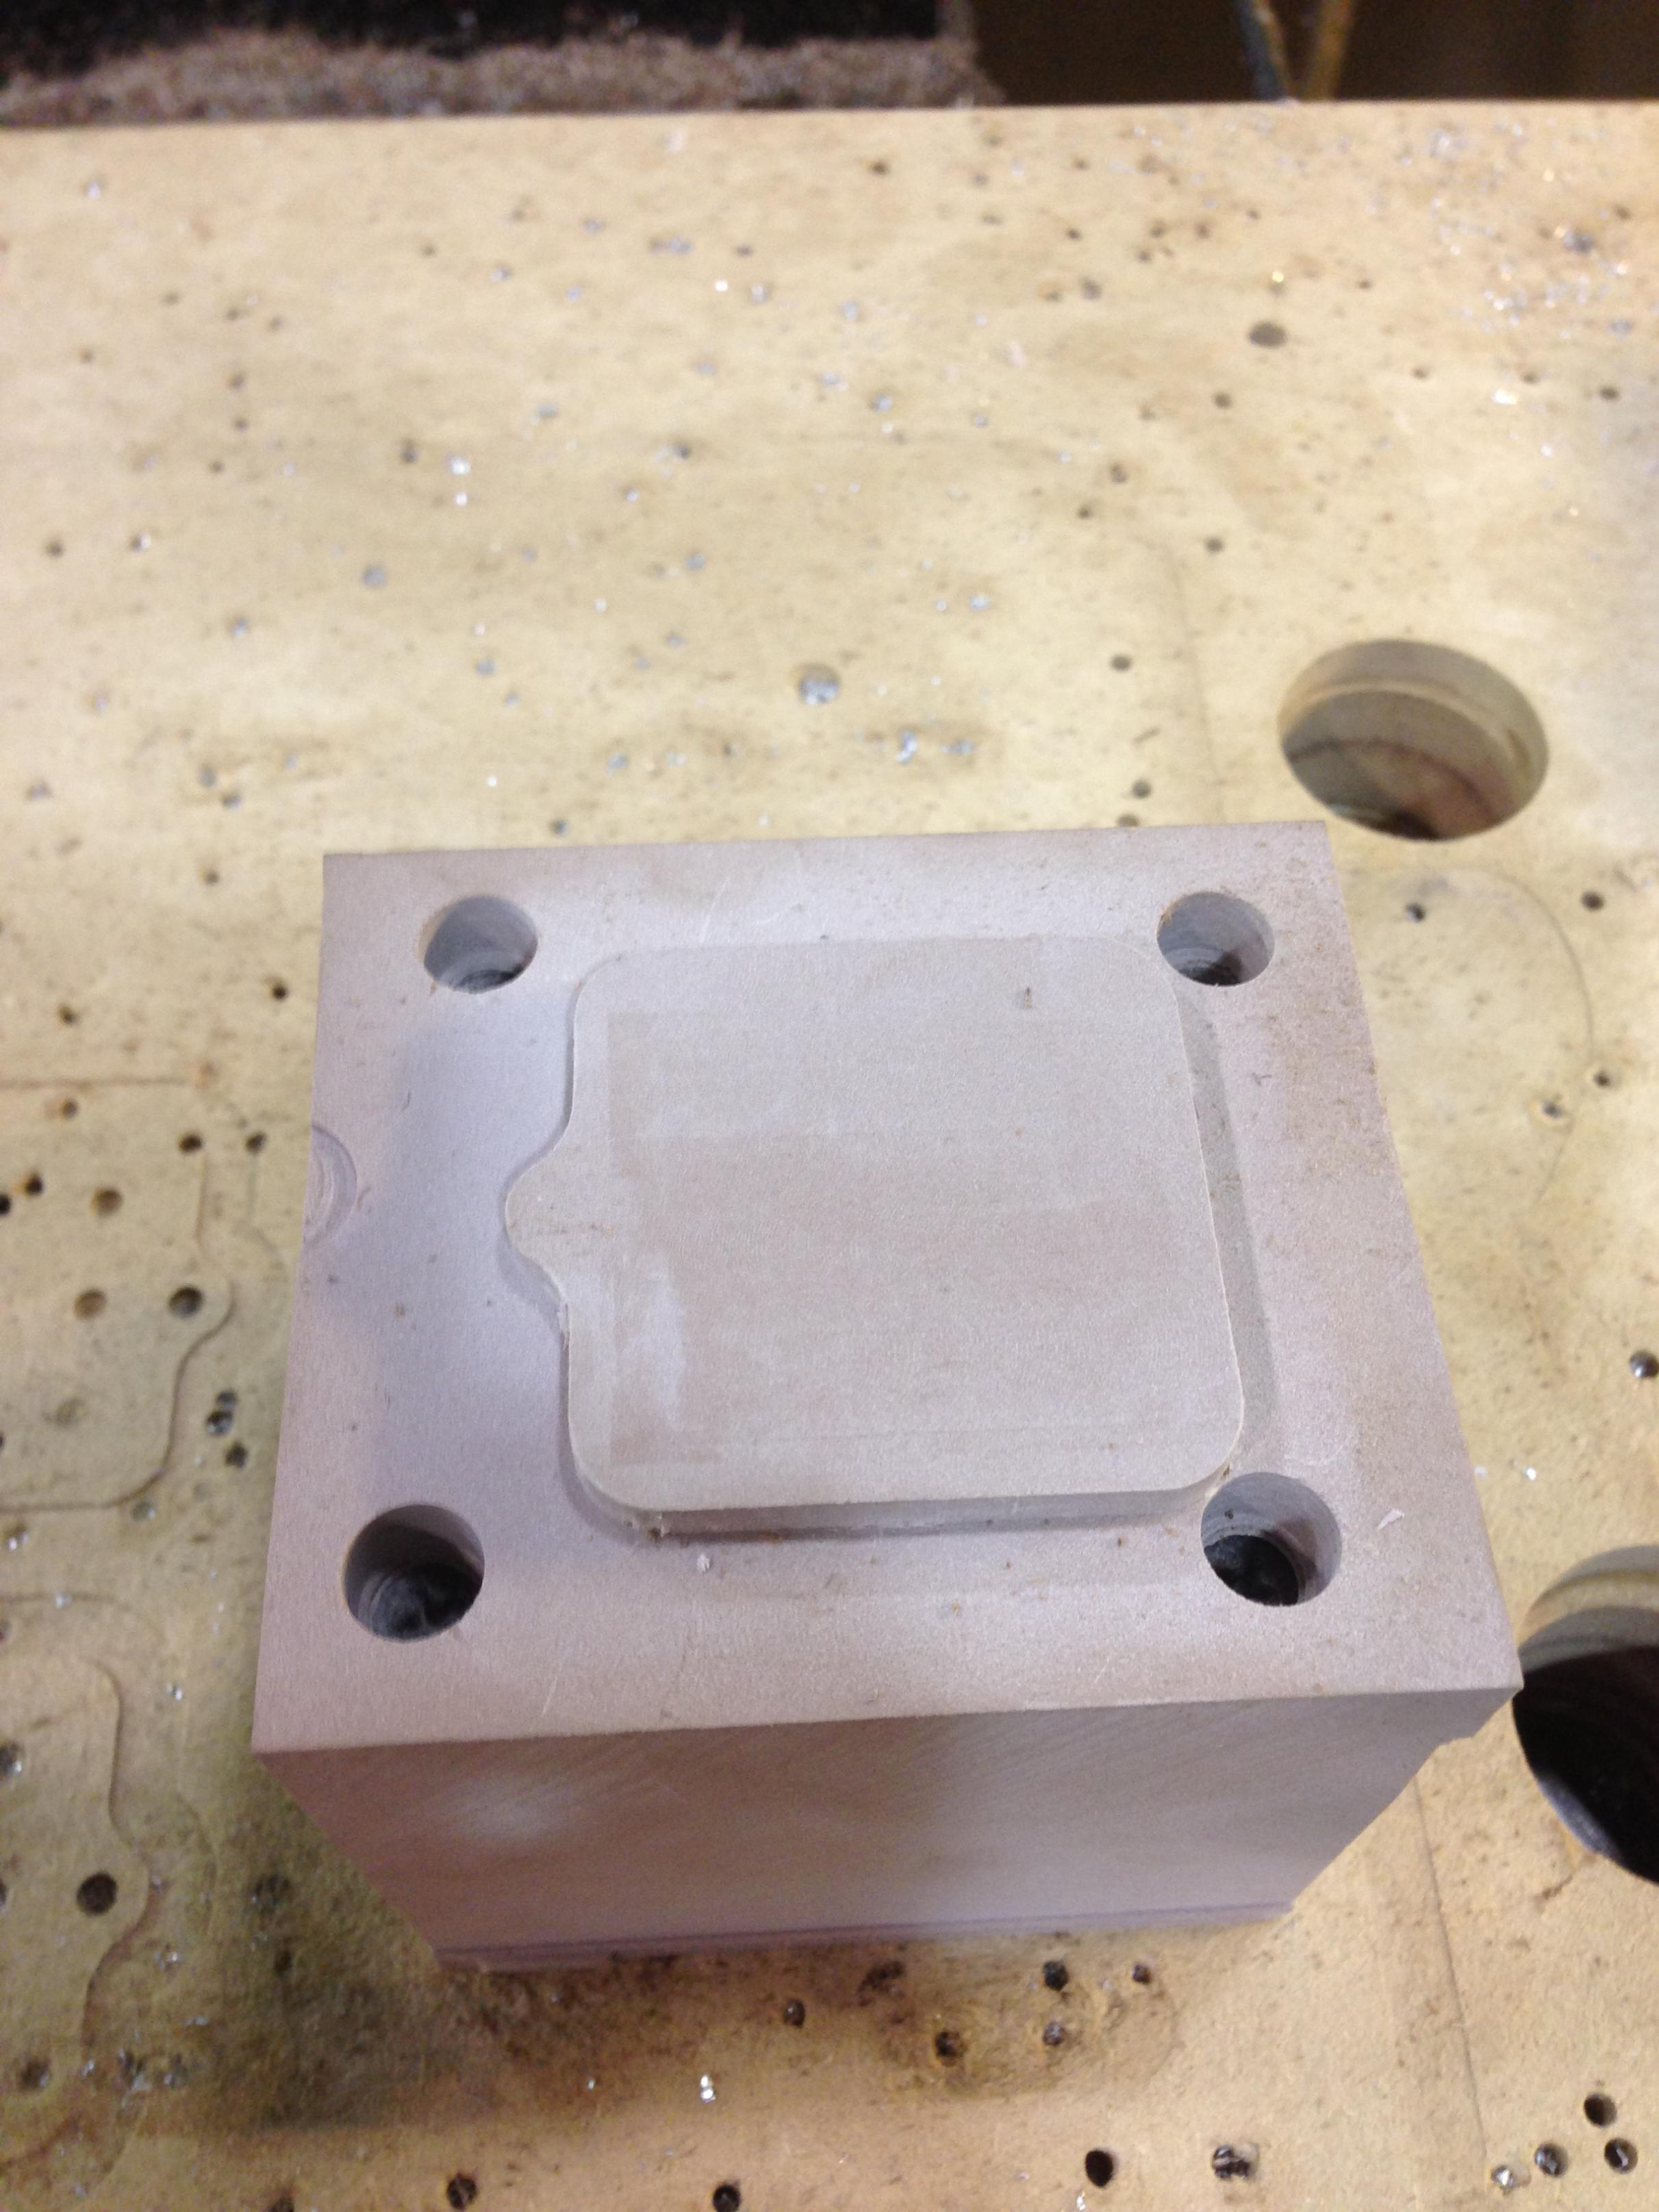
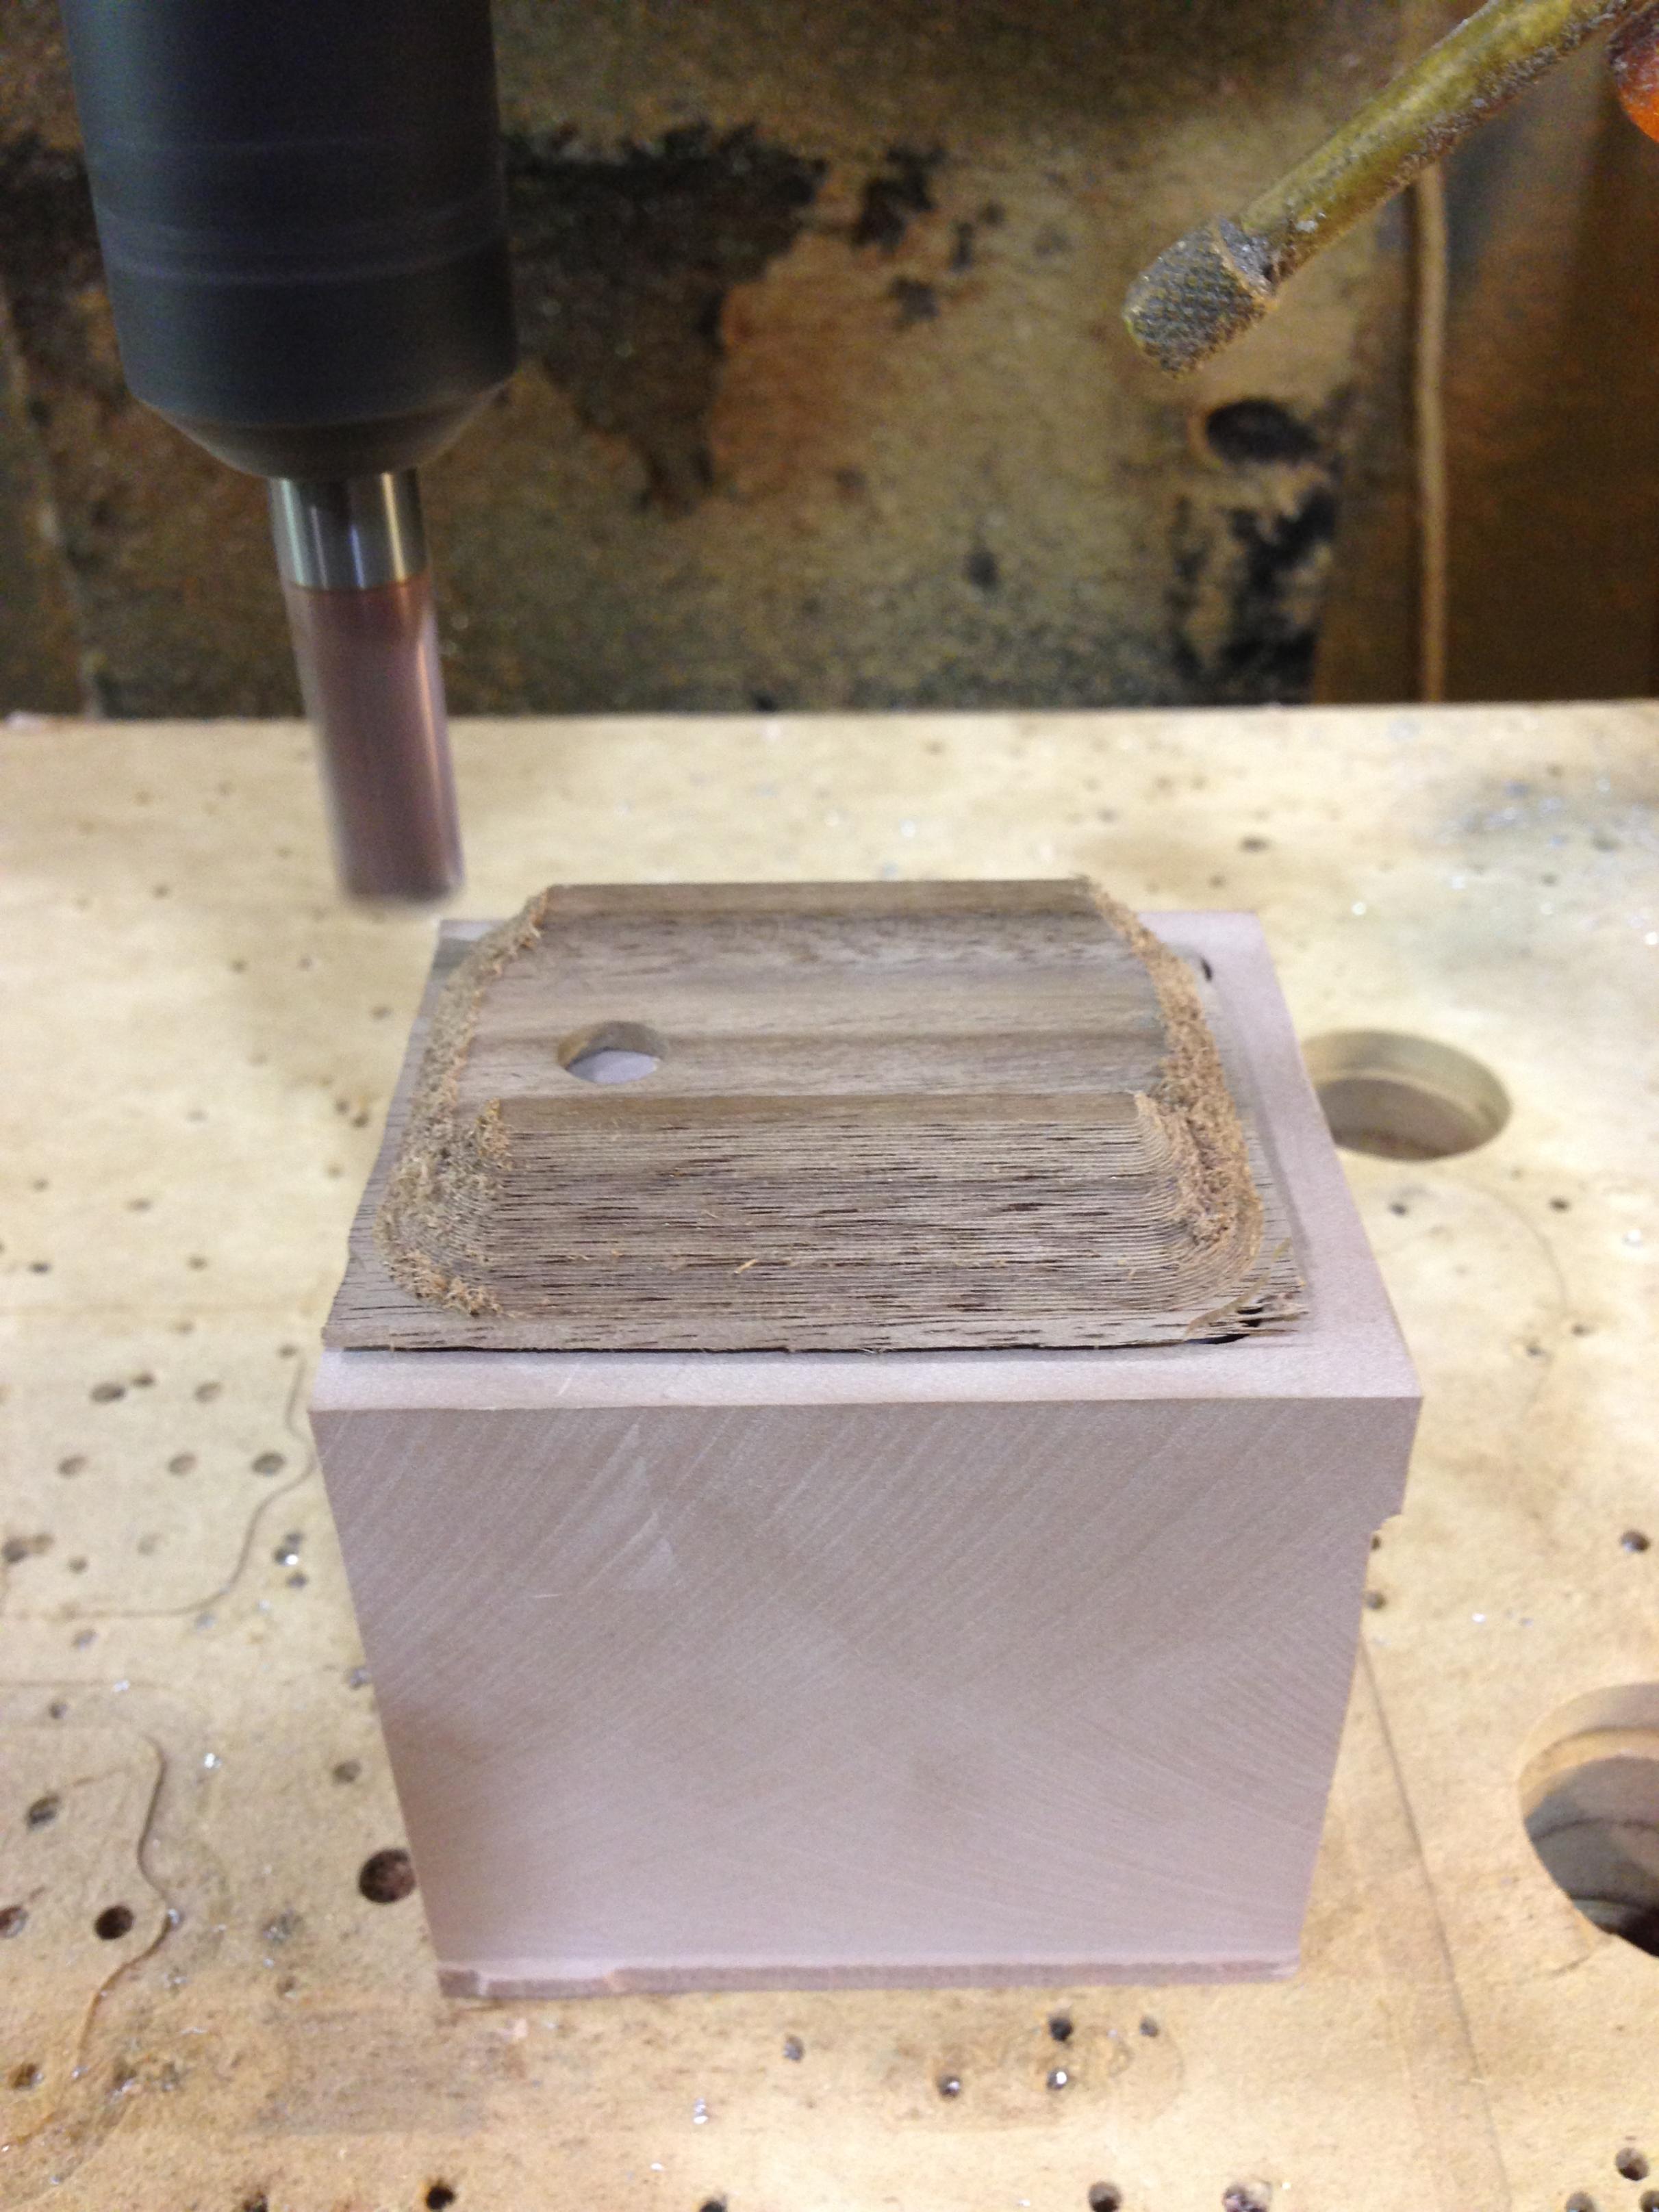
First step was to rip some Walnut blanks, I then roughed out the backsides on the CNC, then used that pocket to locate them on an improvised fixture to finish off the top sides. Machining wood is always a little tricky, it’s not as predictable as other materials, always the chance it could splinter out, so slow feed and fast RPM is the name of the game.


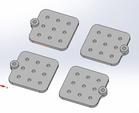
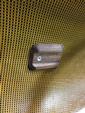
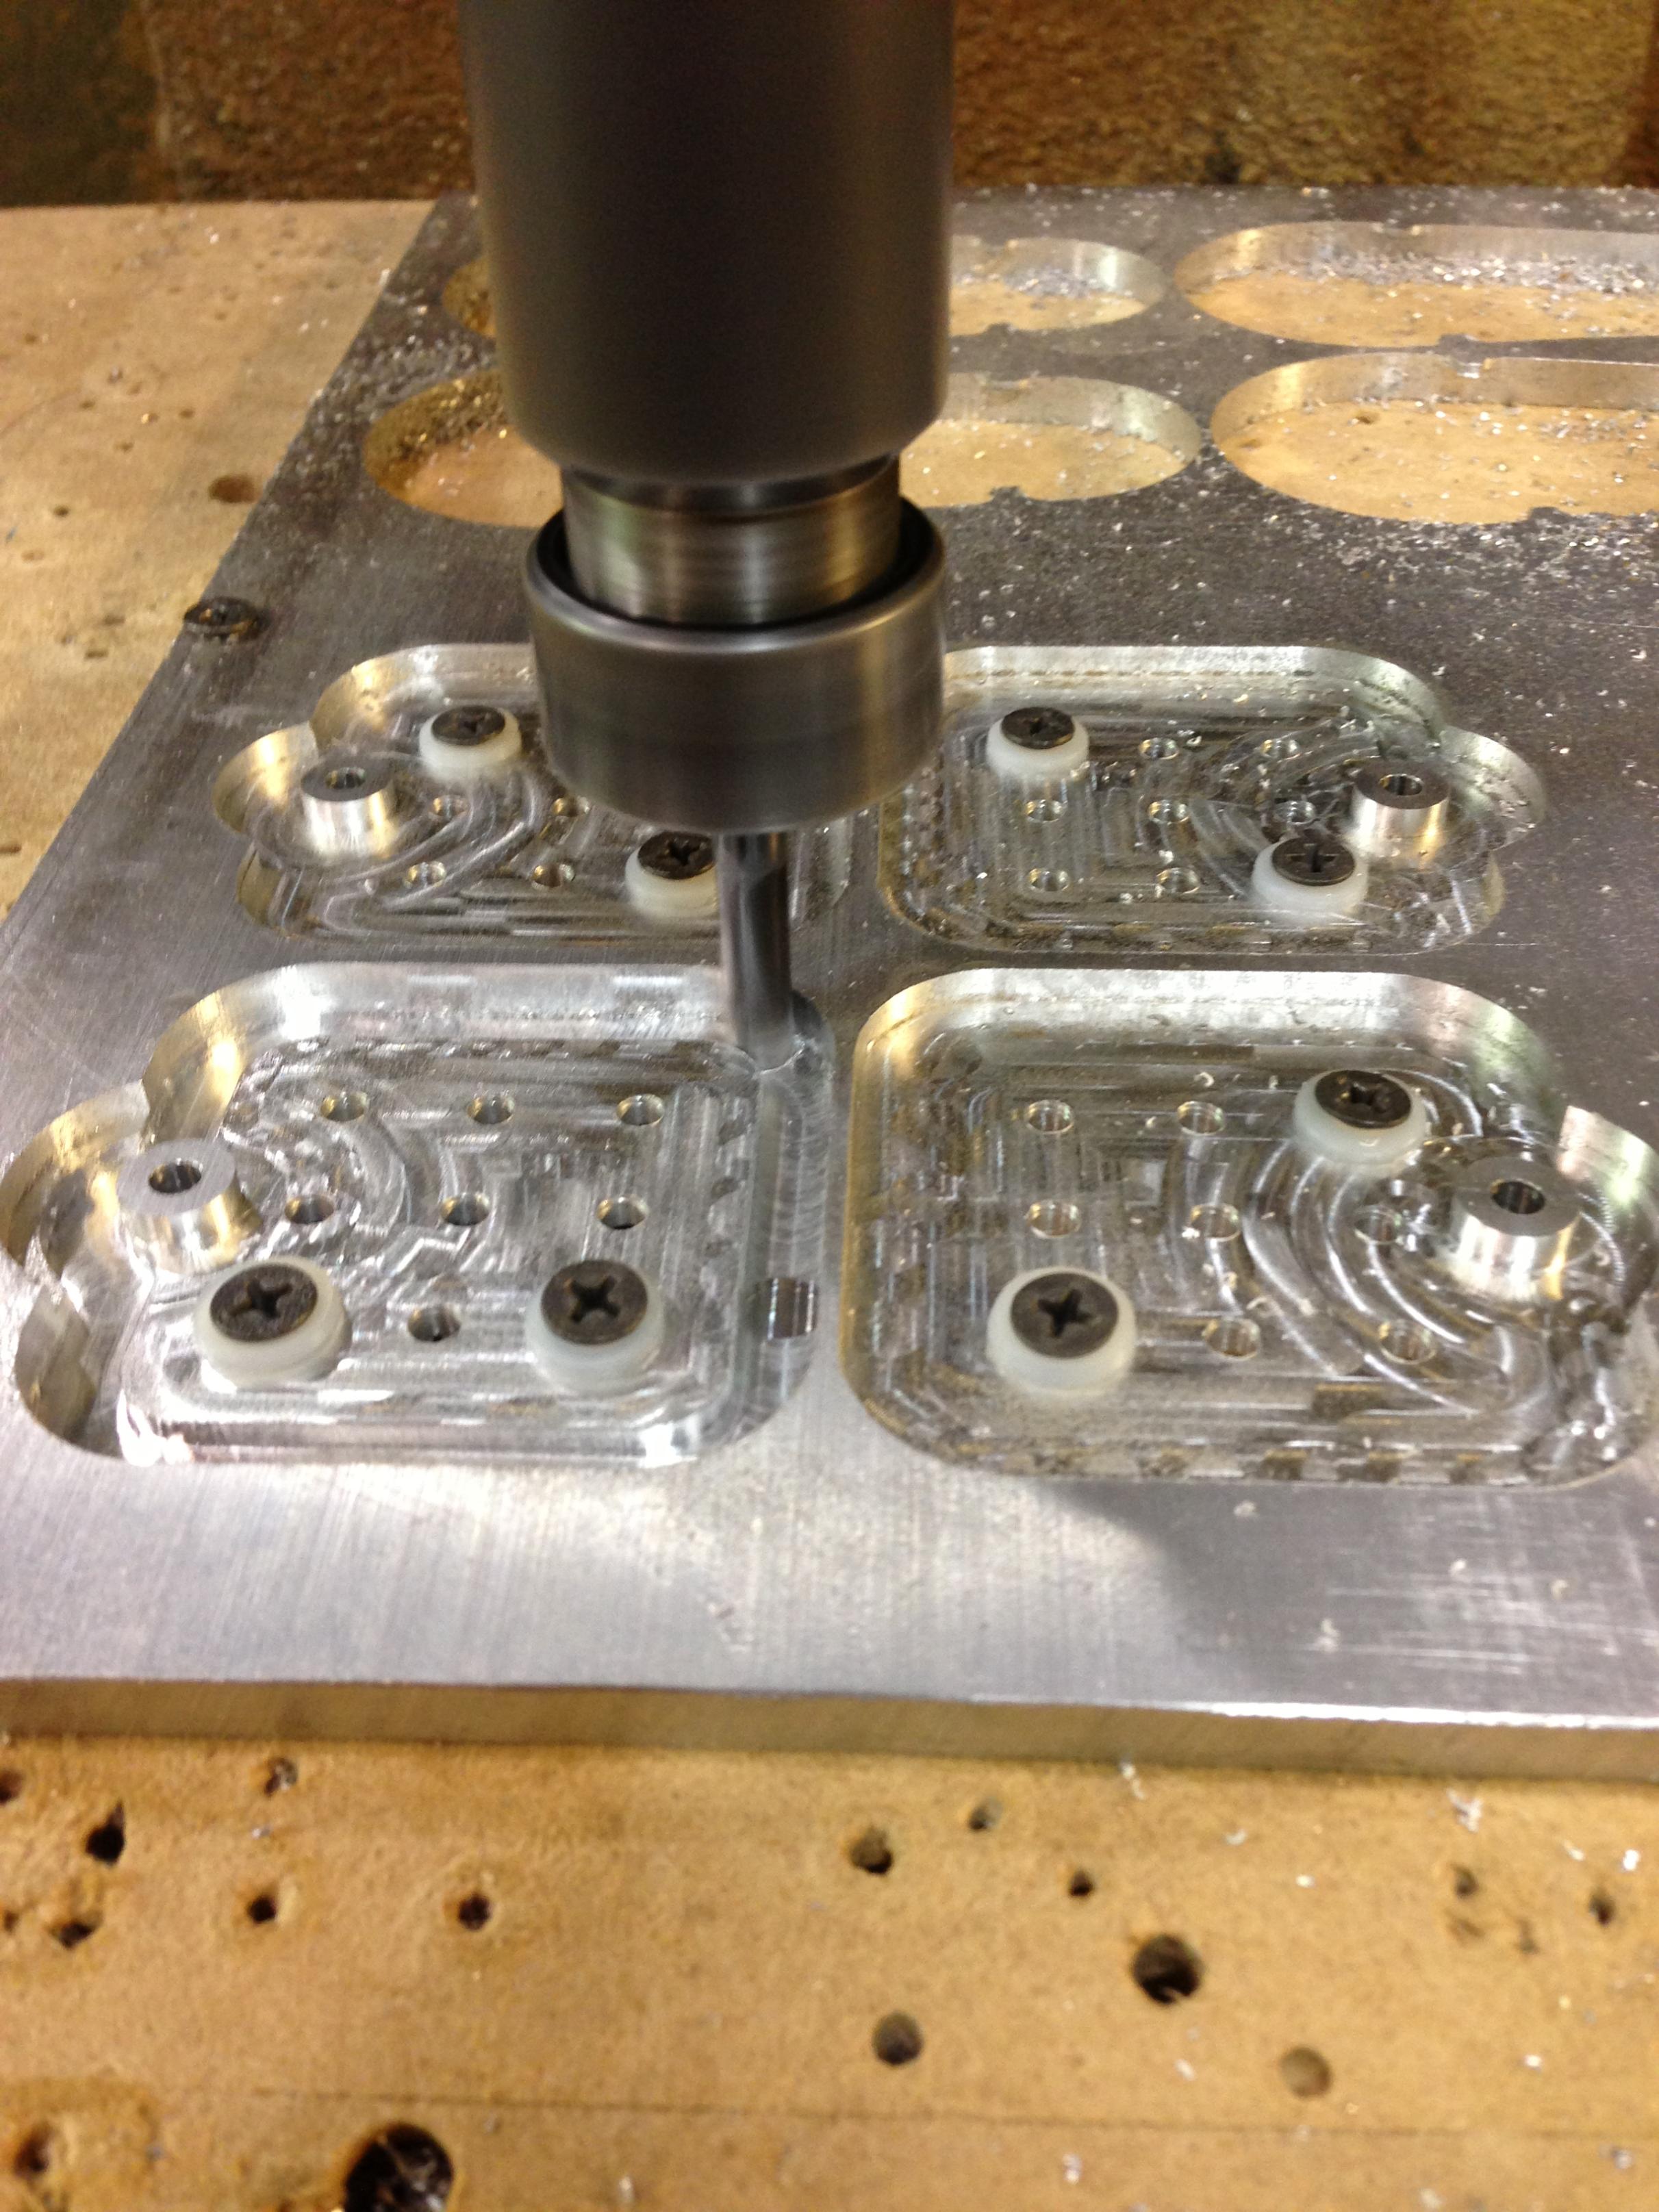
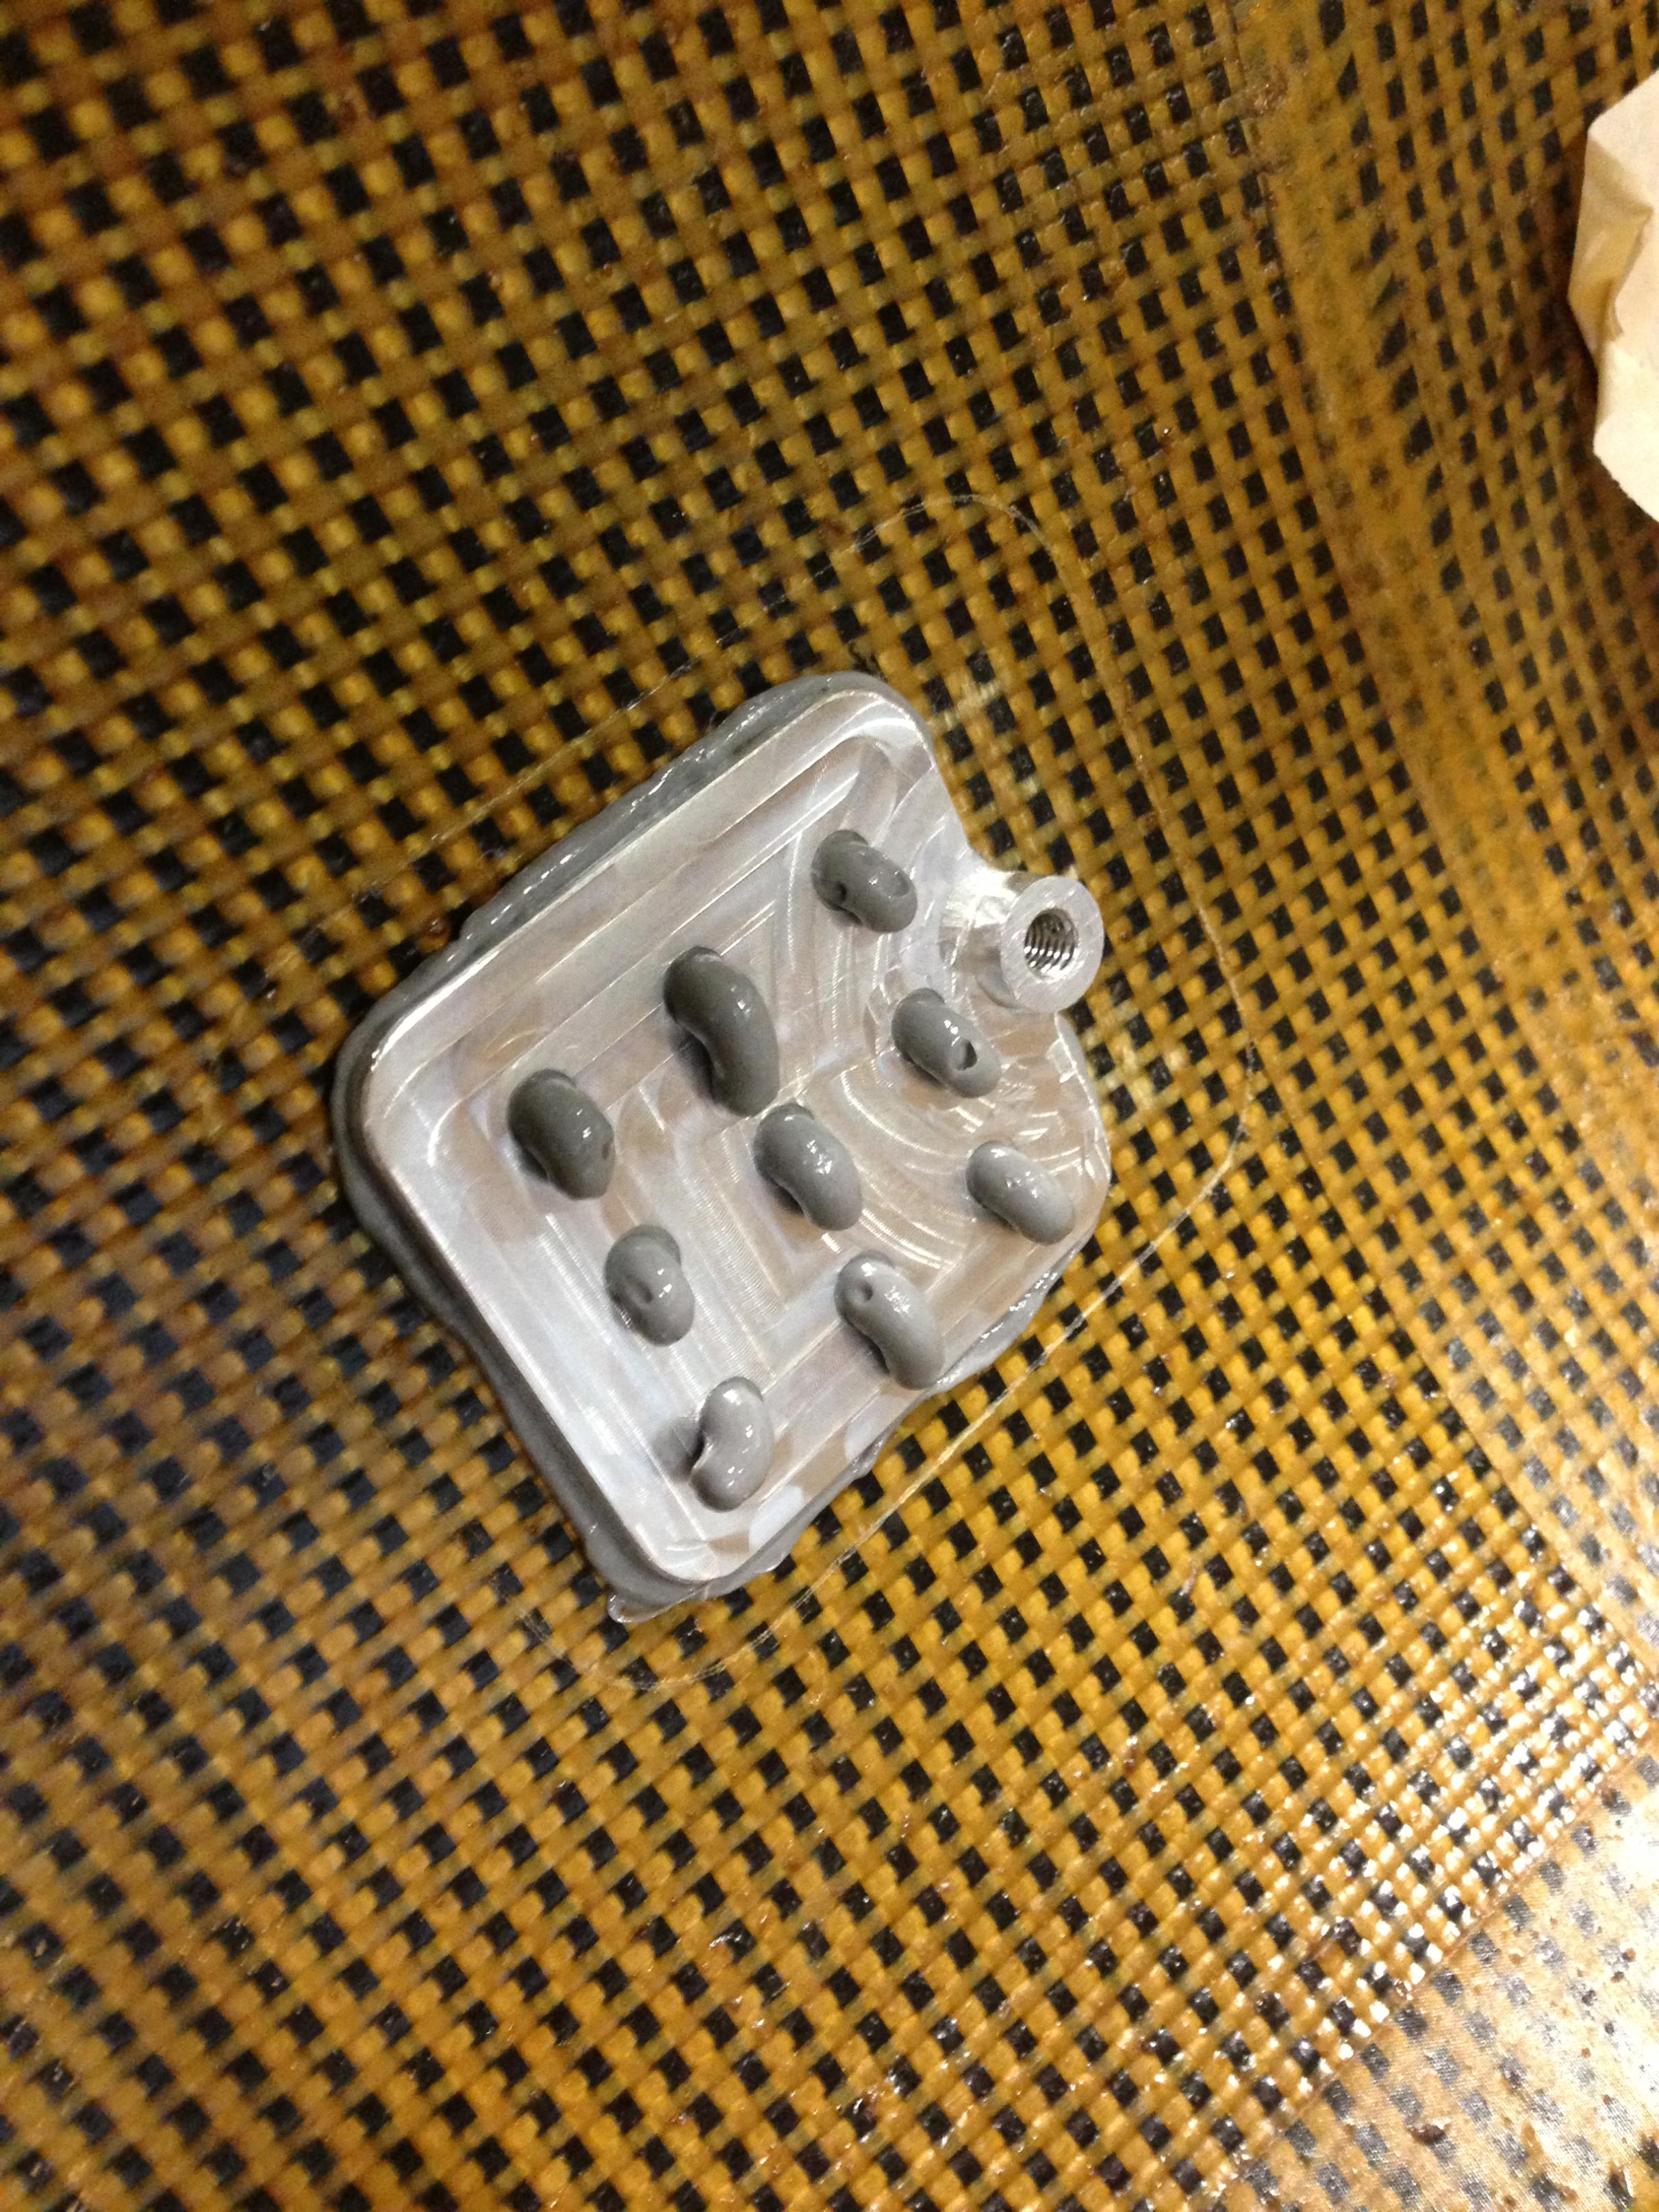
I then turned to the aluminum mounting pads, I added some holes to help the adhesive grab a bit better but also it allows for any air trapped under the pad to exit out the top at the time of bonding, mounts are being machined from 6061-T6 alloy.
Bettween the CAD work, programing, and machining I’m probably at about 15 hours of work at this point, goes allot faster when you are just writing about it lol
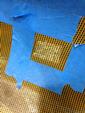
This is the point of the project where the technical side ends and the craftsman side picks up. I used tape as my measuring device, its width is very consistent and allows for mirrored placement on both sides of the curved hull. I roughed out approximately where the mounts would go so I could start the tedious task of fitting the individual assemblies to the contour of the hull, this took dozens of trips to the disk sander for each point, but eventually they all fit pretty nicely.

I then prepped the hull for the pads by abrading the surface and cleaning with a solvent, wanted to make sure the glue was getting good contact with the composite and not with the varnish I applied last year. I used a sharp pick to scribe a faint line on the hull where the pads were to go.
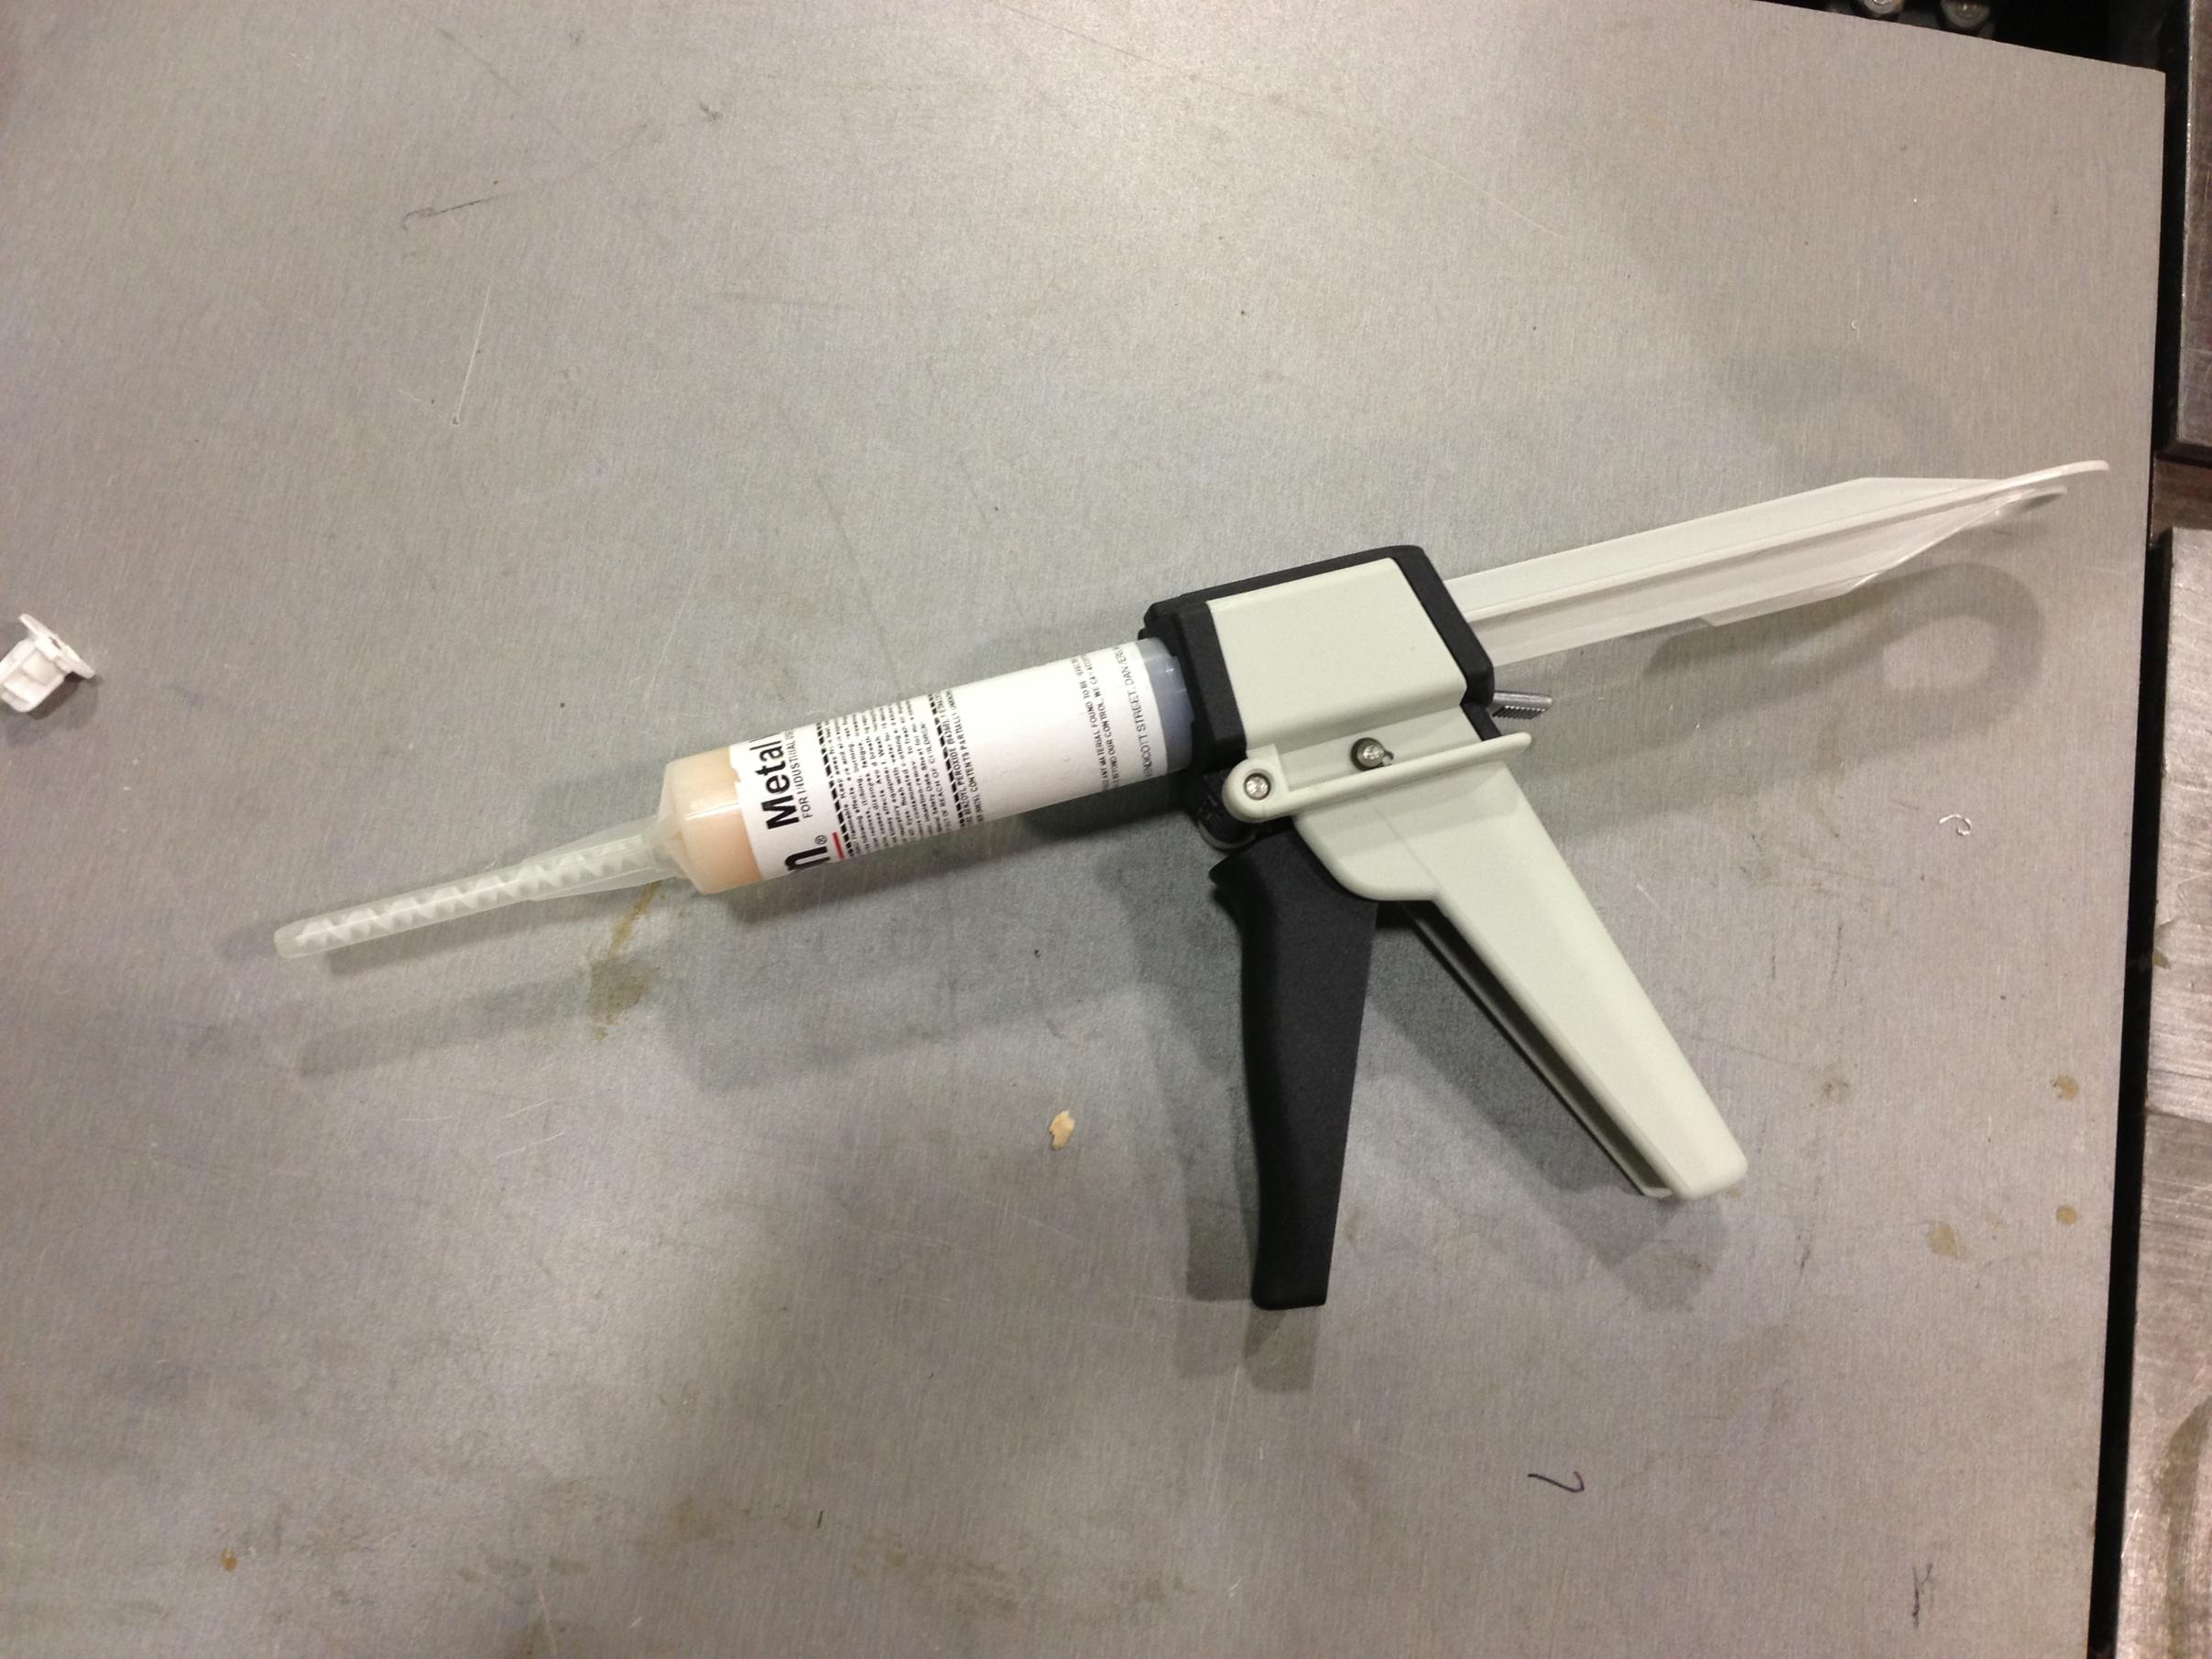
The adhesive I picked is a pretty special product made to bond with aluminum and composites, it’s in the same family as Plexus adhesive commonly used is composite boat building, same company, just a formula tweak for the metal. You must use a special gun applicator and 10:1 ratio plunger when working with this ITW Plexus/Devcon 14366. The specs are somewhere around 1000lbs per sq/in of contact, each mounting point is 1.8 sq inches so I theoretically have somewhere over 7000lbs of glue force, of course that’s in perfect conditions, I know this isn’t that but I’m still fairly confident the hull would tear apart before the glue would ever fail. The 14366 has a 4-5 pot life, so by the time I glued all 4 points I the first point was already gelling up and I could scrape the excess off around the perimeter and top. I turned off the lights and let this cure for a day. The Plexus family of adhesives are really cool methacrylate’s, they are so nasty they actually dissolve some surface impurities on contact, so having the parts 100% perfectly clean isn’t a huge must, thus these products are used allot in production.


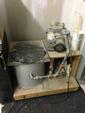
I took the wood covers and immersed them in warm Watco (a weight was put on top to keep them from floating), then placed them in a vacuum chamber, I figure the more oil I can force into these the better, the nice thing is this design allows for the removal of the wood at anytime, so I can maintain or replace whenever.

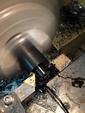
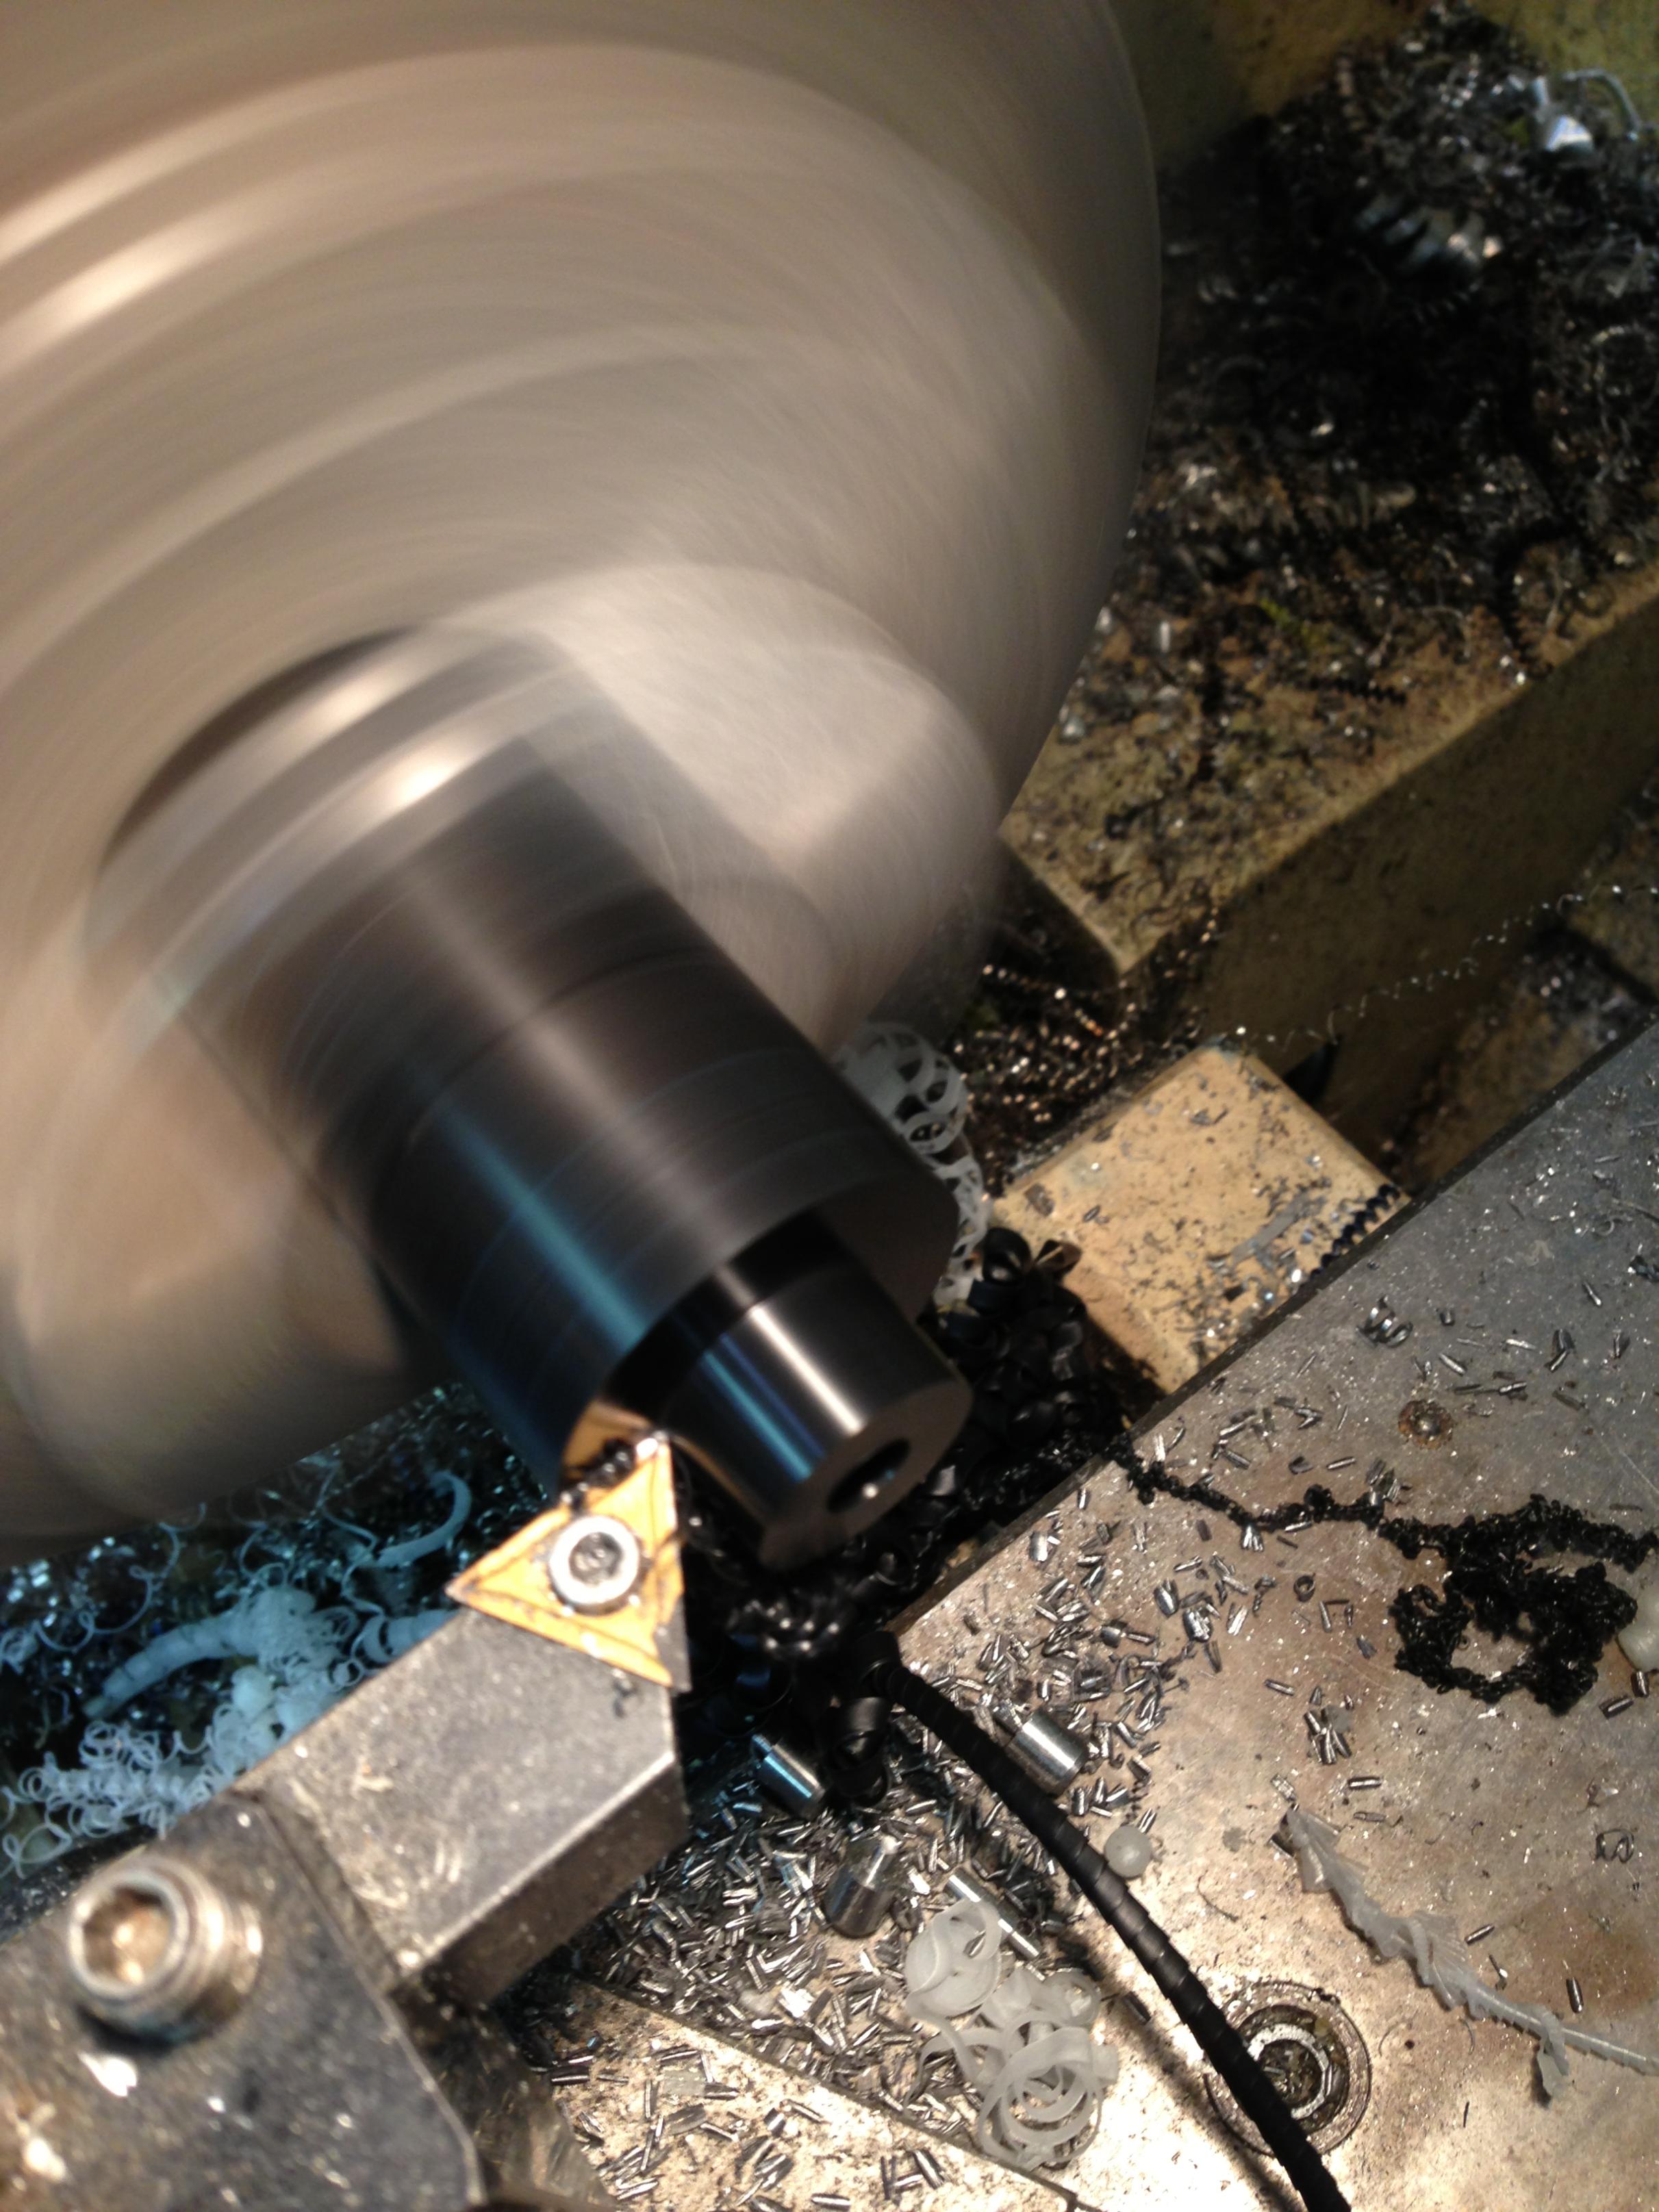
The rails are bolted on using 10-32 Button head cap screws, stainless with a black oxide coating. While mocking it up I noticed the Wenonah assembly had metal washers sliding on the black anodized rails, over time this would have worn the finish down, so I stepped over to the lathe and pumped out a couple of nice thick black acetal (Delrin) washers. The last bit of work is tweaking the angle on the Wenonah bars to match the angle of the rails and allow the assembly to move freely.

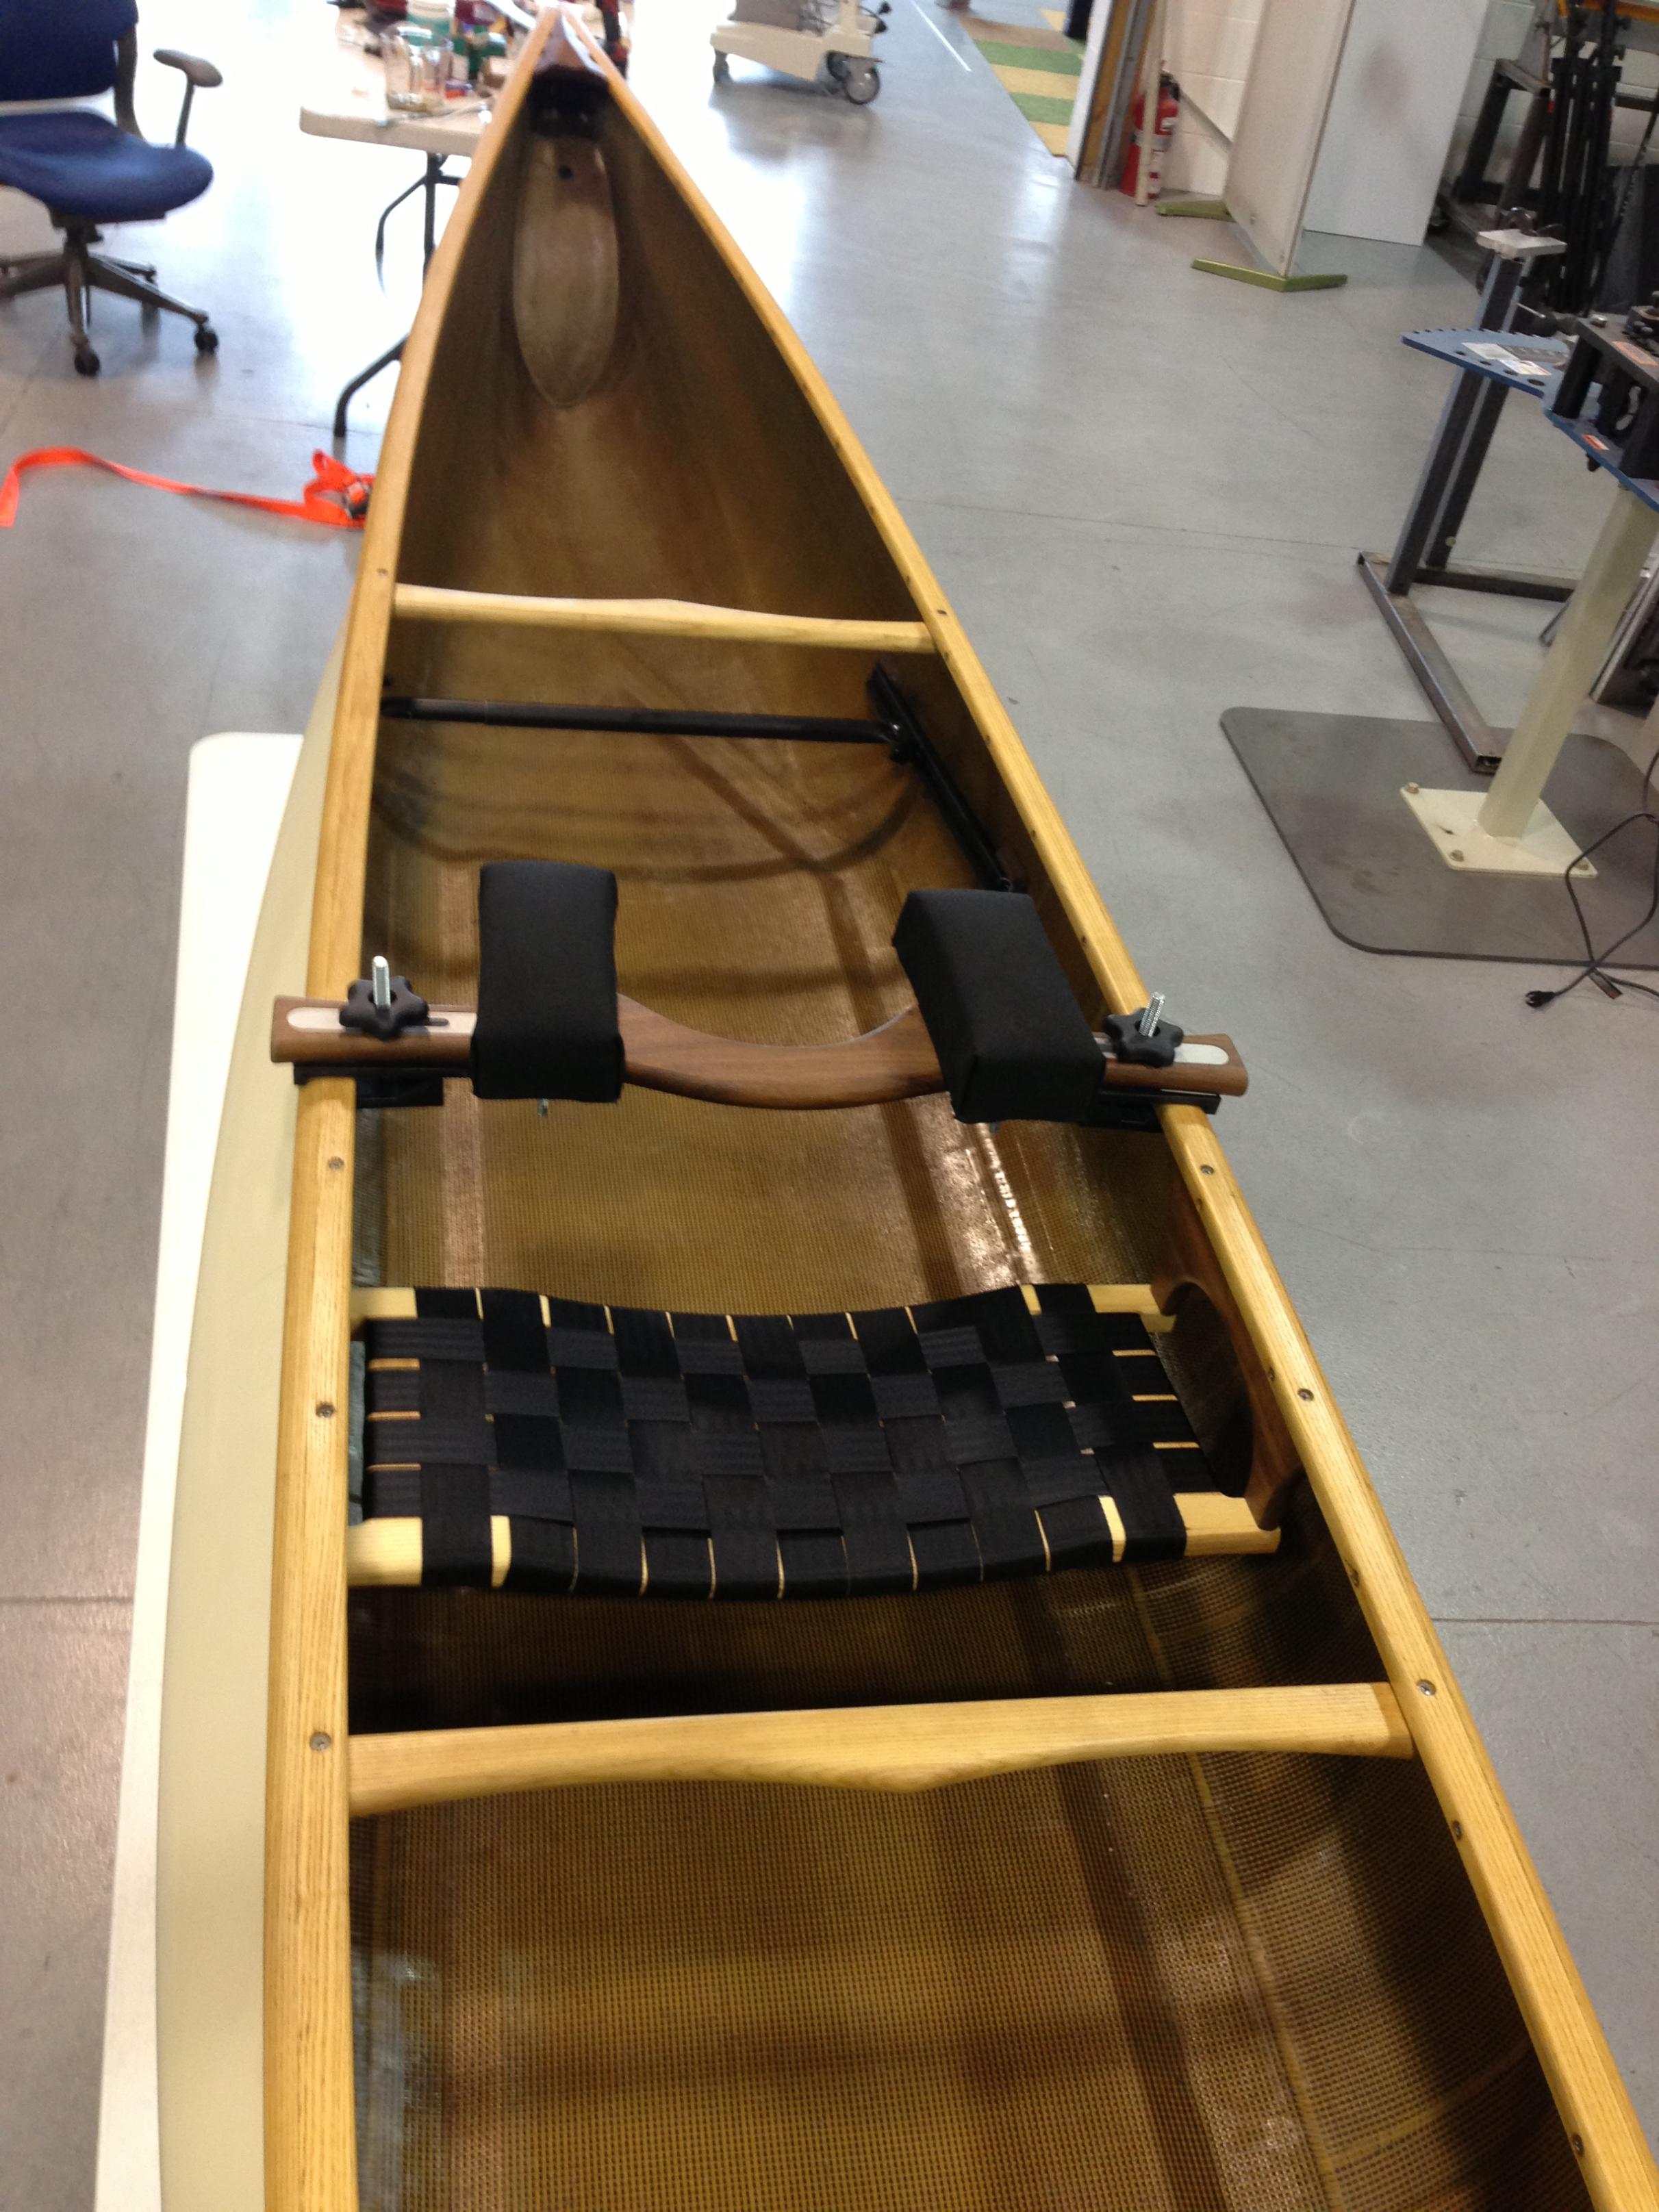
I’m pretty happy with the end result, Black is my “accent color” so it blends in nicely with the other rigging on the boat, the oil rubbed Walnut matches the decks, drops and yoke, the distance is perfect, all the way forward and I can’t tough, all the way back and my knees barley bend. When I get a chance I’m going to machine some slick custom knobs to replace the cheap plastic units that it came with, also might remove the sliding bar completely and make a nicer one out of Carbon fiber, but that will have to come later.
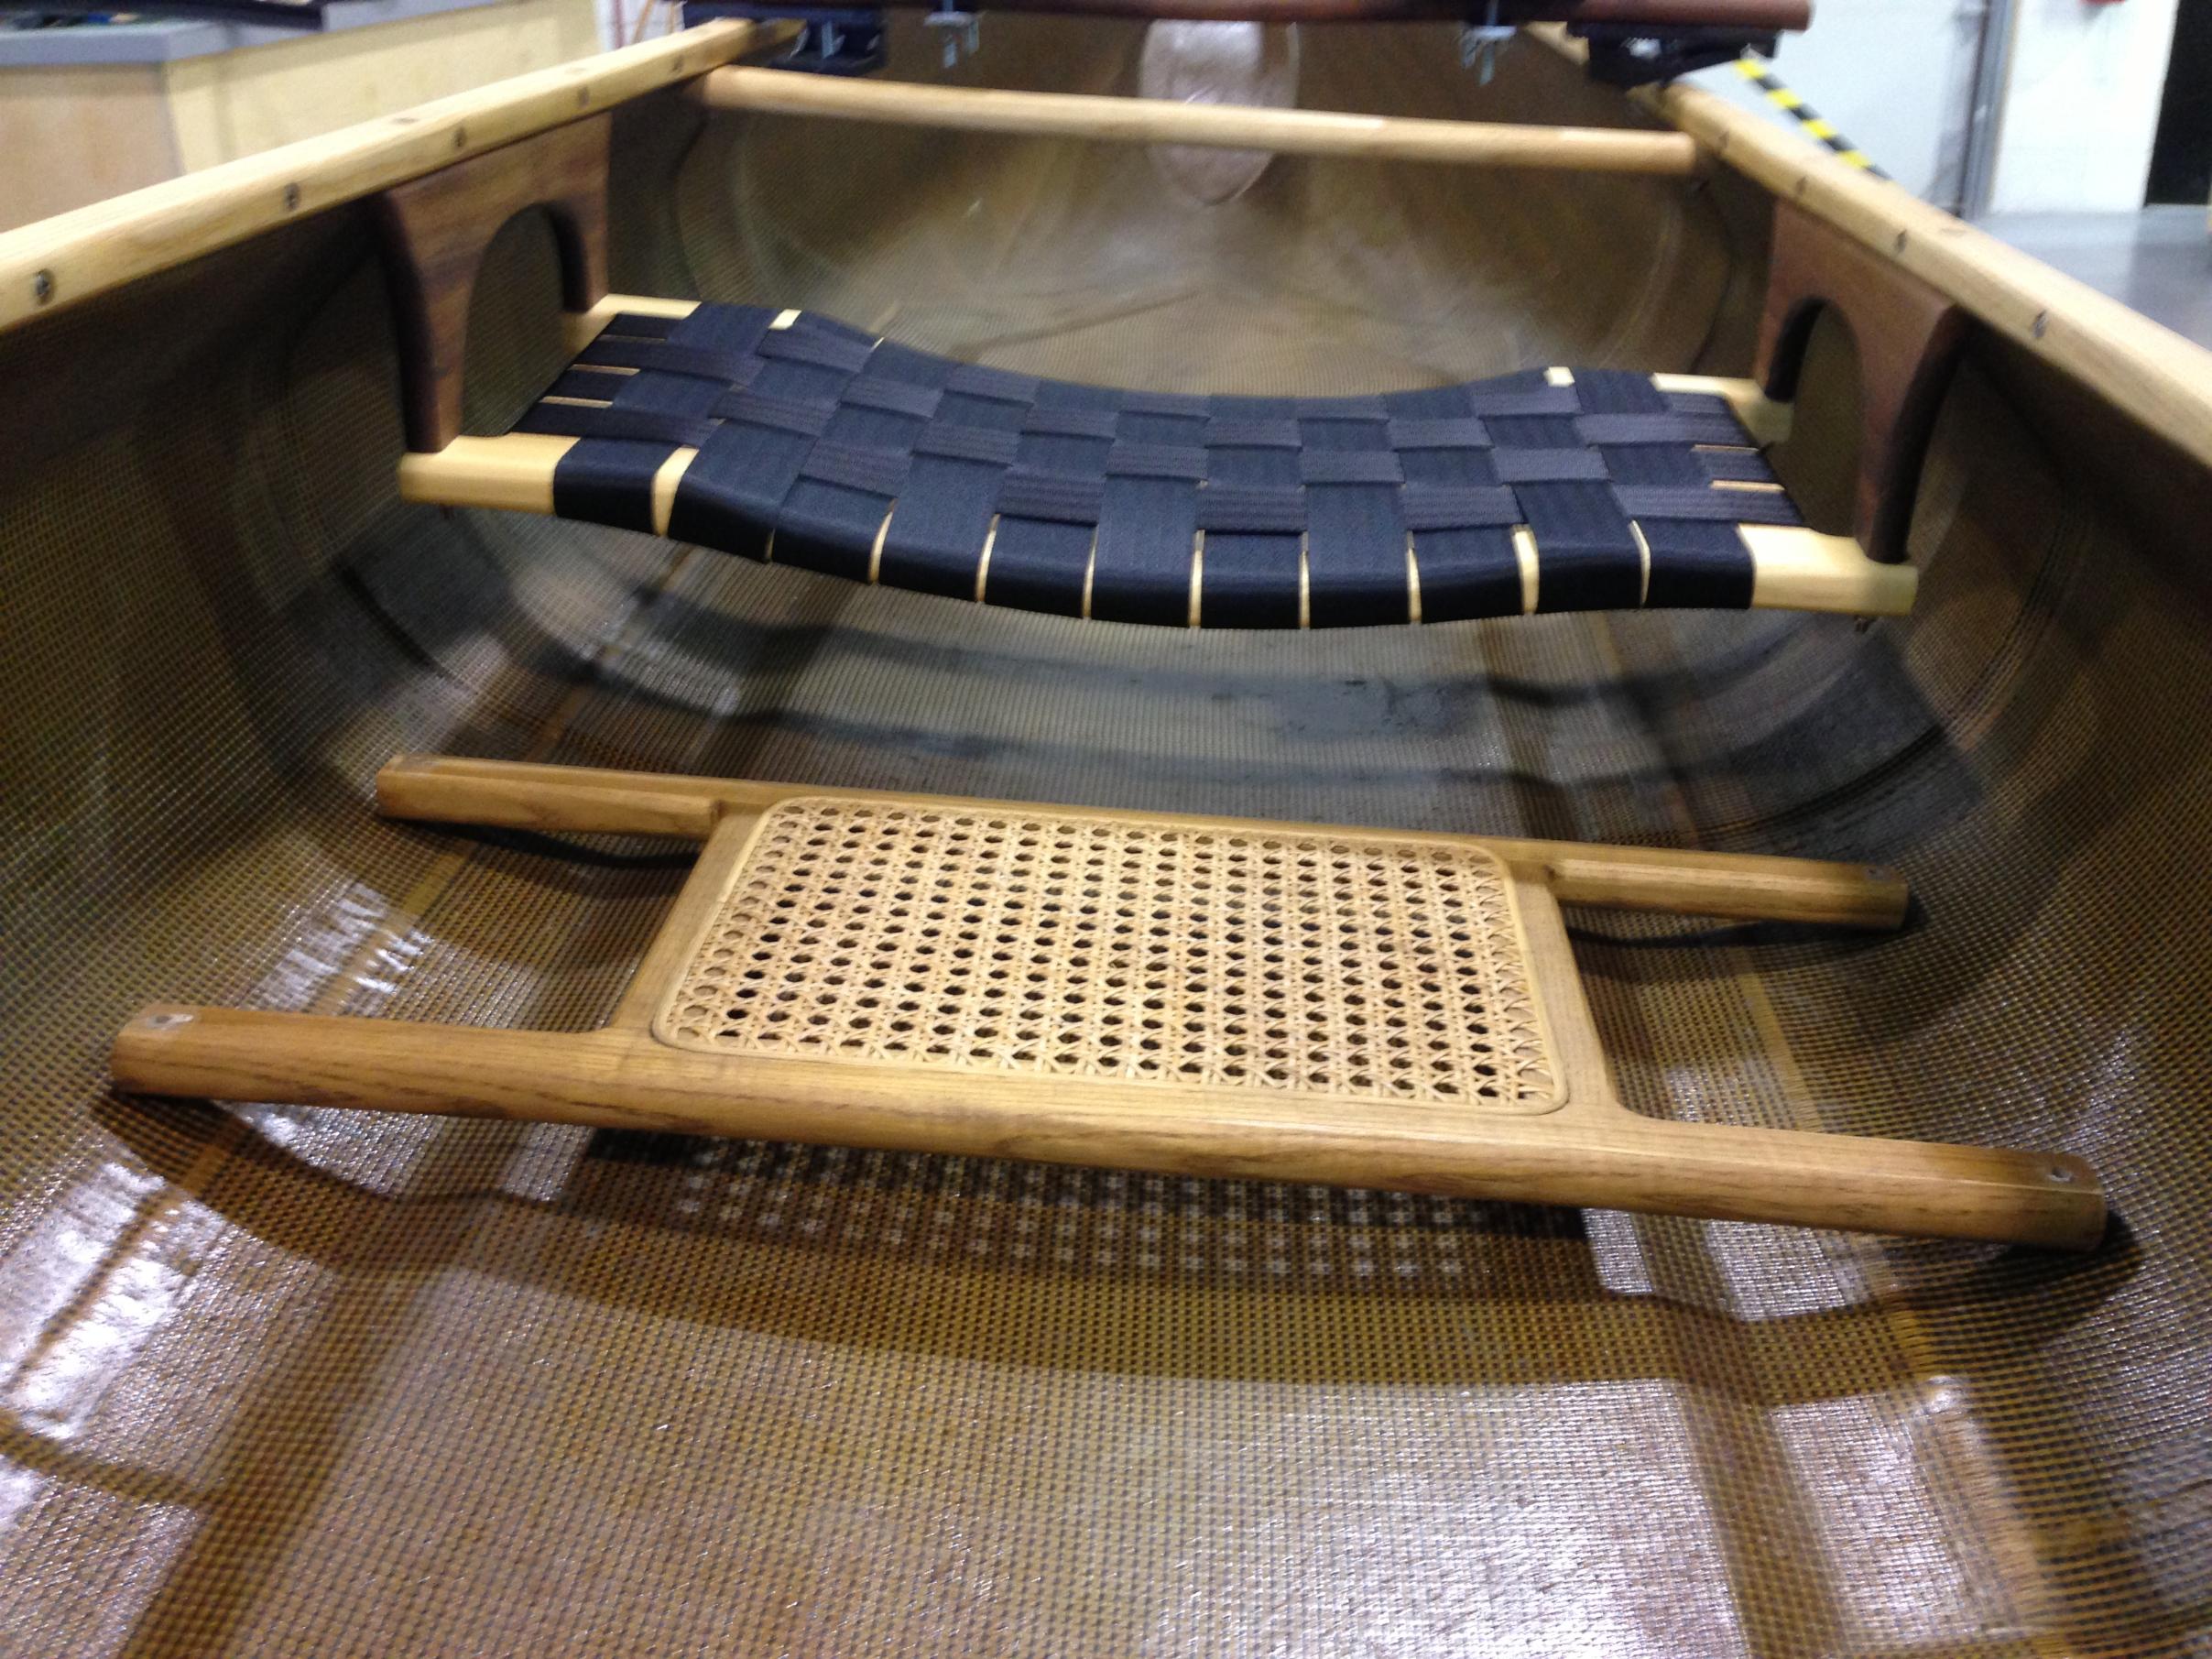
While I had the boat In the shop I buffed the existing wood with steel wool and applied a fresh coat of Watco. I also stopped by Northwest Canoe on Friday and picked up a new seat, had wanted a contoured web seat for a while, ended up going with one of their center seats and cutting it down to make a fat guy extra wide wide, so much more comfortable and I can cuddle up to the gunnels a little better. All in all the boat is looking and feeling pretty good, can’t wait to try it out with the foot brace.


As with just about anything I work on I started with some CAD work, this lets me see what the finished product will look like, what it will weigh, and how strong it will be, plus it provides me with the solid models used for machining later on.


First step was to rip some Walnut blanks, I then roughed out the backsides on the CNC, then used that pocket to locate them on an improvised fixture to finish off the top sides. Machining wood is always a little tricky, it’s not as predictable as other materials, always the chance it could splinter out, so slow feed and fast RPM is the name of the game.

I then turned to the aluminum mounting pads, I added some holes to help the adhesive grab a bit better but also it allows for any air trapped under the pad to exit out the top at the time of bonding, mounts are being machined from 6061-T6 alloy.
Bettween the CAD work, programing, and machining I’m probably at about 15 hours of work at this point, goes allot faster when you are just writing about it lol
This is the point of the project where the technical side ends and the craftsman side picks up. I used tape as my measuring device, its width is very consistent and allows for mirrored placement on both sides of the curved hull. I roughed out approximately where the mounts would go so I could start the tedious task of fitting the individual assemblies to the contour of the hull, this took dozens of trips to the disk sander for each point, but eventually they all fit pretty nicely.
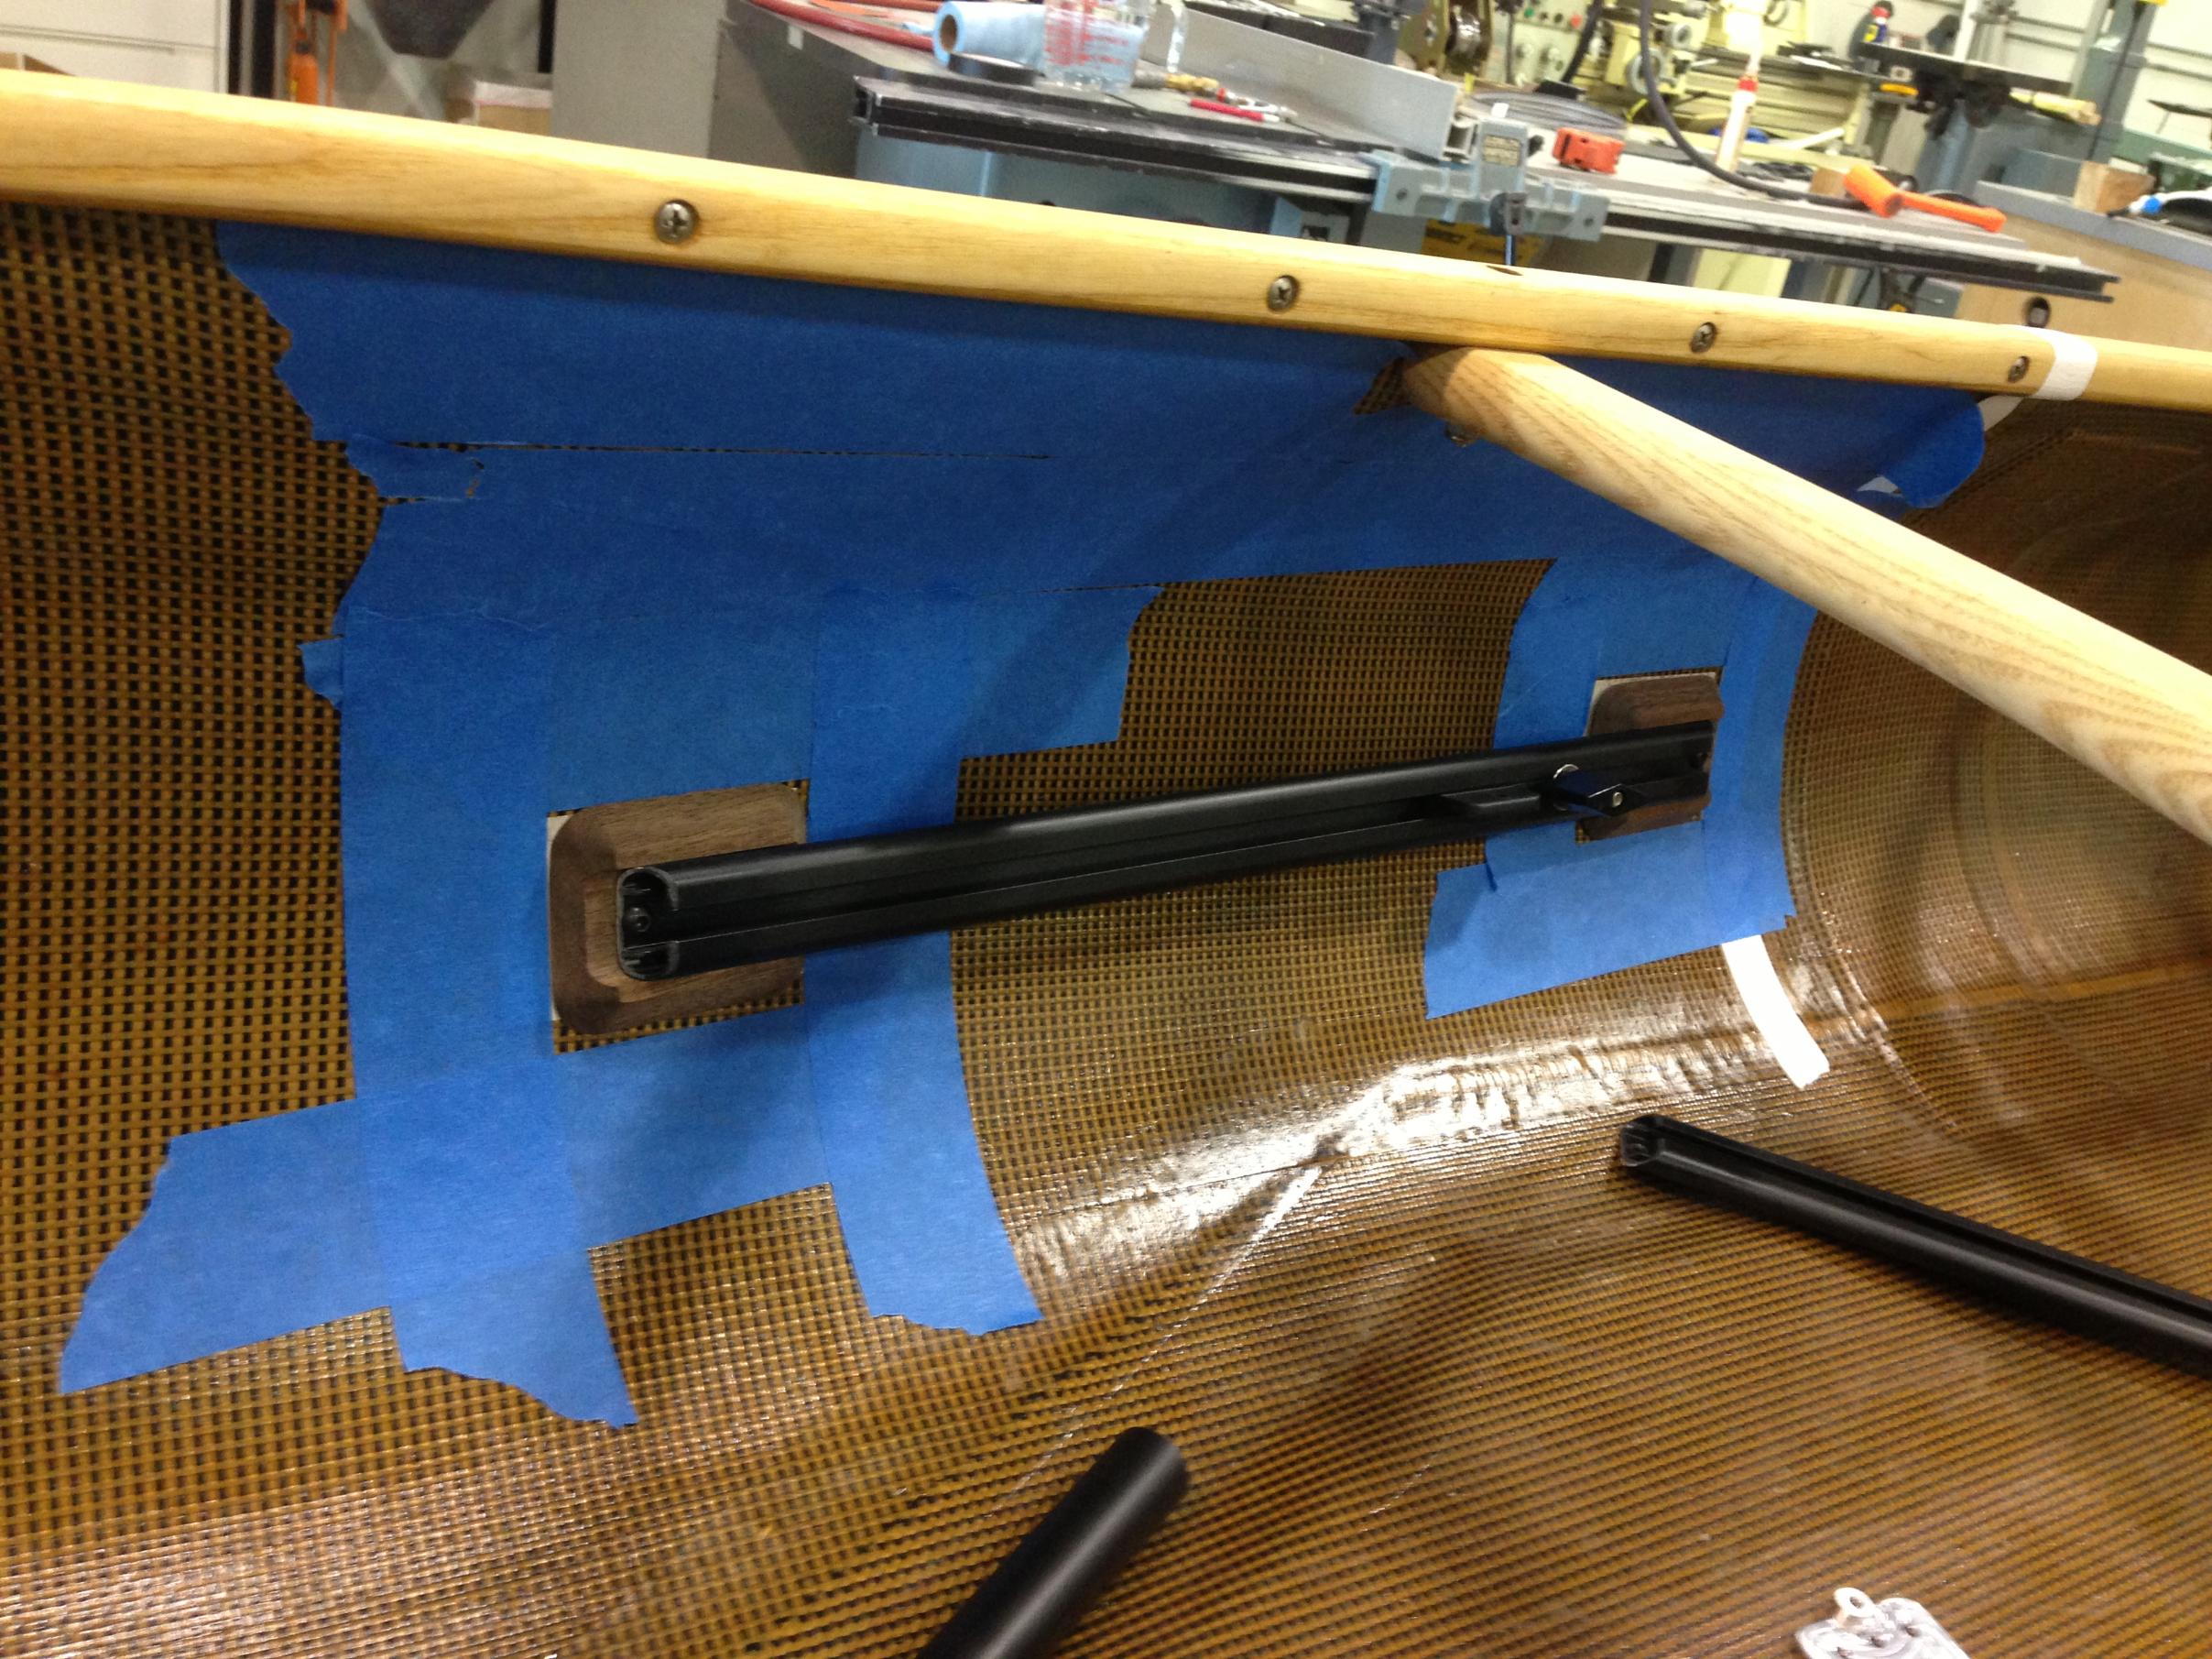
I then prepped the hull for the pads by abrading the surface and cleaning with a solvent, wanted to make sure the glue was getting good contact with the composite and not with the varnish I applied last year. I used a sharp pick to scribe a faint line on the hull where the pads were to go.

The adhesive I picked is a pretty special product made to bond with aluminum and composites, it’s in the same family as Plexus adhesive commonly used is composite boat building, same company, just a formula tweak for the metal. You must use a special gun applicator and 10:1 ratio plunger when working with this ITW Plexus/Devcon 14366. The specs are somewhere around 1000lbs per sq/in of contact, each mounting point is 1.8 sq inches so I theoretically have somewhere over 7000lbs of glue force, of course that’s in perfect conditions, I know this isn’t that but I’m still fairly confident the hull would tear apart before the glue would ever fail. The 14366 has a 4-5 pot life, so by the time I glued all 4 points I the first point was already gelling up and I could scrape the excess off around the perimeter and top. I turned off the lights and let this cure for a day. The Plexus family of adhesives are really cool methacrylate’s, they are so nasty they actually dissolve some surface impurities on contact, so having the parts 100% perfectly clean isn’t a huge must, thus these products are used allot in production.


I took the wood covers and immersed them in warm Watco (a weight was put on top to keep them from floating), then placed them in a vacuum chamber, I figure the more oil I can force into these the better, the nice thing is this design allows for the removal of the wood at anytime, so I can maintain or replace whenever.

The rails are bolted on using 10-32 Button head cap screws, stainless with a black oxide coating. While mocking it up I noticed the Wenonah assembly had metal washers sliding on the black anodized rails, over time this would have worn the finish down, so I stepped over to the lathe and pumped out a couple of nice thick black acetal (Delrin) washers. The last bit of work is tweaking the angle on the Wenonah bars to match the angle of the rails and allow the assembly to move freely.

I’m pretty happy with the end result, Black is my “accent color” so it blends in nicely with the other rigging on the boat, the oil rubbed Walnut matches the decks, drops and yoke, the distance is perfect, all the way forward and I can’t tough, all the way back and my knees barley bend. When I get a chance I’m going to machine some slick custom knobs to replace the cheap plastic units that it came with, also might remove the sliding bar completely and make a nicer one out of Carbon fiber, but that will have to come later.

While I had the boat In the shop I buffed the existing wood with steel wool and applied a fresh coat of Watco. I also stopped by Northwest Canoe on Friday and picked up a new seat, had wanted a contoured web seat for a while, ended up going with one of their center seats and cutting it down to make a fat guy extra wide wide, so much more comfortable and I can cuddle up to the gunnels a little better. All in all the boat is looking and feeling pretty good, can’t wait to try it out with the foot brace.
He leads me beside quiet waters, he restores my soul. Psalm 23:2/3

09/03/2013 12:17PM
As always, I am amazed at what some of you can do with the tools and skills. This is simply awesome.
Now of course being a new owner of a Magic and wanting a decent yoke and foot brace system I will implore as others, any chance you might make some more and give us a chance to buy them?
Now of course being a new owner of a Magic and wanting a decent yoke and foot brace system I will implore as others, any chance you might make some more and give us a chance to buy them?
")

09/04/2013 01:36AM
quote kanoes: "william? that new seat fit the drops ok? looks like it but just want confirmation."
I have one of the NW canoe contoured seats in my Magic. Fits the seat drops just fine. Gives you a little more seat drop than the stock, straight seat.
09/04/2013 08:09AM
Sweet! In another life, I would have your design and craftsmanship abilities. Am I reading it right that you are grinding down the aluminum to fit the contours of the hull with a disk sander?
For some time now, I have been planning a relatively crude footbrace installation with the Wenonah footbrace and stainless steel glue on studs from Duckworks: http://www.duckworksbbs.com/ProductDetails.asp?ProductCode=sd%2D900110
My plan is to hacksaw down the bolt part a bit as it is a bit too long, fiberglass the studs onto the hull with gflex, drill two holes in a wood bar, thread the bolt part through the wood and then through the brace channel at the ends, and attach the nuts.
My fiberglassing skills are limited but the wood should cover the worst of it. I have a quality, coarse file to contour the wood to the hull, but I might end up having to compress a thin layer of minicell between the wood and hull for a tight, stable fit.
I don’t know CAD from DAC, so the technical side of this is nil/all in my head. It’s all the “craftsmanship” side,” ha. I like my plan because it is within my range of abilities (hopefully), and the whole thing will be removable and adjustable for future maintenance or change of usage. If this works well enough, I am considering using the glue on studs to make rails for a sliding, adjustable solo bench seat.
I’ve butchered and/or devalued many a boat with similar brainstorms, so I am over it. Canoes are made to be used and customized. My first efforts at glassing in nylon straps for air bags are insanely large, lumpy, and downright ugly, but they work.
But I would probably spring for a more elegant, prefab solution like yours. Cheers and thanks for sharing.
P.S. DOH, I never thought to use tape as a measuring device for mirrored placement on both sides of the curved hull. Of course!
09/04/2013 09:36AM
quote bhouse46: "
Now of course being a new owner of a Magic and wanting a decent yoke and foot brace system I will implore as others, any chance you might make some more and give us a chance to buy them?"
Thanks for the kind words! As with most of the over complicated terribly inefficient stuff I design, it just wouldn't be feasible to make any to sell, plus the fitting to the hull would change and have to be done by the end user, which was one of the harder parts of the project, its destine to be a one and only. I would however highly recommend the Wenonah foot brace kit, its a great product, then just rip some strips of wood to glue into the hull behind the aluminum strips, I think this is how Wenonah does it on their nicer bats like the Advantage, pretty sure Butthead's Advantage has no rivets through the hull like most outfitter class Wenonahs do.
quote OldScout48: " I always get a laugh when you make a point and say something like the hull will come apart before the glue lets loose.
"
I'm really hoping that to be the case!
quote KevinL: "Once again real cool job William. You guys and posting in CAD. Now if you can only show me how to put knurrling on without going into photoshop in SolidWorks.
Keep up the good work and hope the little one is doing good."
I once knew how to do it, but I'm pretty rusty when it comes to advanced finishes, I poked around and couldn't get it to work lol So I'm right with you! I'll ask some of the guys that do more stuff for presentations, I just make their stuff.
Little guy is doing great, but he severely limits my shop time, small chunks for now, can't get away with full weekend days or long nights, wife would kill me if I made her fly solo all the time.
quote RainGearRight: "Looks real good William, hope it didn't take too much time away from FF draft prep!"
1st pick overall and I still screwed it up, really hoping Wes Welker clicks with manning, if not, I'm done for, AP or no AP.
quote Hanz: "
It's fun fitting things to things we enjoy, isn't it?"
It sure is, for me I spend my days at work trying to make things as simple as possible, as cheap as possible, it kind of nice to go the other way in my free time..
quote DanCooke: "Well thought out an executed. No gaps in what you wanted or how you got there. I will have to see this to appreciate all the thought and work that went into this."
Thanks Dan, its kind of funny, once it was all done it really doesn't look like much, couple of wood chunks glued to the hull, nobody would pass by and assume some guy spent 20-25 hours on that, complete labor of love, but it is fun sometimes!
quote kanoes: "william? that new seat fit the drops ok? looks like it but just want confirmation."
It fit "OK" not as perfect as the stocker, I want to say it was longer front to back than the stocker, so the holes had to favor the inside edges of the frame slightly, the wood was a little thicker and more robust. I'm hoping to try and get it to look a bit better but it may not work for the long run, I'll try and grab some pics when I take it down next time, my guess is you wouldn't be happy with the fit,I give it a C+ on fit, A+ on comfort.
quote Dave1111: "Sweet! In another life, I would have your design and craftsmanship abilities. Am I reading it right that you are grinding down the aluminum to fit the contours of the hull with a disk sander?
For some time now, I have been planning a relatively crude footbrace installation with the Wenonah footbrace and stainless steel glue on studs from Duckworks: http://www.duckworksbbs.com/ProductDetails.asp?ProductCode=sd%2D900110
My plan is to hacksaw down the bolt part a bit as it is a bit too long, fiberglass the studs onto the hull with gflex, drill two holes in a wood bar, thread the bolt part through the wood and then through the brace channel at the ends, and attach the nuts.
My fiberglassing skills are limited but the wood should cover the worst of it. I have a quality, coarse file to contour the wood to the hull, but I might end up having to compress a thin layer of minicell between the wood and hull for a tight, stable fit.
I don’t know CAD from DAC, so the technical side of this is nil/all in my head. It’s all the “craftsmanship” side,” ha. I like my plan because it is within my range of abilities (hopefully), and the whole thing will be removable and adjustable for future maintenance or change of usage. If this works well enough, I am considering using the glue on studs to make rails for a sliding, adjustable solo bench seat.
I’ve butchered and/or devalued many a boat with similar brainstorms, so I am over it. Canoes are made to be used and customized. My first efforts at glassing in nylon straps for air bags are insanely large, lumpy, and downright ugly, but they work.
But I would probably spring for a more elegant, prefab solution like yours. Cheers and thanks for sharing.
P.S. DOH, I never thought to use tape as a measuring device for mirrored placement on both sides of the curved hull. Of course!
"
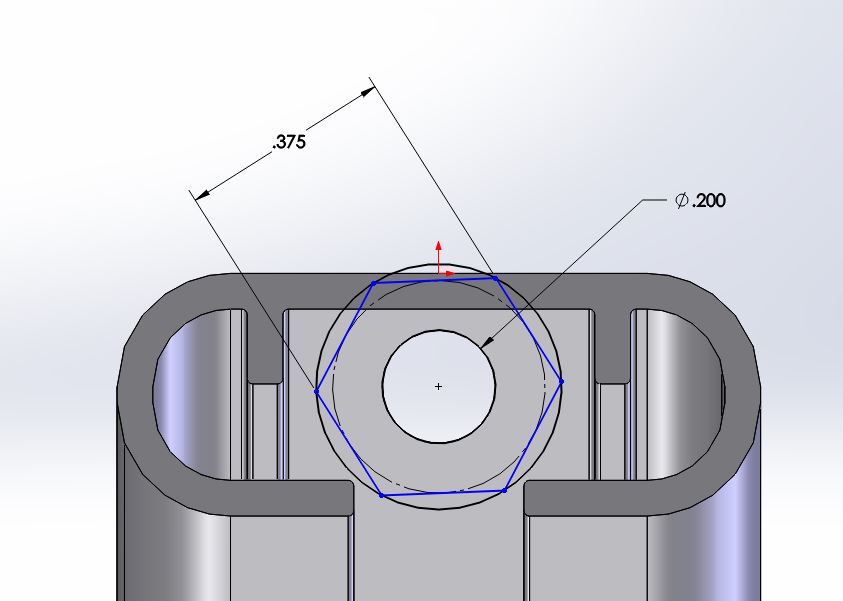
We are thinking on the same page my friend, that was one of the first things I looked at and was part of the inspiration for what I came up with, I departed from that path because.... I'm crazy lol I would suggest buying the studs from McMaster Carr, they have all sorts of screw sizes and lengths, I would recommend the 10-32 size if you are planning to use the Wenonah brace, the holes on there are sized for that already, going up to a 1/4-20 in that link you sent might get a bit tricky, drilling the hole bigger wouldn't be an issue, but it would result in a very thin area at the end opf the rail, the .2 holes in there are pretty close to the end as it is. There are also some stiffening ribs on the back side of the aluminum extrusion and I don't think it would allow a 1/4-20 nut to fit, but a 10-32 would fit, so its a no brainer in my book, order the 10-32 studs, you have to buy in packs of 10, the unit cost is much less, but it may cost you a few bucks more or less depending on the length, the 1" long versions look to be $8 for a 10 pack, could always sell the extras on here in the for sale section. You will have to form the flat part of the base to match the curve of the hull, but that should be doable, could always put a nice looking fender washer (McMaster Carr Part # 90313A156) over the stud to hide the glued portion, at any rate I think you are on the right track! I would consider using an adhesive like I used instead of the fabric lay up, might look nicer, might be a little more money upfront, the gun is $22, the plunger is a few of bucks, and the adhesive is $16 or so, but its a standard gun for this style adhesive and once you use it you will likely use it again, the plastic versions are equally strong, allows for a very tidy application.
Perforated Base Studs
McMaster Carr Part #'s
Gun 74695A71
1:10 Plunger 74695A45
14366 Metal Adhesive 66215A52
Mixing Tip 74695A12
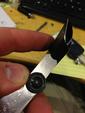
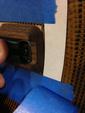
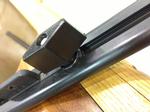
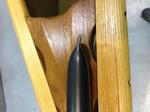
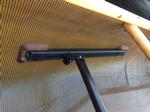
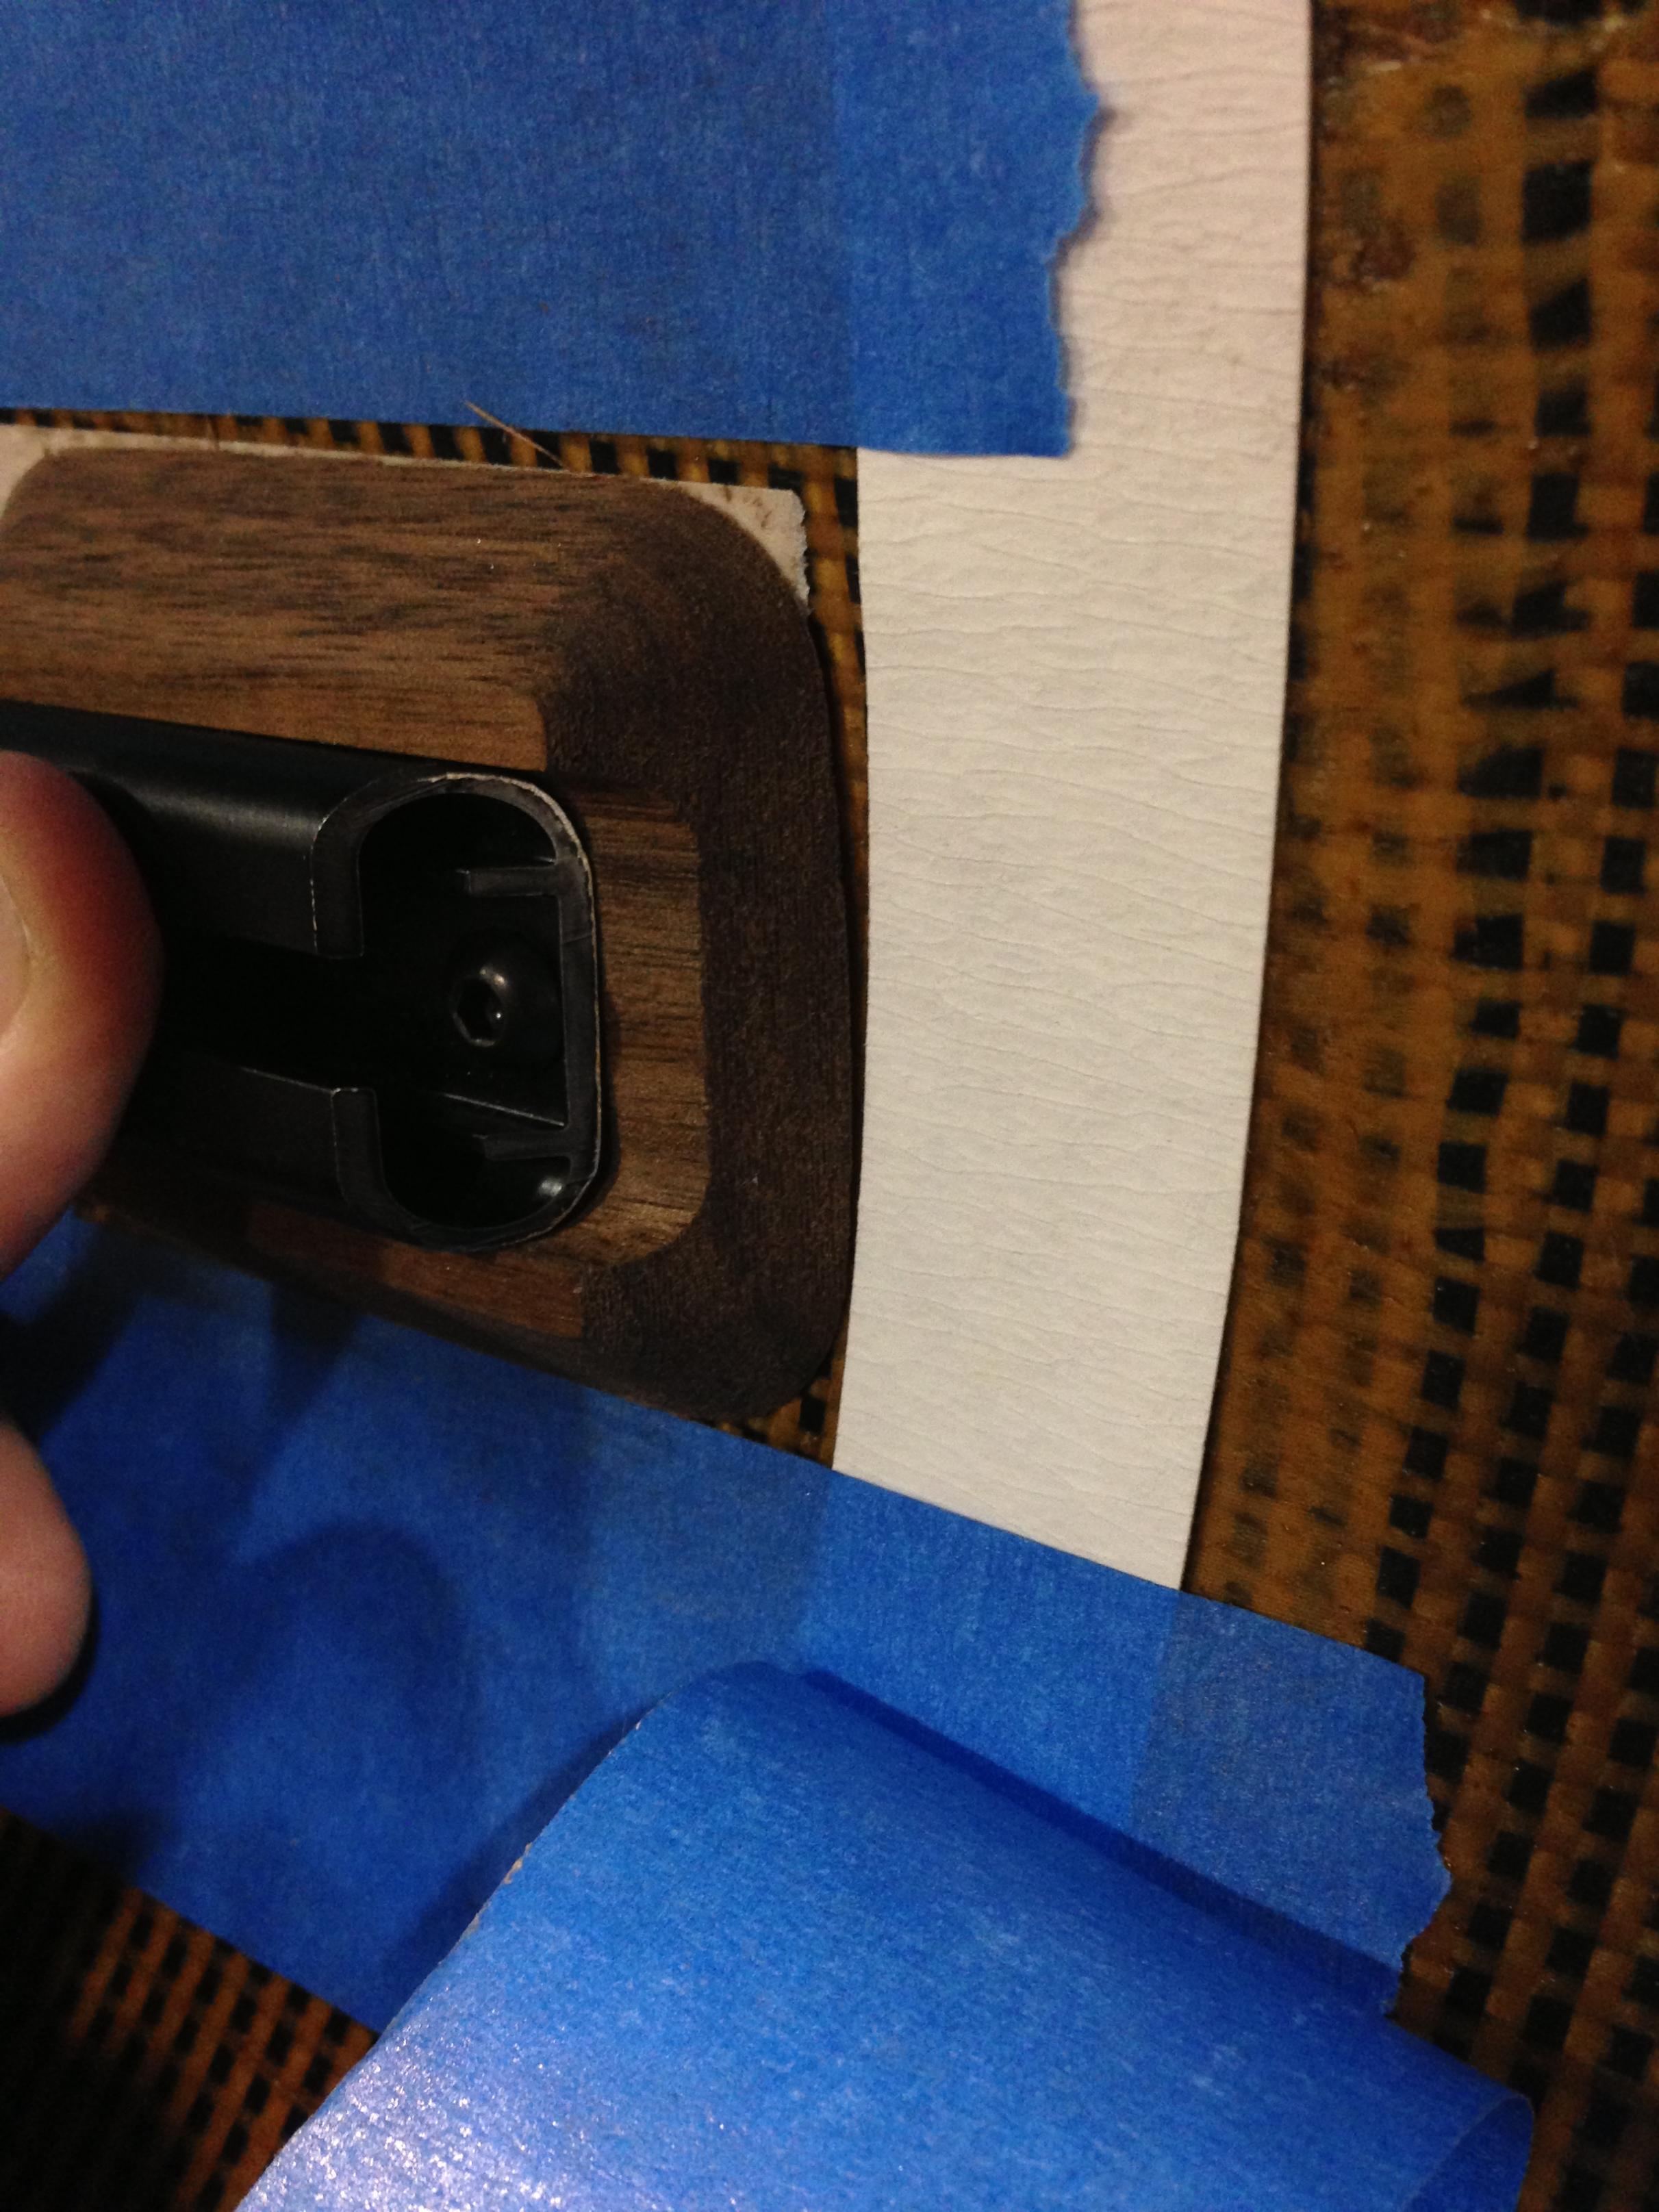
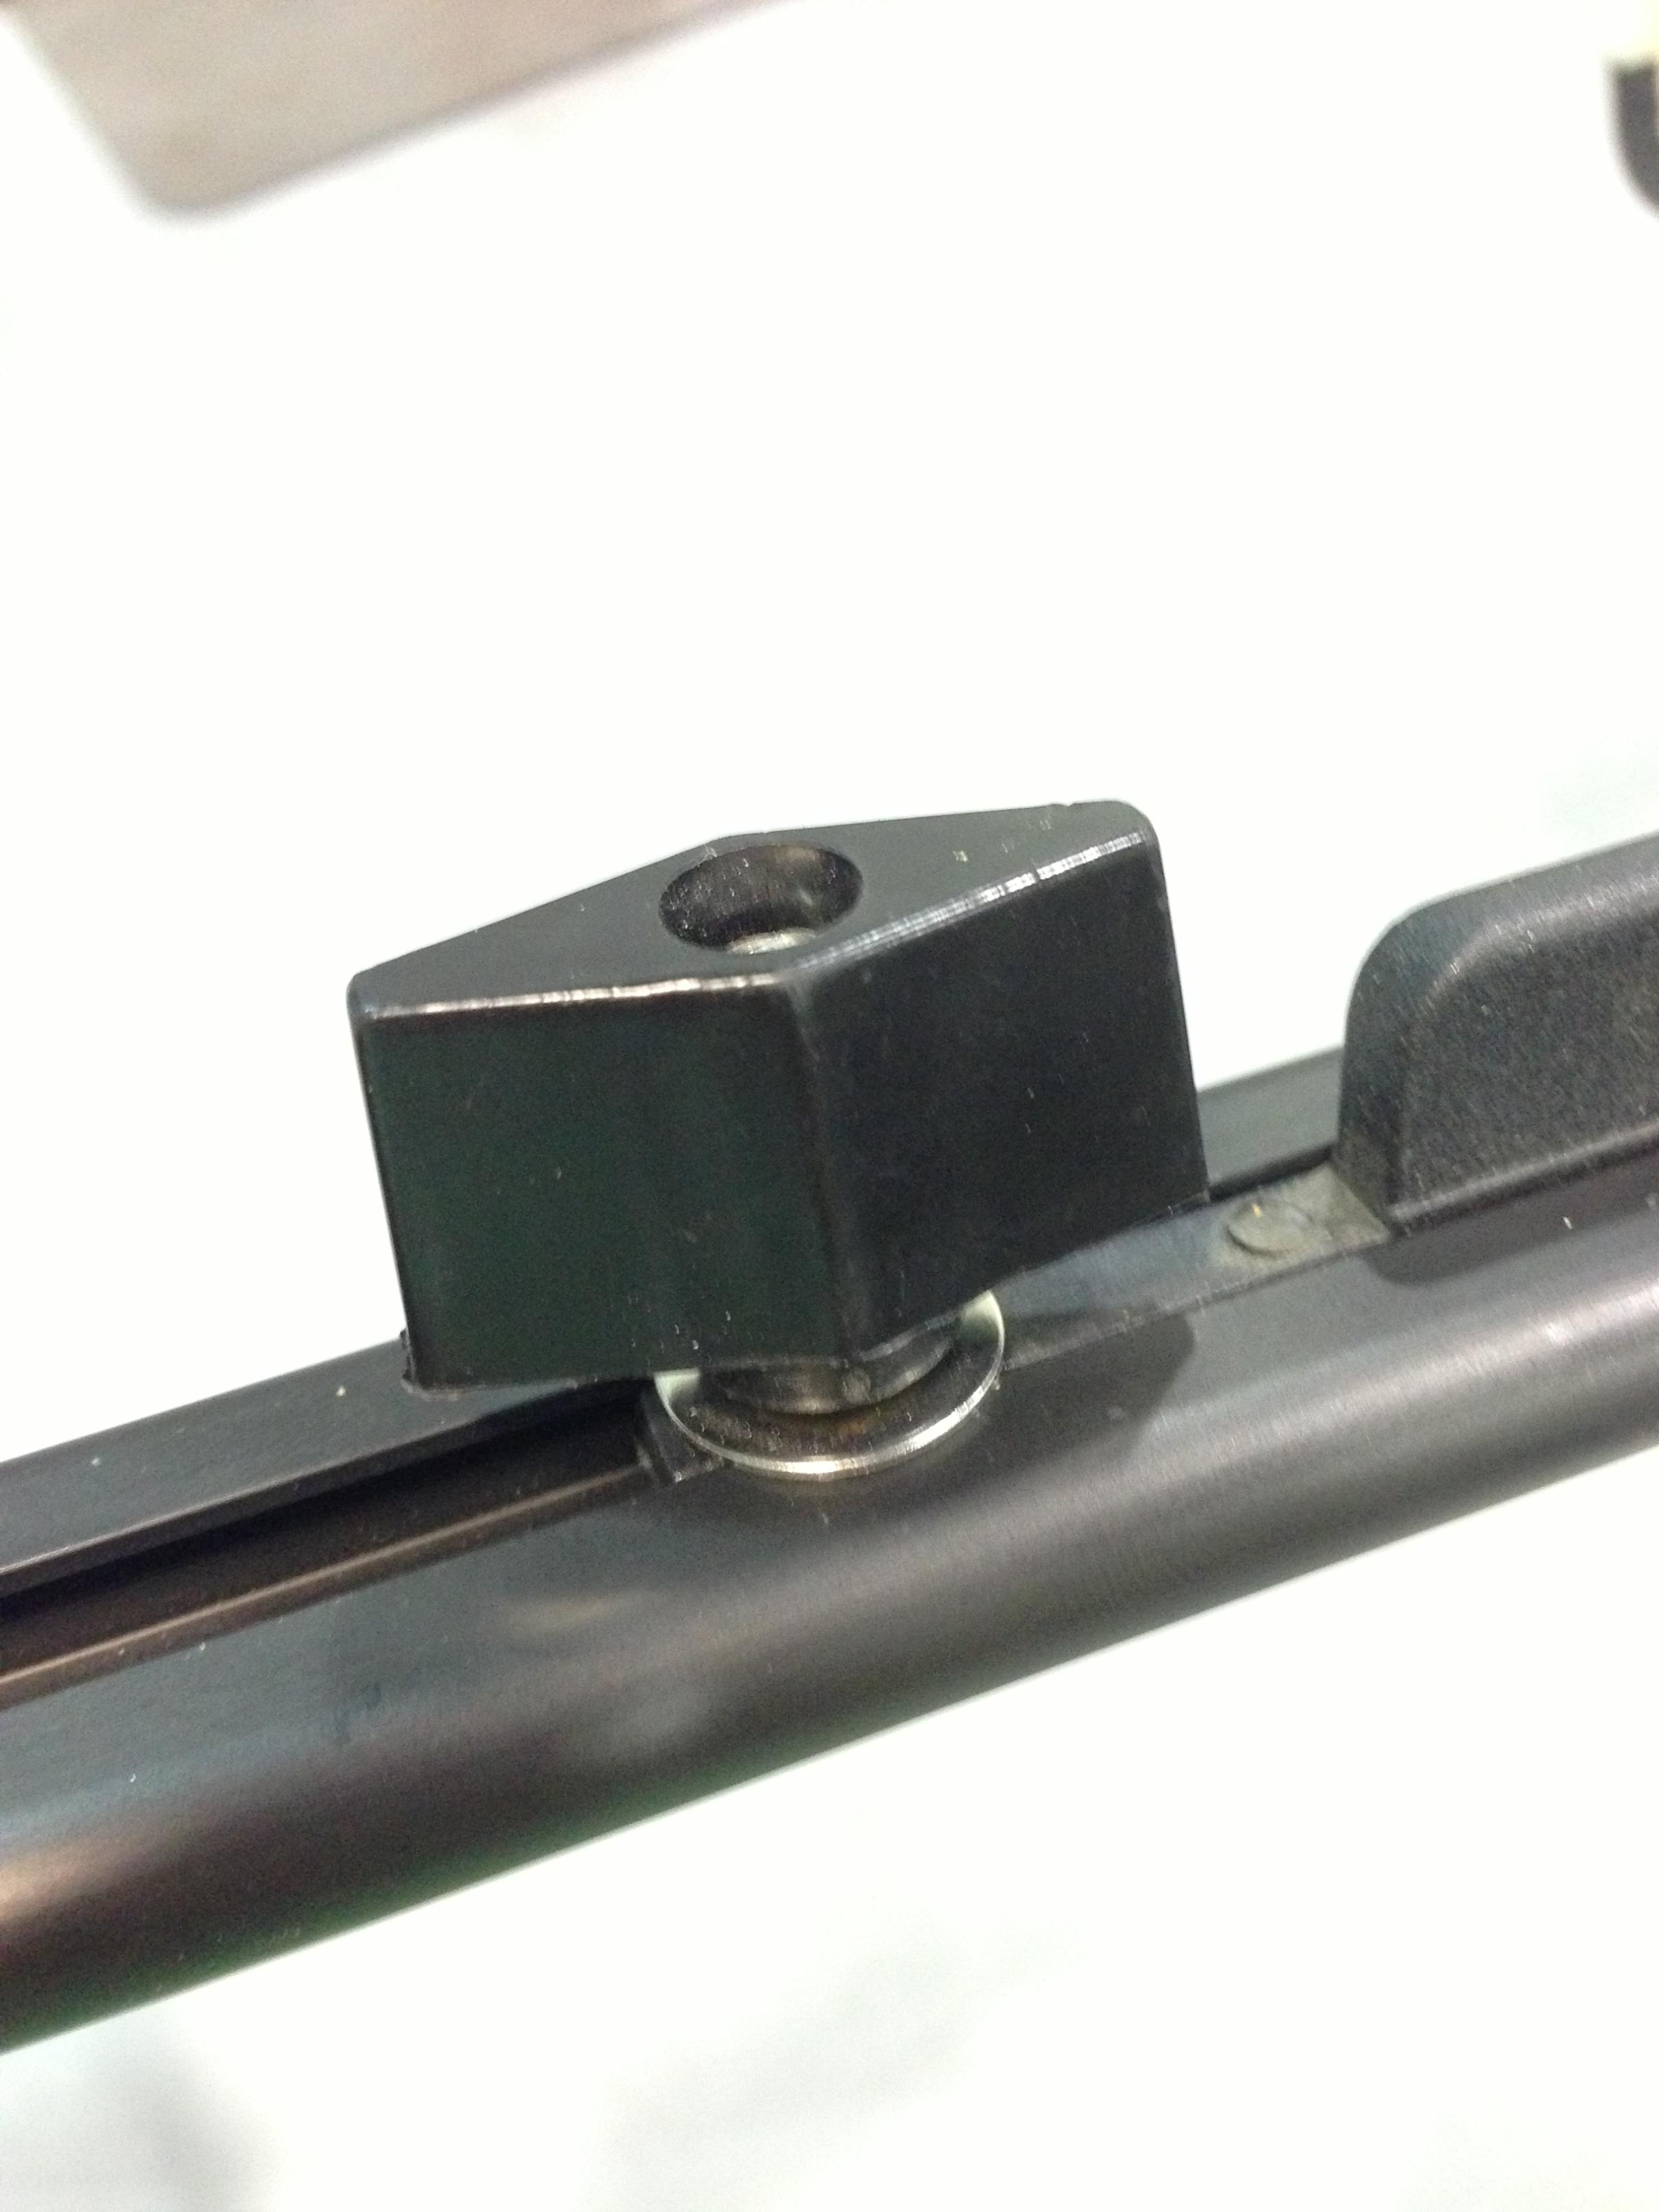
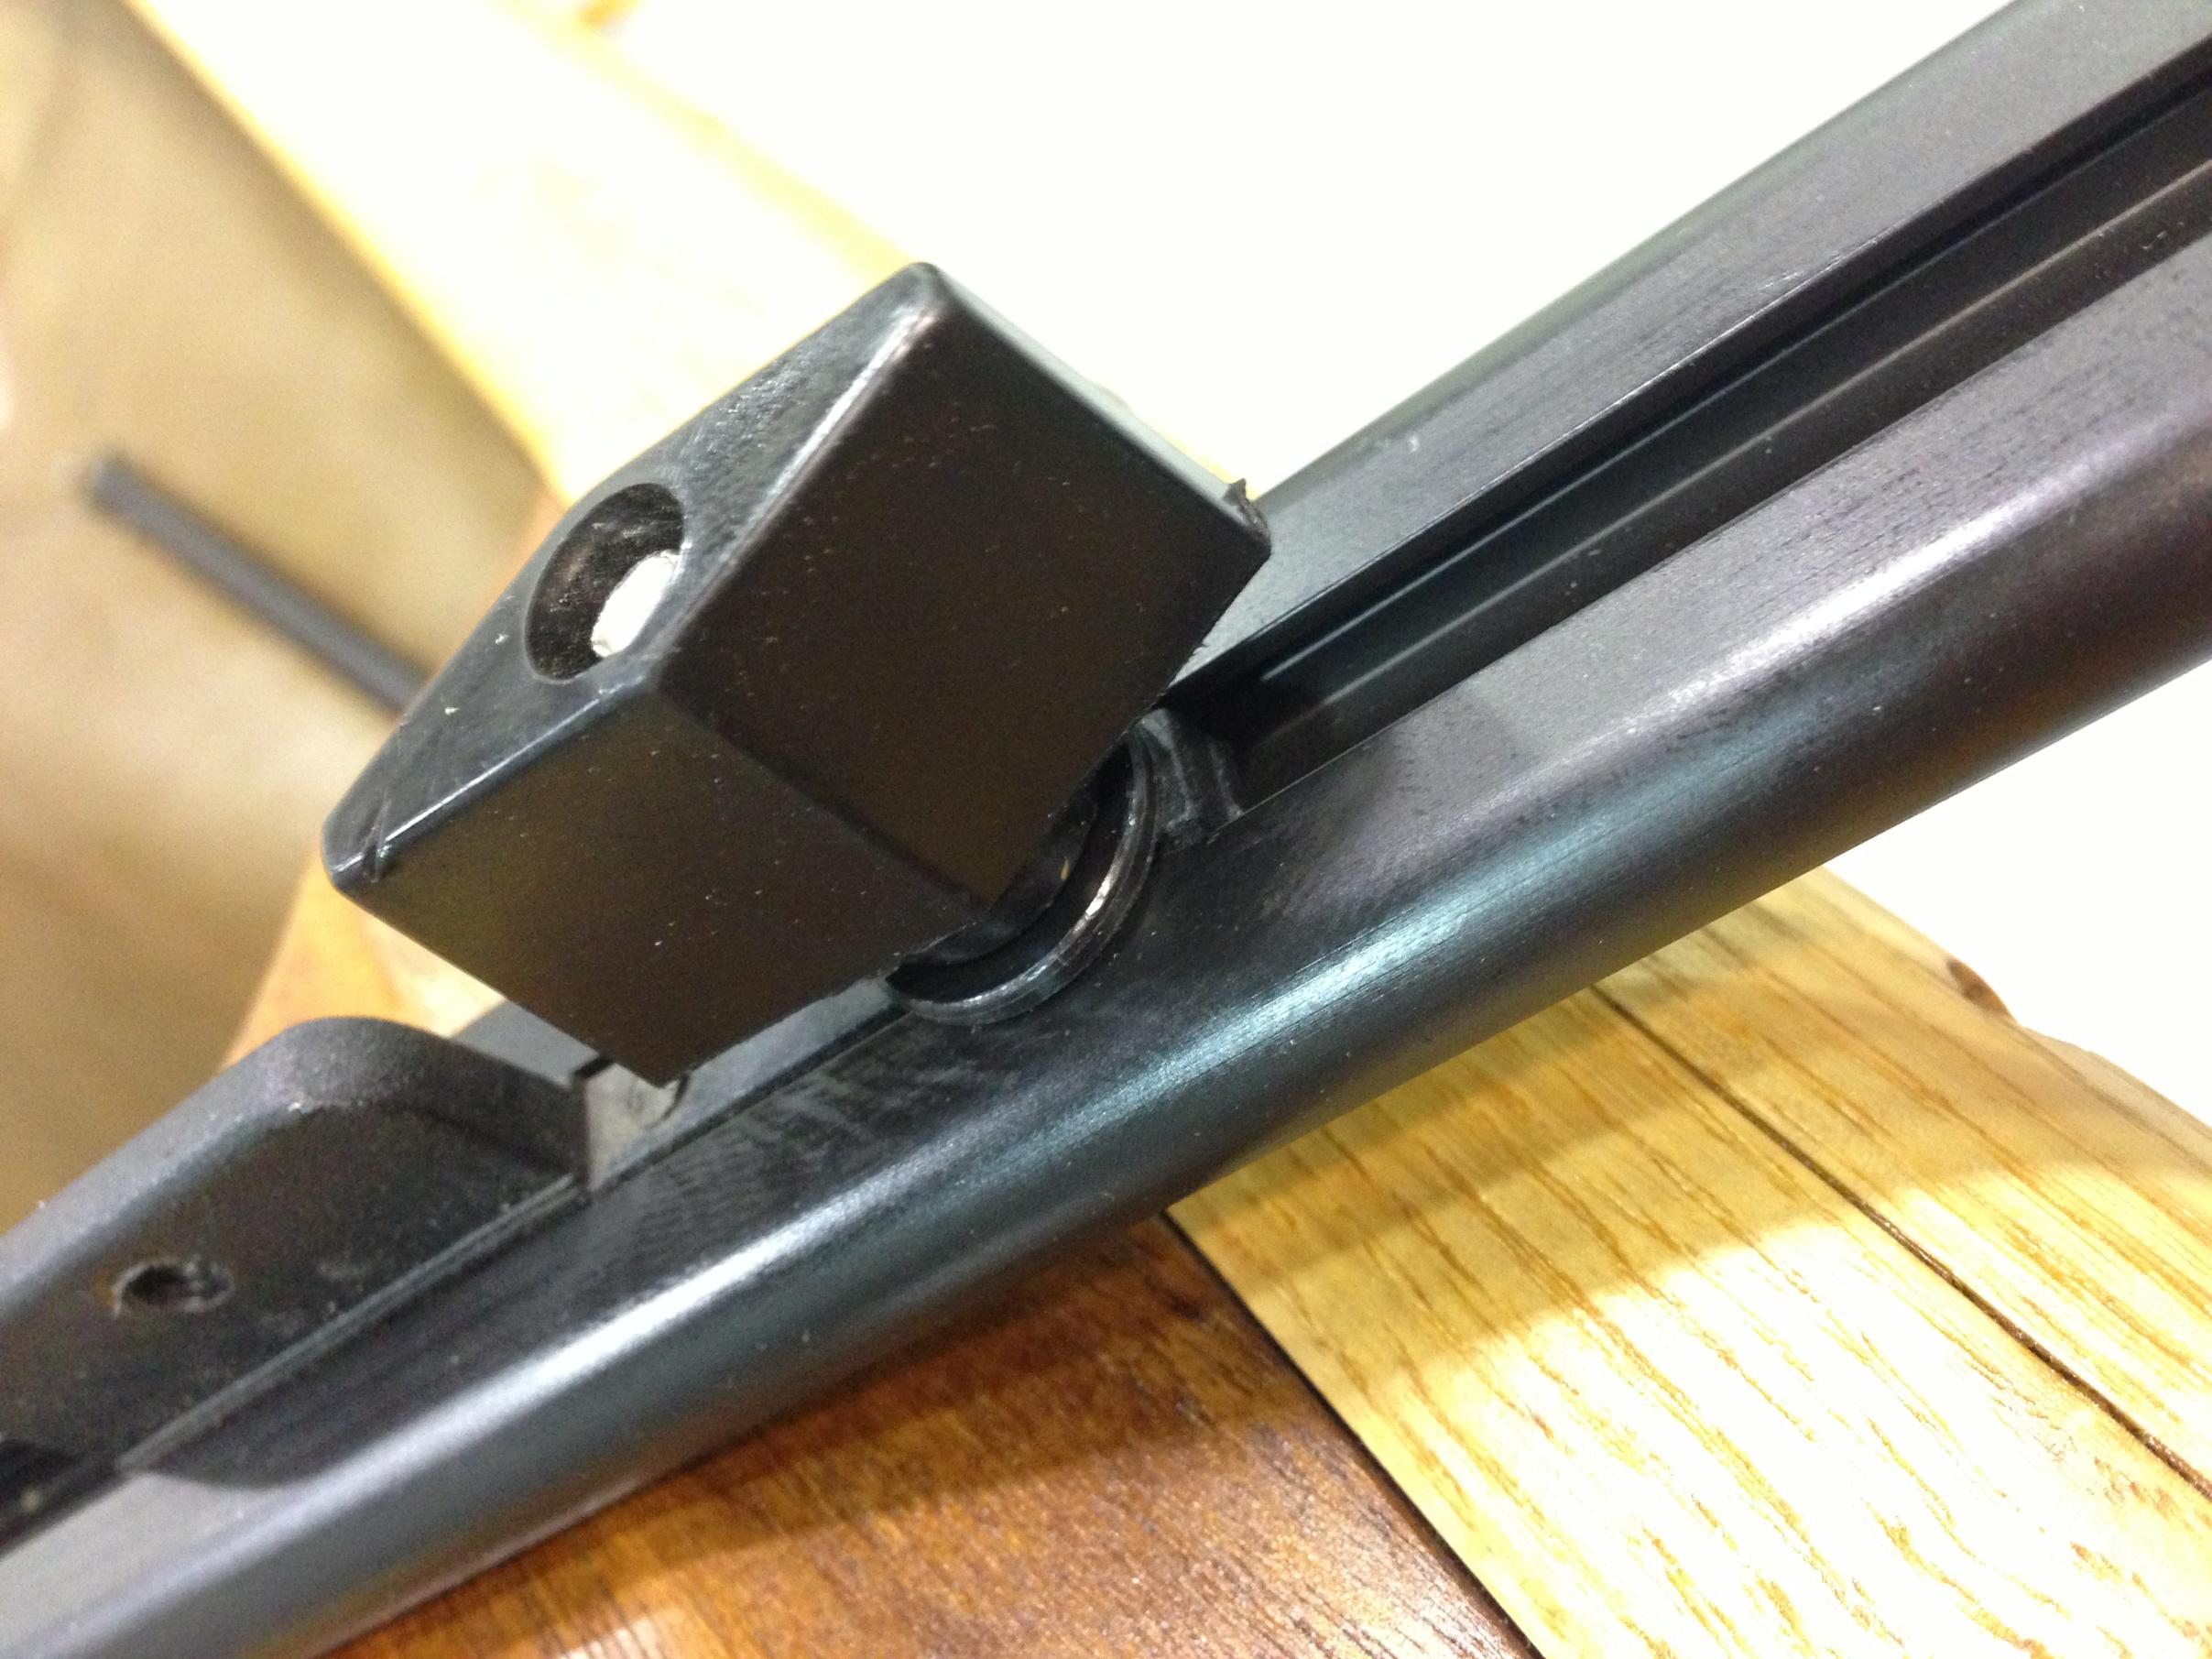
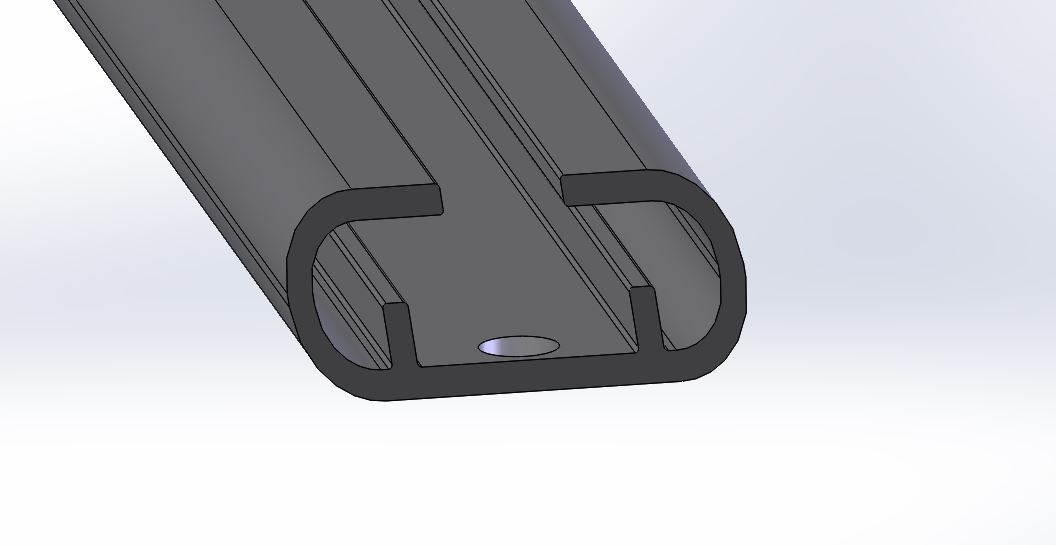
Pics below show the Wenonah Alum foot brace profile, as you can see, a 10-32 hex nut is about all it will take without some pretty heavy modifications.

He leads me beside quiet waters, he restores my soul. Psalm 23:2/3
09/04/2013 04:23PM
Thank you, William, that is super helpful. I did not know that Mac– Car carried those, or that they were available with various diameter and length bolts. Yep, 10-32 is a no-brainer.
As to the plexus, please, if you would, are you suggesting that I just glue the flat base of the stud to the hull with plexus, and overlay with a (bent) fender washer? That would be much easier and cleaner than fiberglassing it on. On my own, I would have thought it probably not up to the shearing force of my 220 lbs. As you undoubtedly know, the base of the stud is very thin metal, and it appears to have much less surface area than your aluminum plates. Then again, I have a tendency toward overbuilding, for good or ill. Any further thoughts would be appreciated.
Your kind help is spurring me to get this done and done right. I plan to take pictures and post my experience, as a pay-it-forward for anyone else looking to install a footbrace in this way. Cheers, Dave

Subscribe to Thread
Become a member of the bwca.com community to subscribe to thread and get email updates when new posts are added. Sign up Here
Community Links
 Search BWCA.com
 Donate
 Featured Sponsor