|
 Boundary Waters Quetico ForumGear ForumIrwin saw sheath
|
 Forum Sponsor

Author
Text
")


03/08/2021 09:30AM
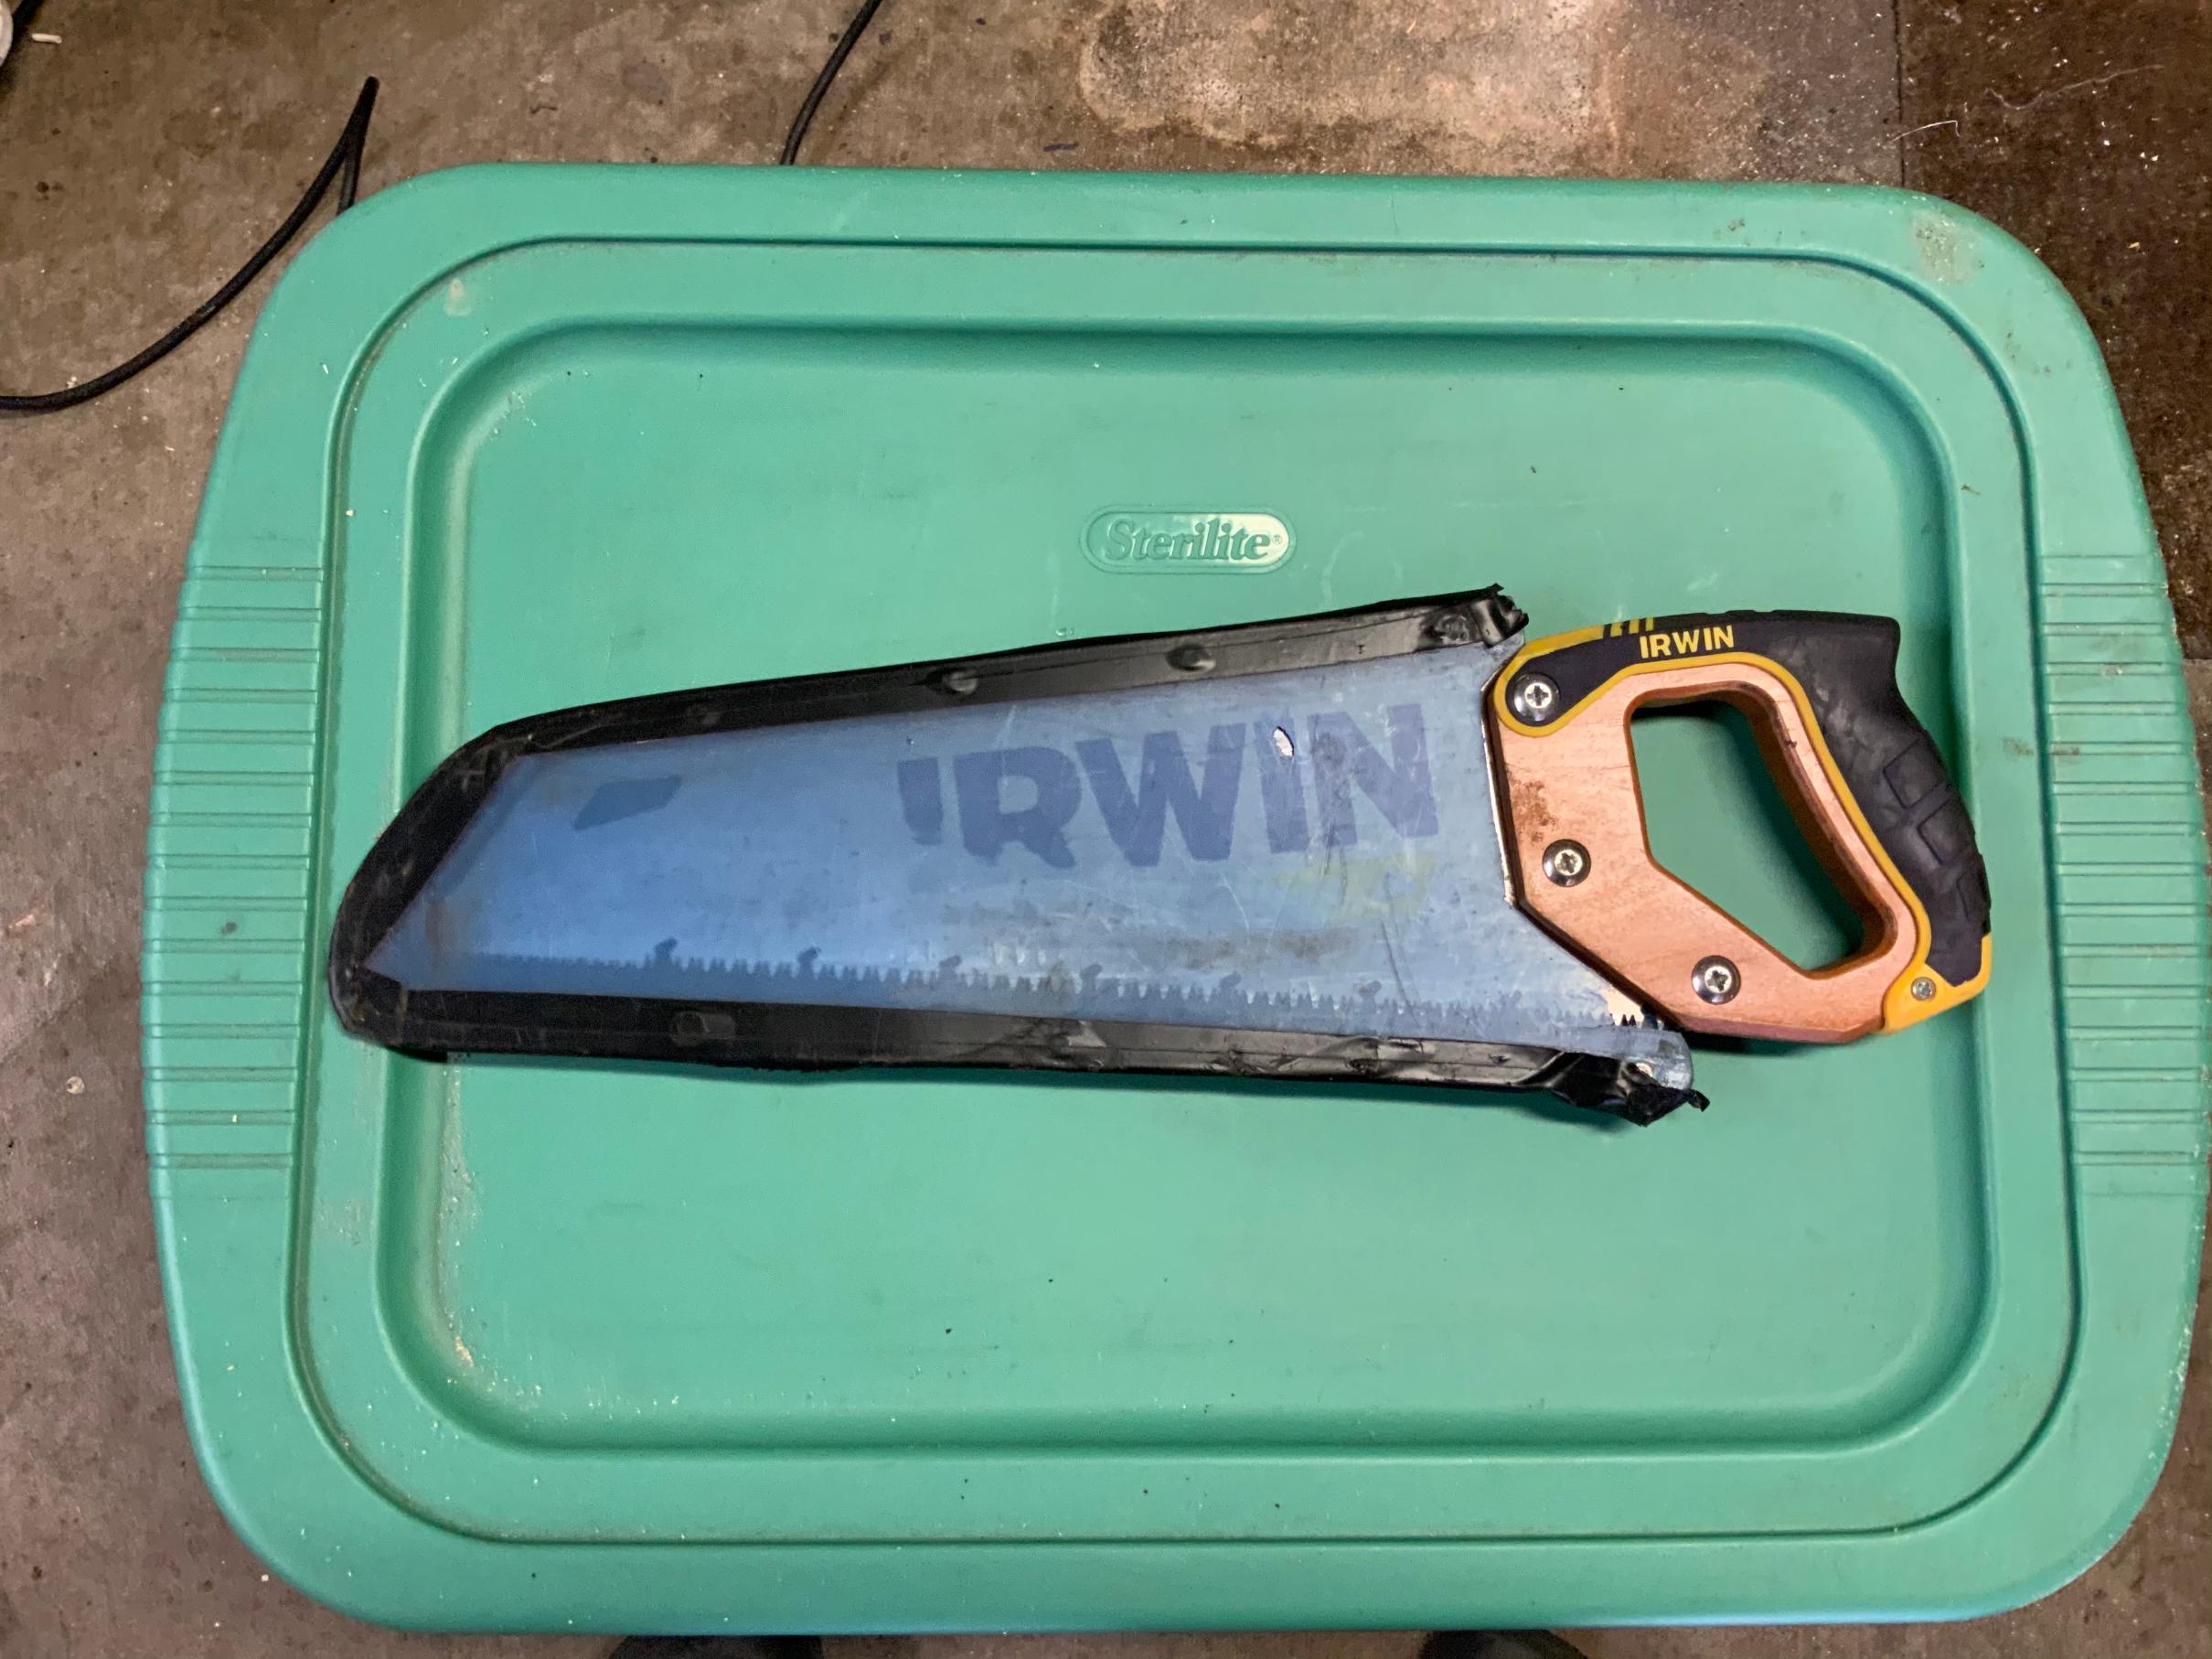
Not beautiful, but I use the cardboard cover it came in. It used to slide off a bit and the first few teeth would catch on things. I extended the bottom of the cover with a piece of duct tape. Probably 4 inches long using 6 inches of duct tape. Two inches taped to the end, bottom. Four inches doubled over on itself to it doesn't stick. It forms a U around the start of the handle.
I put a twist-tie through the hole in the end to hold it on. It has survived a half dozen trips and shows no wear.
I'm not super weight conscious, but some of the covers people make weigh as much as the saw itself.
Can send a pic if you want when I get home.
I put a twist-tie through the hole in the end to hold it on. It has survived a half dozen trips and shows no wear.
I'm not super weight conscious, but some of the covers people make weigh as much as the saw itself.
Can send a pic if you want when I get home.
03/08/2021 09:51AM
RedLakePaddler: "I could possibly make leather sheaths. I would have to come up with a design. Any suggestions would be helpful.
Carl"
Thanks for the offer but I was thinking more along the lines of a plastic type of sheath.
I may explore using the cardboard sheath it came in if the plastic ones are not available.
03/08/2021 10:49AM
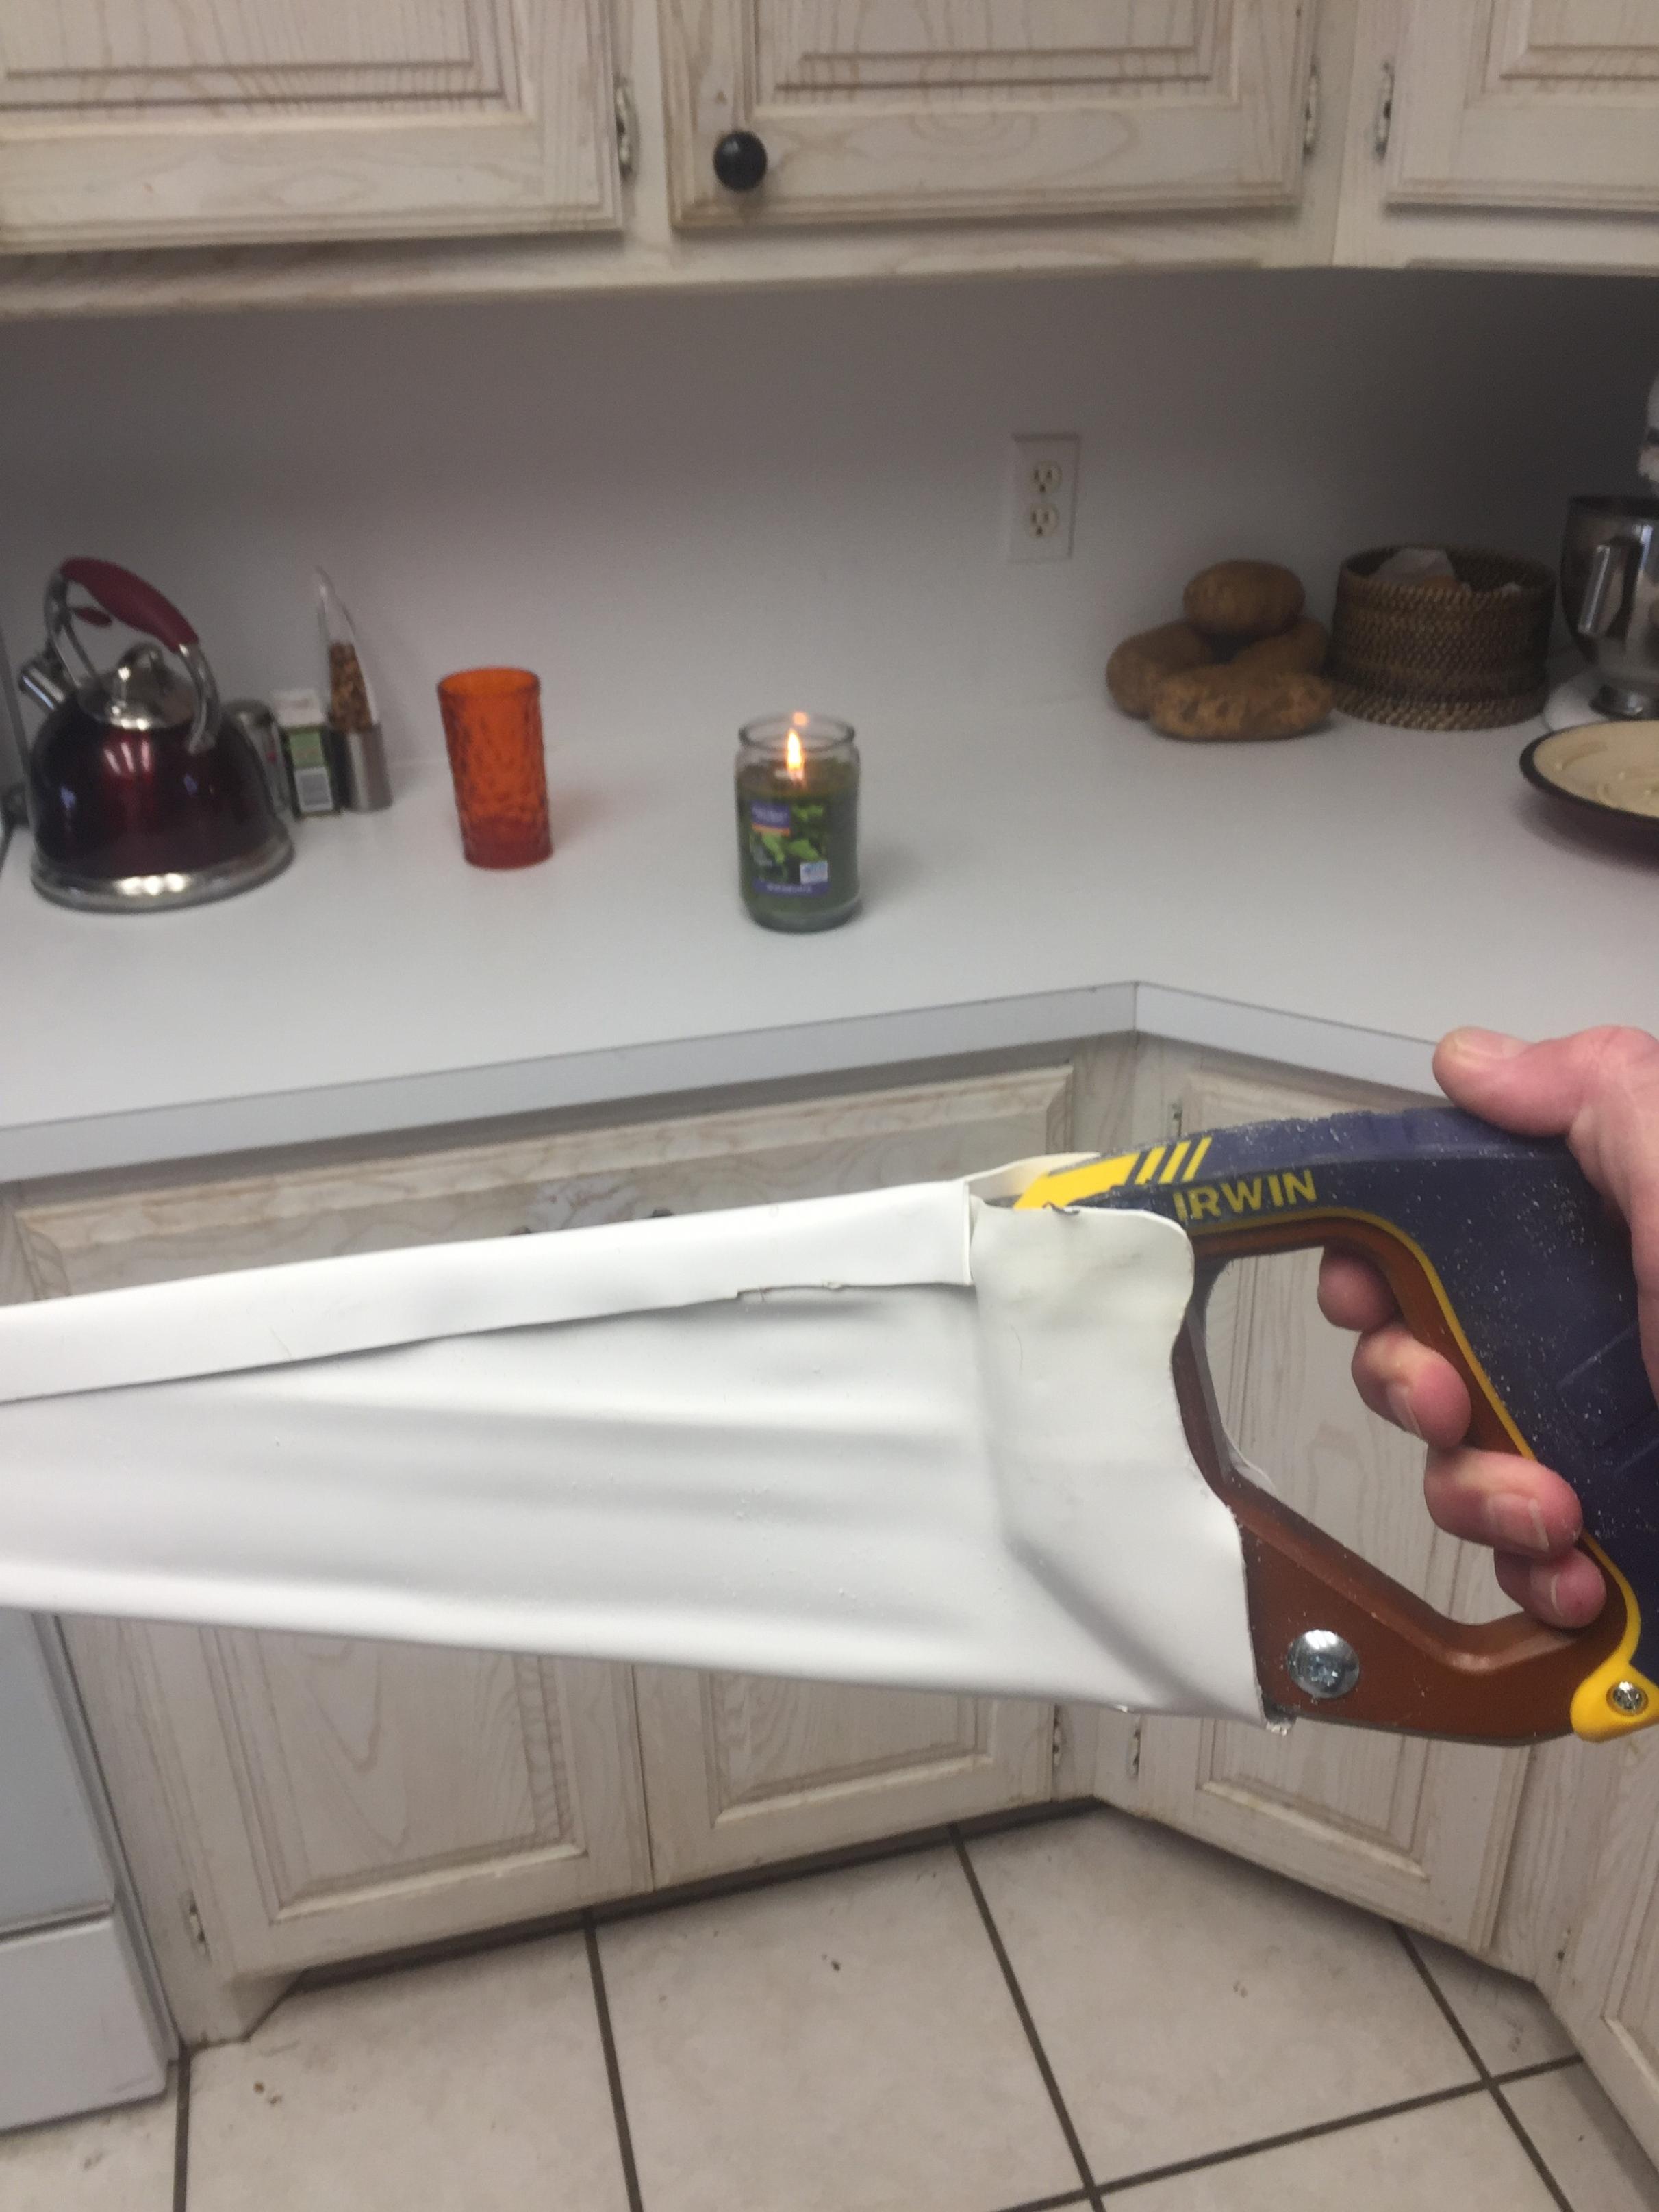
I took a piece of plastic from the packaging for my table saw blade, cut it to shape, then duct taped the edges together. It ain't pretty, but it weighs next to nothing and nothing gets cut or scratched up.
I thought it looked pretty dumb, but my brother liked it and thought it was clever. "If it's stupid but it works, it isn't stupid."
I thought it looked pretty dumb, but my brother liked it and thought it was clever. "If it's stupid but it works, it isn't stupid."
03/08/2021 12:08PM
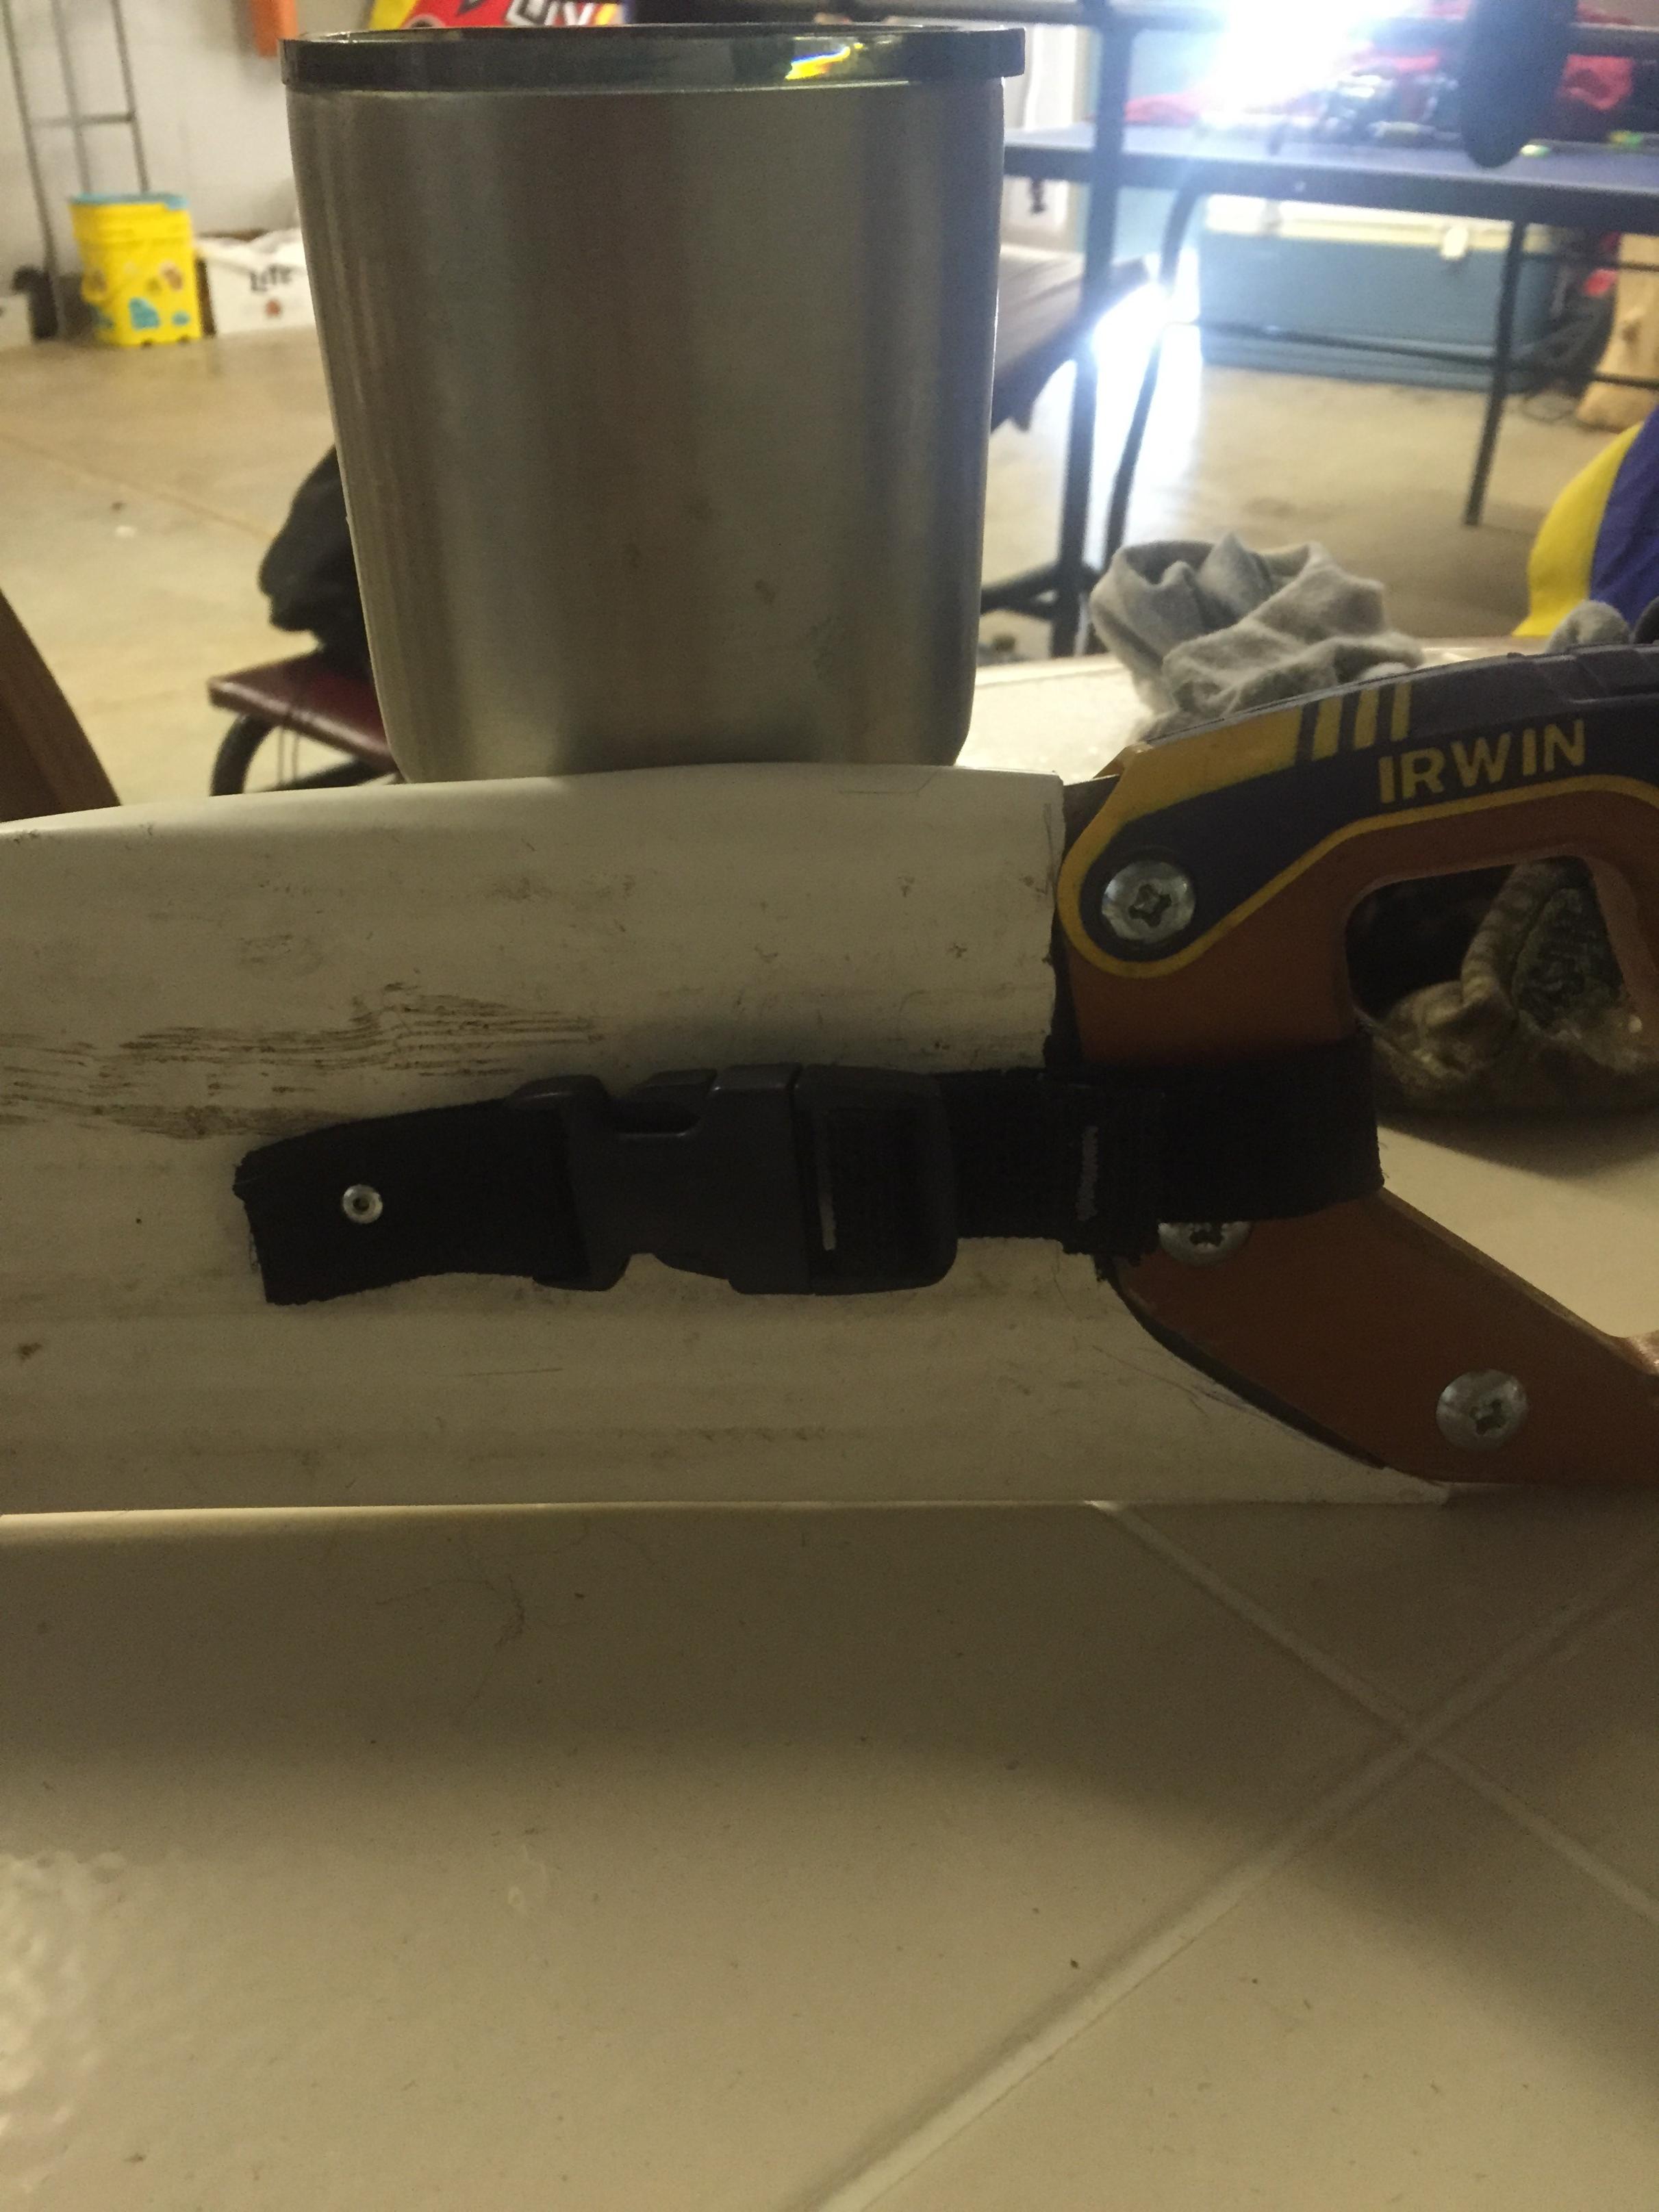
Used the cutting board method. Traced the cardboard sheath on the plastic, cut, put pop rivets along the edge, covered edge with electrical tape and done. Ain’t pretty, but functional. 
 Edit: Wasn’t actually cutting board, but an old top to a storage tote.
 Edit: Wasn’t actually cutting board, but an old top to a storage tote.

03/08/2021 03:05PM
It was Ragged who was making and selling some really nice sheaths. But last post I can find was a few years ago and he was selling a final batch and then stopping that model. The reason was that it took a lot of effort to make them. He held out the possibility that he might come up with a new, more minimal model but also had a second kid on the way. So I think it is down to DIY right now. I'm glad to have my Ragged-sheath because it is really nice and also a bit of bwca.com culture. But some of these molded ones look good too.

03/08/2021 06:28PM
I appreciate the kind words from OneMatch, but I'm not making Irwin Saw Sheaths for sale.
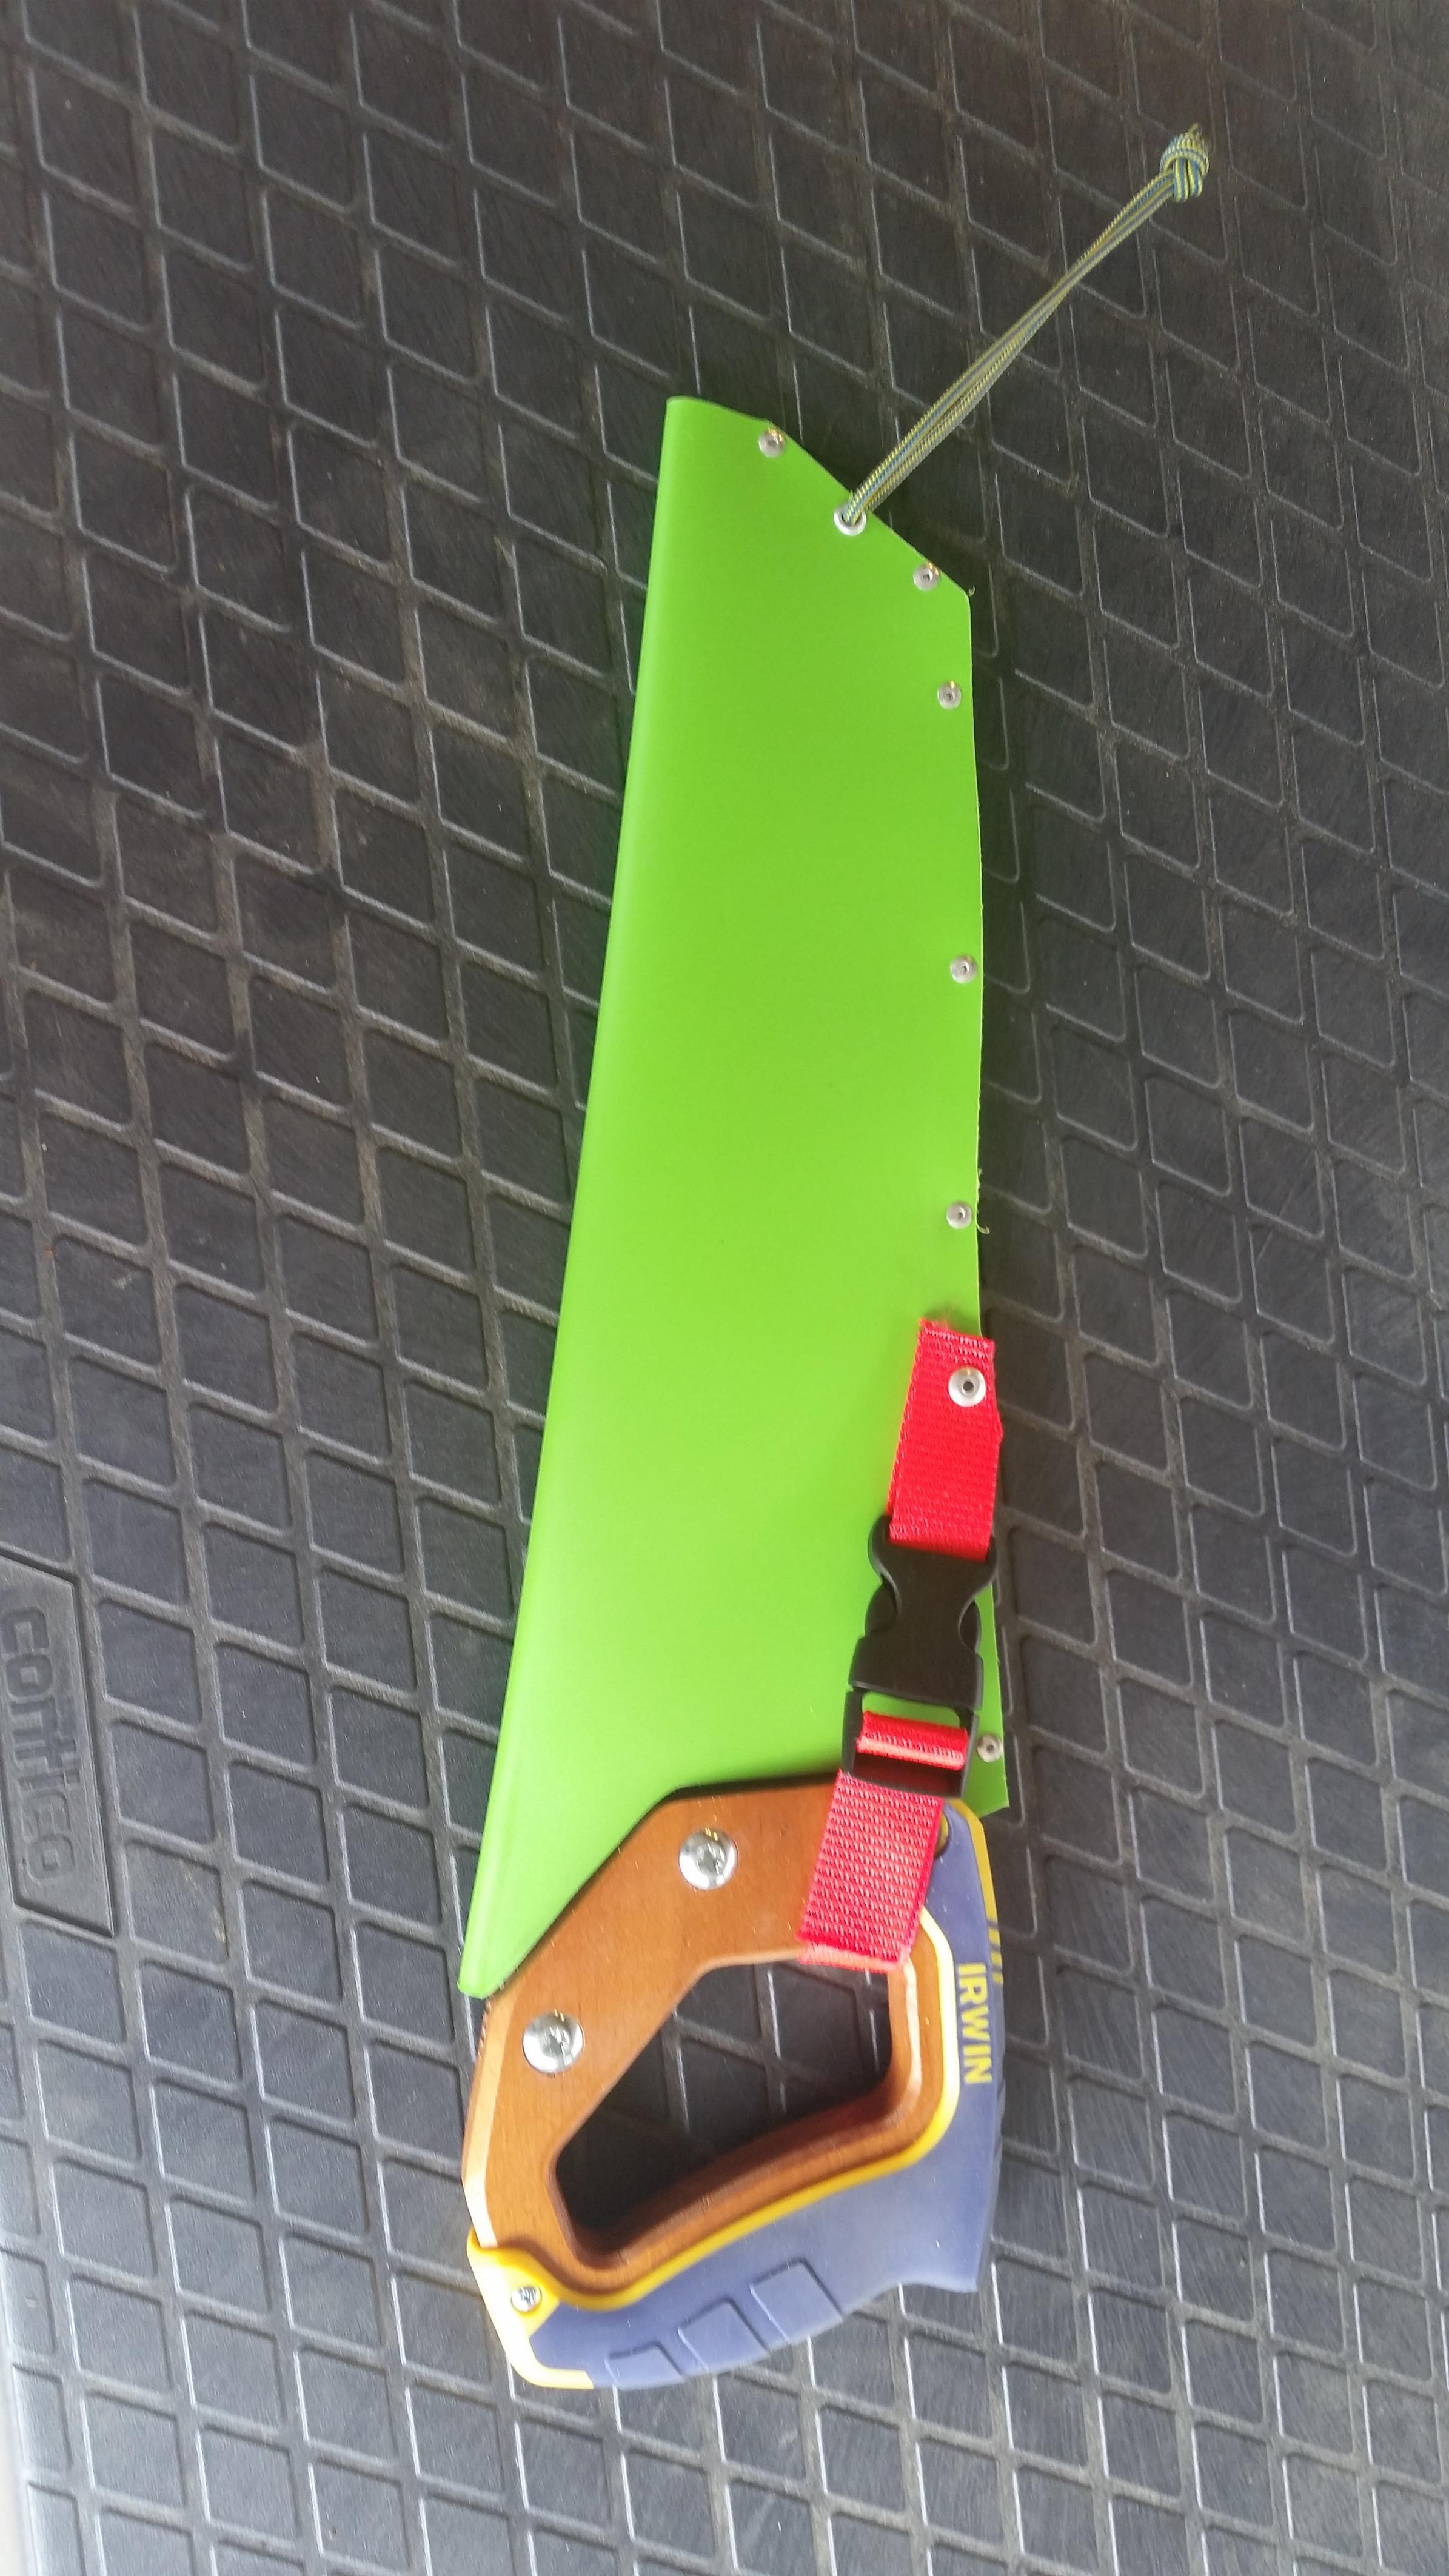
I have made a number of them and have found that a flexible plastic cutting board works well for the material, get the thickest ones you can find (Wal-Mart).
The first thing you do is fold the cutting board in half long ways using a hot air gun to warm the plastic along the fold. Be careful with the heat it doesn't take much to melt the plastic.
(Edit: place a 1/4" thick piece of wood along the fold to keep it from closing down too tight. You want the saw teeth to be able to slip in and out easily)
After you have it folded over use the cardboard sheath to outline the shape of the sheath and add about 1/4" to the top edge for the pop rivets you will use to finish the sheath.
Clamp the top edge together and using a snap knife or dremel cut-off wheel to cut along the lines.
I use 1" webbing and 1" snap buckles to secure the saw.

Old Scout


")
03/15/2021 11:28AM
RunningFox: "I wonder if you could do it yourself using a “flying carpet plastic snow sled”. Seems to me that this might be faster, lighter, and cheaper than using cutting boards.
"
That stuff is HPDE, and cowdoc posted a photo.One thing Ragged did with his Kydex (??) sheath was to add a divider layer between the 2 sides making the saw easier to draw or replace.
butthead
"never underestimate the power of stupid people in large groups" George Carlin
03/23/2021 07:29PM
Definitely not making the last iteration anymore, still get a fair amount of people asking for them but they are really kind of ridiculous (ridiculous like a Rolls Royce) and so very much overkill (on purpose) So many great options out there for a functional DIY version. If I ever made something again I’d likely explore going a completely different direction, lightweight, cheaper, laser cut vs CNC machined (so hard to say goodbye to those beautifully chamfered edges) likely ship to the end user as a simple kit where I produce the nicely made “flats” and have the folks on the other side do some simple assembly.
He leads me beside quiet waters, he restores my soul. Psalm 23:2/3
03/24/2021 04:58AM
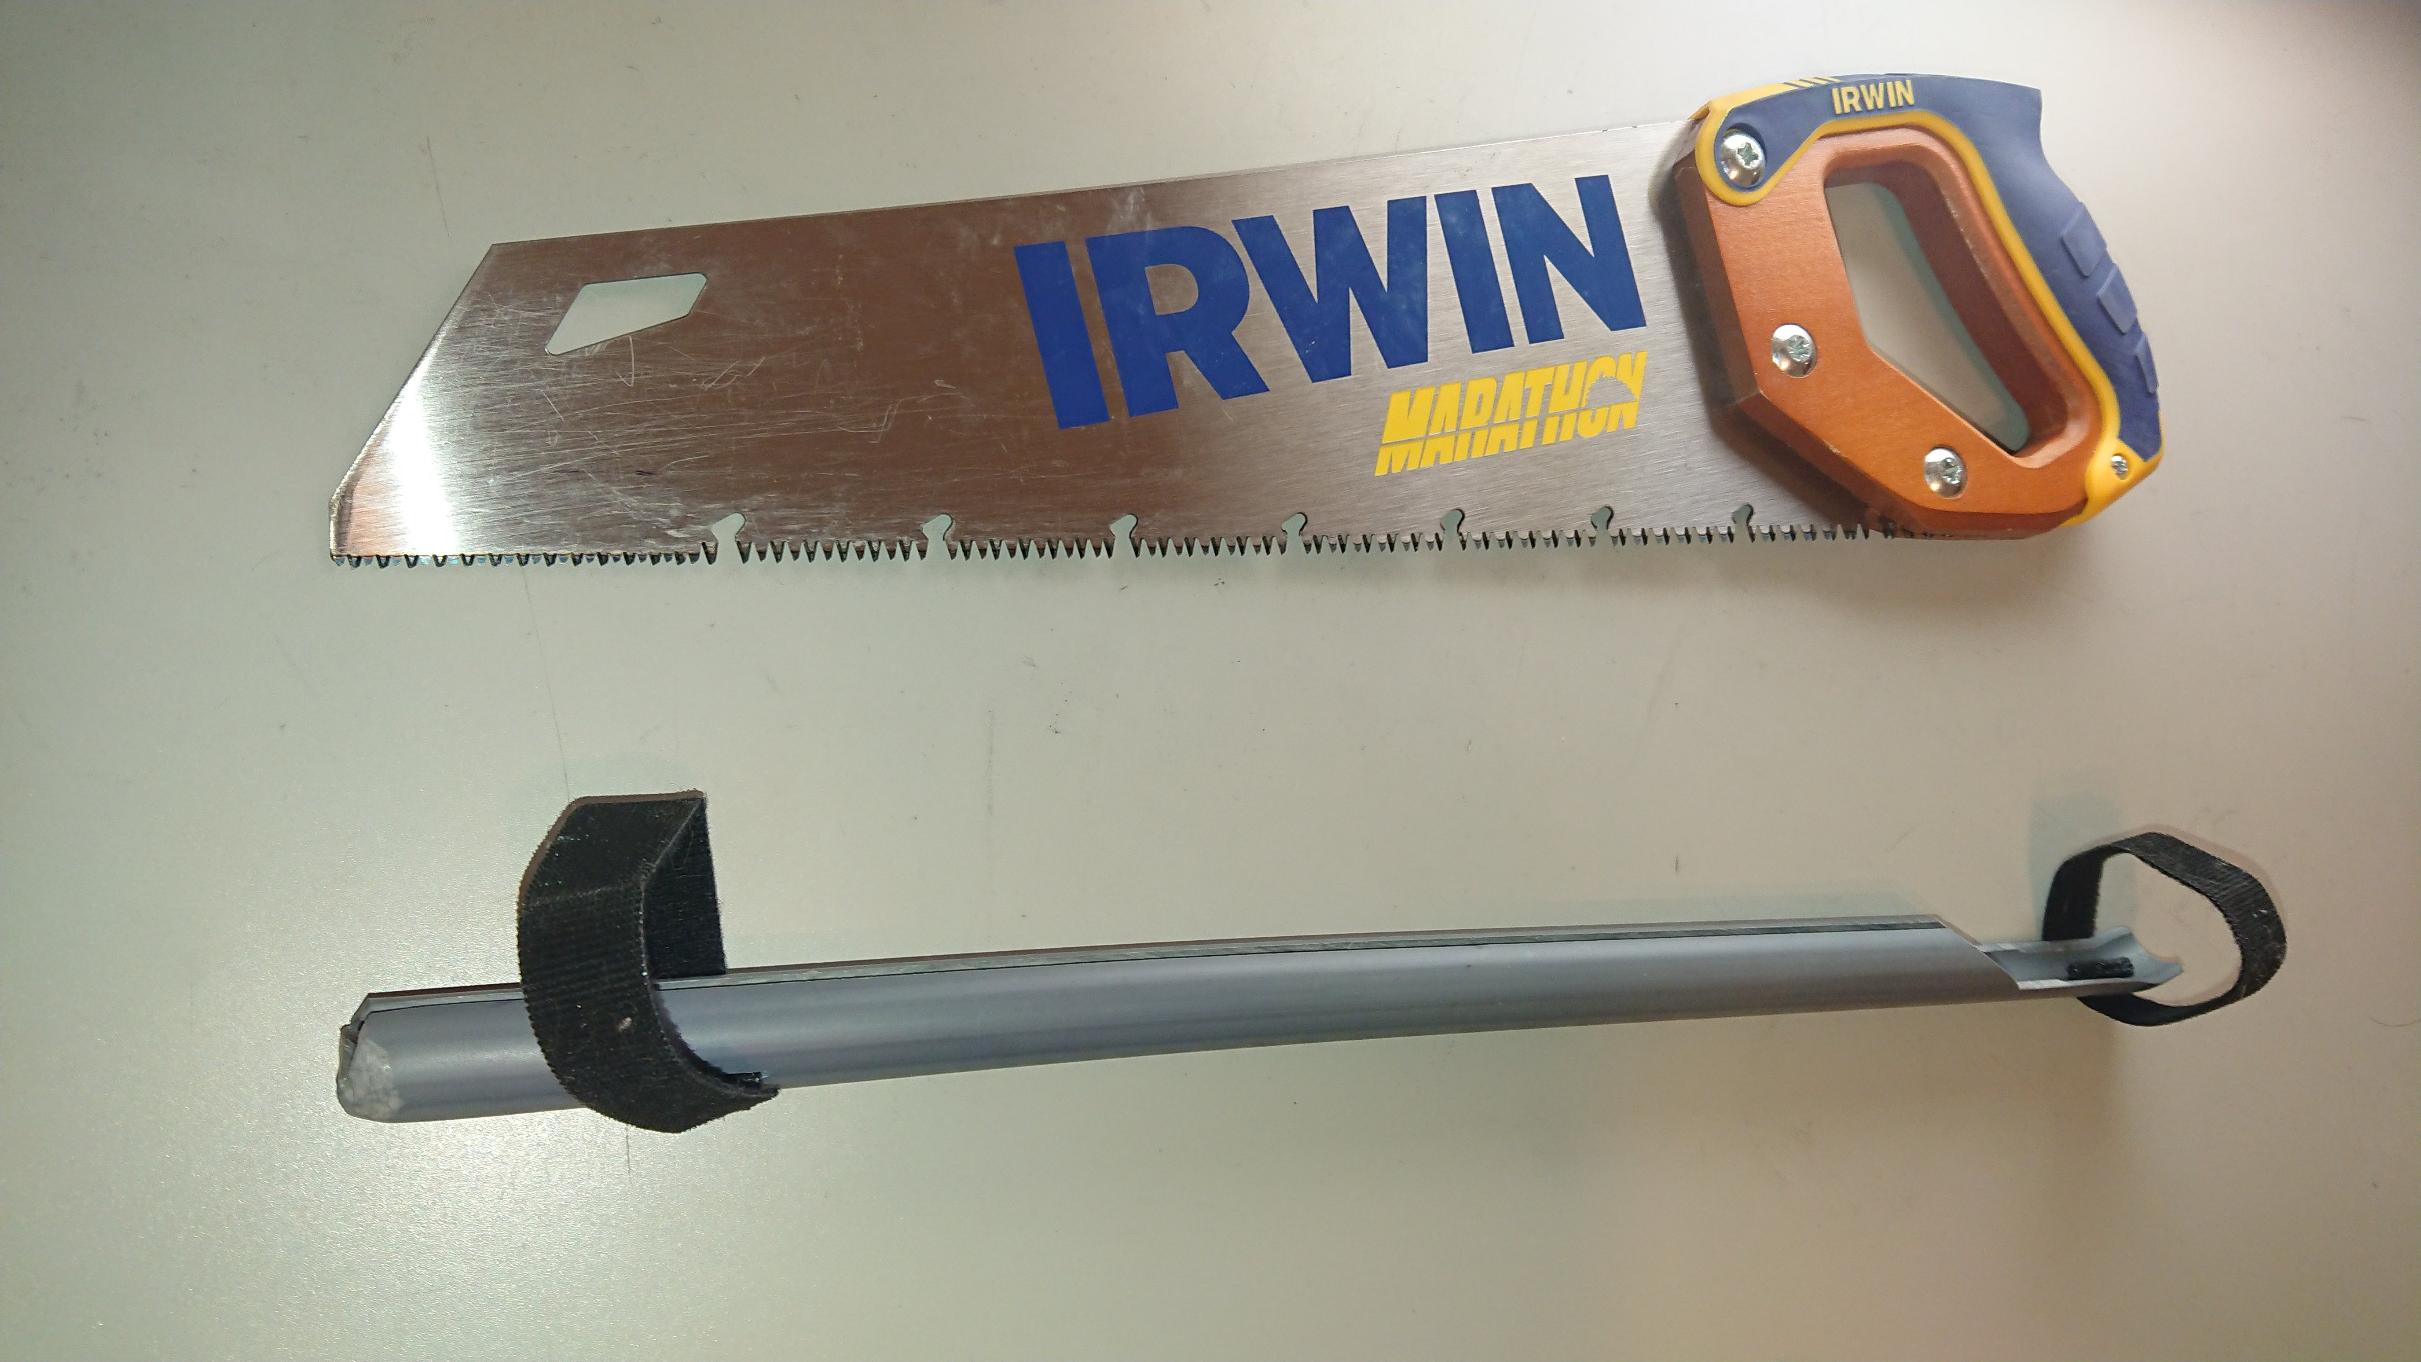
For those with access to vinyl siding, a piece of undersill trim makes a pretty good blade guard. It is kind of self-clamping. I don't know how well it would stay on in a pack. Maybe add a rubber band or two. Just the trim stays on well enough on my pruning saws to prevent those errant lacerations while digging around on the workbench for something else.
04/03/2021 08:19AM
Little bit off topic, but I need a sheath for my knife, and I have been looking at using an old ball glove. Haven't quite got all the details down yet, but I have a good idea of what I want to do. BTW, it isn't one of my gloves.
Respect Mother Nature, because She has no respect for you
Subscribe to Thread
Become a member of the bwca.com community to subscribe to thread and get email updates when new posts are added. Sign up Here
 Search BWCA.com
 Donate